
What Makes These Ghost Brownies So Spooky?
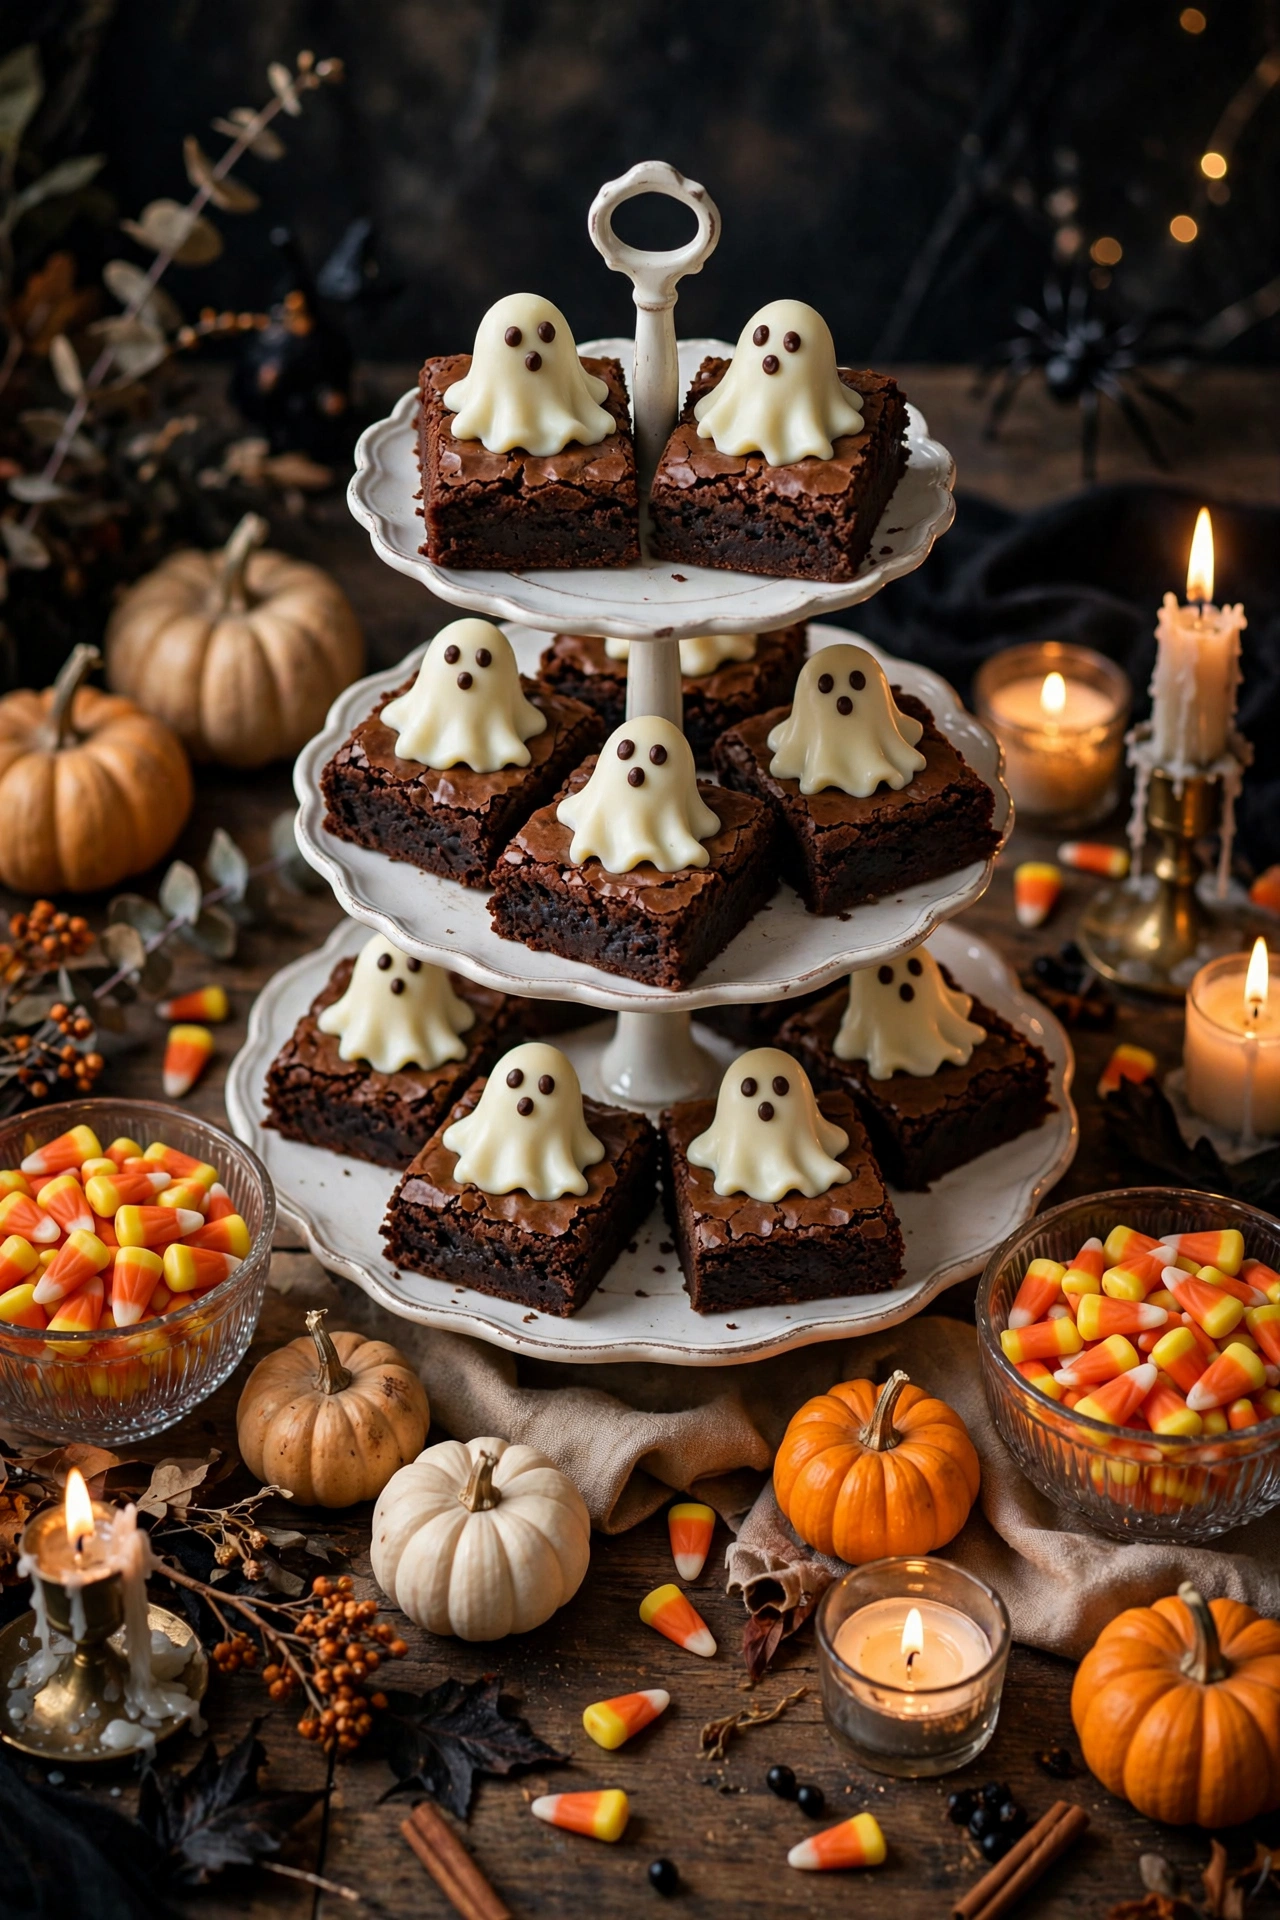
Picture this: a tray of deep, dark, fudgy brownies, and on top of every single one sits a little white ghost with wide chocolate-chip eyes. They look like they floated straight out of a Halloween cartoon — spooky, adorable, and almost too cute to eat. Almost.
These ghost brownies are not just cute, though. The brownie underneath is the real deal: intensely chocolatey, dense, and fudgy, with crackly tops and gooey centers. The ghost on top is a swirl of creamy white chocolate that melts in your mouth. Together, they taste as good as they look, which is more than you can say for most holiday desserts.
Halloween bakers are clearly onto something. Pinterest’s own Halloween trend report shows searches for ghost brownies climbing 200% as October approaches. They’re easy to make in big batches, they travel well to parties, and kids go absolutely wild for them. If you need one Halloween dessert this year, this is the one.
Why Are Ghost Brownies Perfect for Halloween?
Halloween treats have a tough job. They need to look festive, feed a crowd, survive a party table, and taste great. Ghost brownies check every box.
They look the part without any scary skills. The ghosts are just piped blobs of white chocolate. No fondant sculpting, no royal icing practice, no art degree required. If you can squeeze a piping bag, you can make these ghosts look charming. Slightly lopsided ghosts somehow look even cuter.
Brownies are a crowd-pleaser. Unlike fussy layered cakes or temperamental cookies, brownies please everyone — kids, adults, picky eaters, chocolate lovers. Nobody has ever turned down a good brownie.
They’re portable and party-proof. Ghost brownies hold their shape at room temperature for hours. They stack, they travel in a container, and they don’t need refrigeration. That makes them ideal for school parties, office potlucks, trick-or-treat gatherings, and Halloween bake sales.
They’re a fun activity with kids. Older kids can pipe the ghosts themselves (with a little help), and younger kids love pressing in the chocolate-chip eyes. It’s the kind of baking project that makes a Halloween afternoon feel special.
What Ingredients Do You Need for Ghost Brownies?
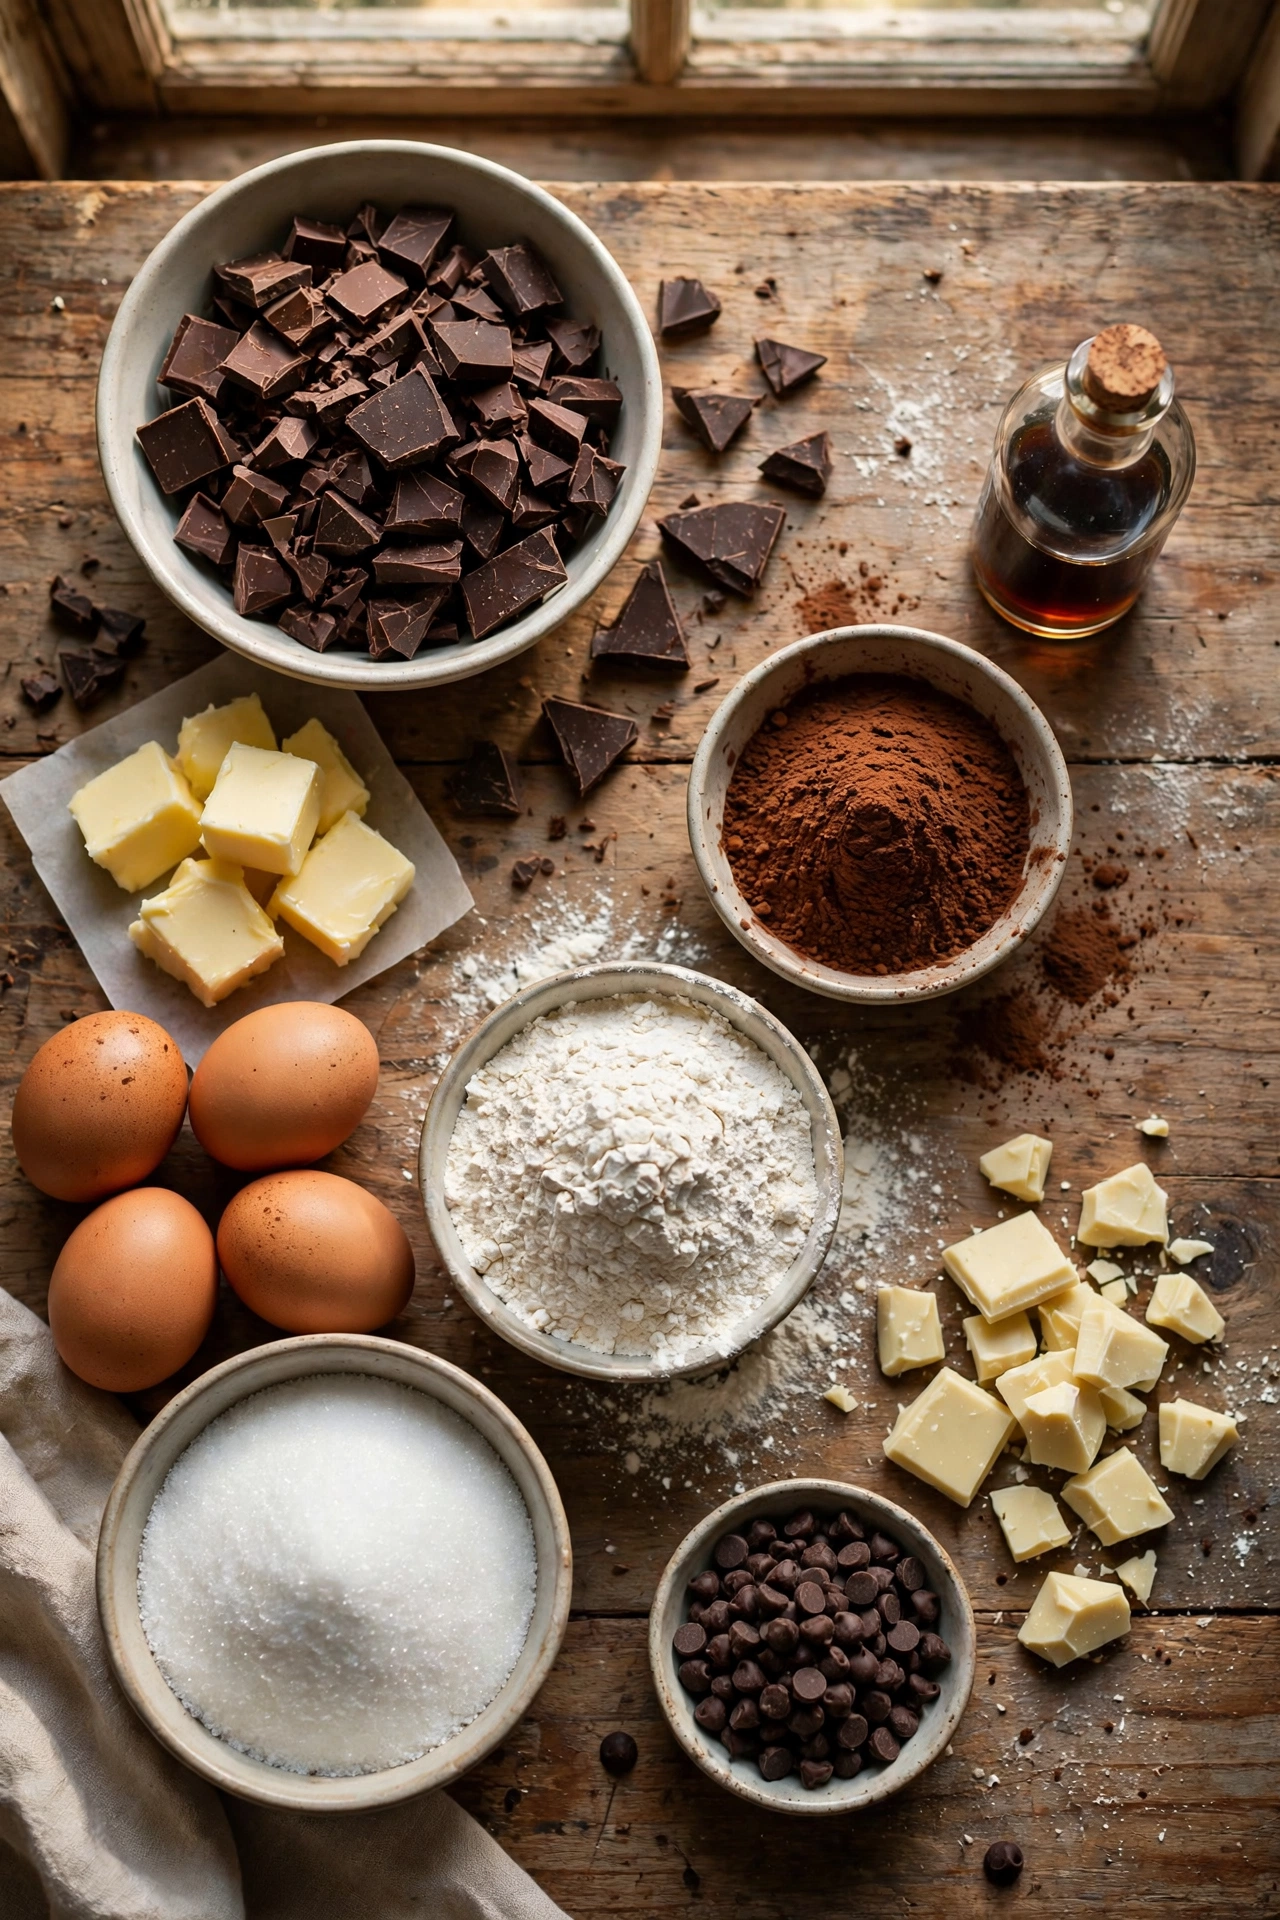
This recipe makes 16 ghost brownies in a 9×9-inch pan. The ingredient list is short, and most of it is probably in your pantry already.
For the brownies:
- 3/4 cup (170g) unsalted butter
- 8 oz (225g) semi-sweet chocolate, chopped into chunks
- 1 1/2 cups (300g) granulated sugar
- 3 large eggs, at room temperature
- 2 teaspoons pure vanilla extract
- 3/4 cup (95g) all-purpose flour
- 1/4 cup (25g) unsweetened cocoa powder
- 1/2 teaspoon salt
- 1/2 cup (90g) semi-sweet chocolate chips (optional, for extra gooey pockets)
For the ghosts:
- 8 oz (225g) white chocolate, chopped (or white candy melts)
- 2 tablespoons heavy cream
- 48 mini chocolate chips (2 eyes + 1 mouth per ghost)
Each ingredient earns its place. Butter and chopped chocolate melt together into the rich base that makes these brownies fudgy instead of cakey. Sugar does more than sweeten — it creates those shiny, crackly tops everyone loves. Eggs bind the batter and add richness. Flour and cocoa give structure without drying things out. Salt sharpens the chocolate flavor.
For the ghosts, real white chocolate tastes better, but white candy melts are easier to work with and set firmer. Either one works, so use whichever you have. The mini chocolate chips become the ghosts’ faces — regular-size chips look too big and cartoonish, so minis are worth grabbing.
Which Chocolate Makes the Best Ghost Brownies?
Chocolate is the whole point of a brownie, so this choice matters more than anything else in the recipe.
For the brownie base, use chopped semi-sweet baking chocolate. Chopped bars melt more smoothly and evenly than chocolate chips, because chips contain stabilizers that help them hold their shape. Those stabilizers fight against melting, which is exactly what you don’t want here. A good baking bar in the 50–60% cacao range gives deep flavor without bitterness.
Cocoa powder plays a supporting role. A few tablespoons of unsweetened cocoa (Dutch-process if you have it) deepen the chocolate flavor and darken the color. Dutch-process cocoa tastes smoother and less acidic than natural cocoa, which makes the brownies taste richer.
For the ghosts, white chocolate or white candy melts both work. Real white chocolate tastes creamier and more luxurious, but it can be fussy — it seizes if even a drop of water touches it. Candy melts are practically foolproof: they melt smoothly in the microwave, pipe easily, and harden quickly. For a party dessert where the ghosts need to survive a buffet table, candy melts are honestly the practical choice. If flavor matters most to you, use real white chocolate and melt it gently.
Mini chocolate chips make the best ghost faces. Their small size looks proportional on a piped ghost. Regular chips look like googly eyes — fun, but less ghost-like. If you only have regular chips, flip them pointy-side out for a smaller look.
What Equipment Do You Need to Make Ghost Brownies?
Nothing you don’t already own. Here’s the full list:
- A 9×9-inch baking pan
- Parchment paper
- A medium saucepan or a microwave-safe bowl
- A whisk and a rubber spatula
- Two mixing bowls
- Measuring cups and spoons
- A piping bag, or a zip-top bag with one corner snipped off
- A toothpick or cake tester
- A wire cooling rack
That’s it. No stand mixer, no candy thermometer, no specialty tools. The piping bag is the only thing that might be new to you, and a zip-top bag works just as well — snip a small corner (about 1/4 inch) and you’re in business.
How Do You Make Ghost Brownies Step by Step?
Total time is about 3 hours, but most of that is cooling. Active work takes roughly 30 minutes. Here’s the full process:
Step 1: Preheat and prep the pan. Heat your oven to 350°F (175°C). Line a 9×9-inch pan with parchment paper, leaving overhang on two sides. The overhang works as handles for lifting the brownies out cleanly later.
Step 2: Melt the butter and chocolate. Place the butter and chopped semi-sweet chocolate in a medium saucepan over low heat. Stir constantly until smooth and glossy, then remove from the heat. (Or microwave in 30-second bursts, stirring between each, until melted.) Let the mixture cool for 5 minutes — you want it warm, not hot.
Step 3: Whisk in the sugar. Add the granulated sugar to the warm chocolate mixture and whisk until combined. The mixture will look grainy. That’s normal. The sugar won’t fully dissolve, and that’s actually what creates the crackly tops during baking.
Step 4: Add eggs and vanilla. Whisk in the eggs one at a time, beating well after each addition. Then stir in the vanilla extract. The batter should look thick, shiny, and smooth — almost like chocolate pudding.
Step 5: Fold in the dry ingredients. Sprinkle the flour, cocoa powder, and salt over the batter. Fold gently with a rubber spatula until just combined, then stop. A few small streaks are fine. If you’re using the extra chocolate chips, fold them in now. Overmixing at this stage is the fastest way to turn fudgy brownies into cakey ones.
Step 6: Bake. Pour the batter into the prepared pan and smooth the top. Bake for 28–33 minutes. Start checking at 28 minutes. The brownies are done when a toothpick inserted in the center comes out with a few moist crumbs clinging to it — not wet batter, but not clean either. Clean means overbaked.
Step 7: Cool completely. This step is non-negotiable. Let the brownies cool in the pan for 20 minutes, then lift them out using the parchment handles and cool on a wire rack for at least 1 1/2 to 2 hours. Warm brownies fall apart when cut, and warm brownies melt the ghosts. Be patient.
Step 8: Cut into squares. Cut the cooled slab into 16 even squares (4 rows by 4 rows). Wipe your knife clean between cuts for neat edges. A long, thin knife works better than a short, thick one.
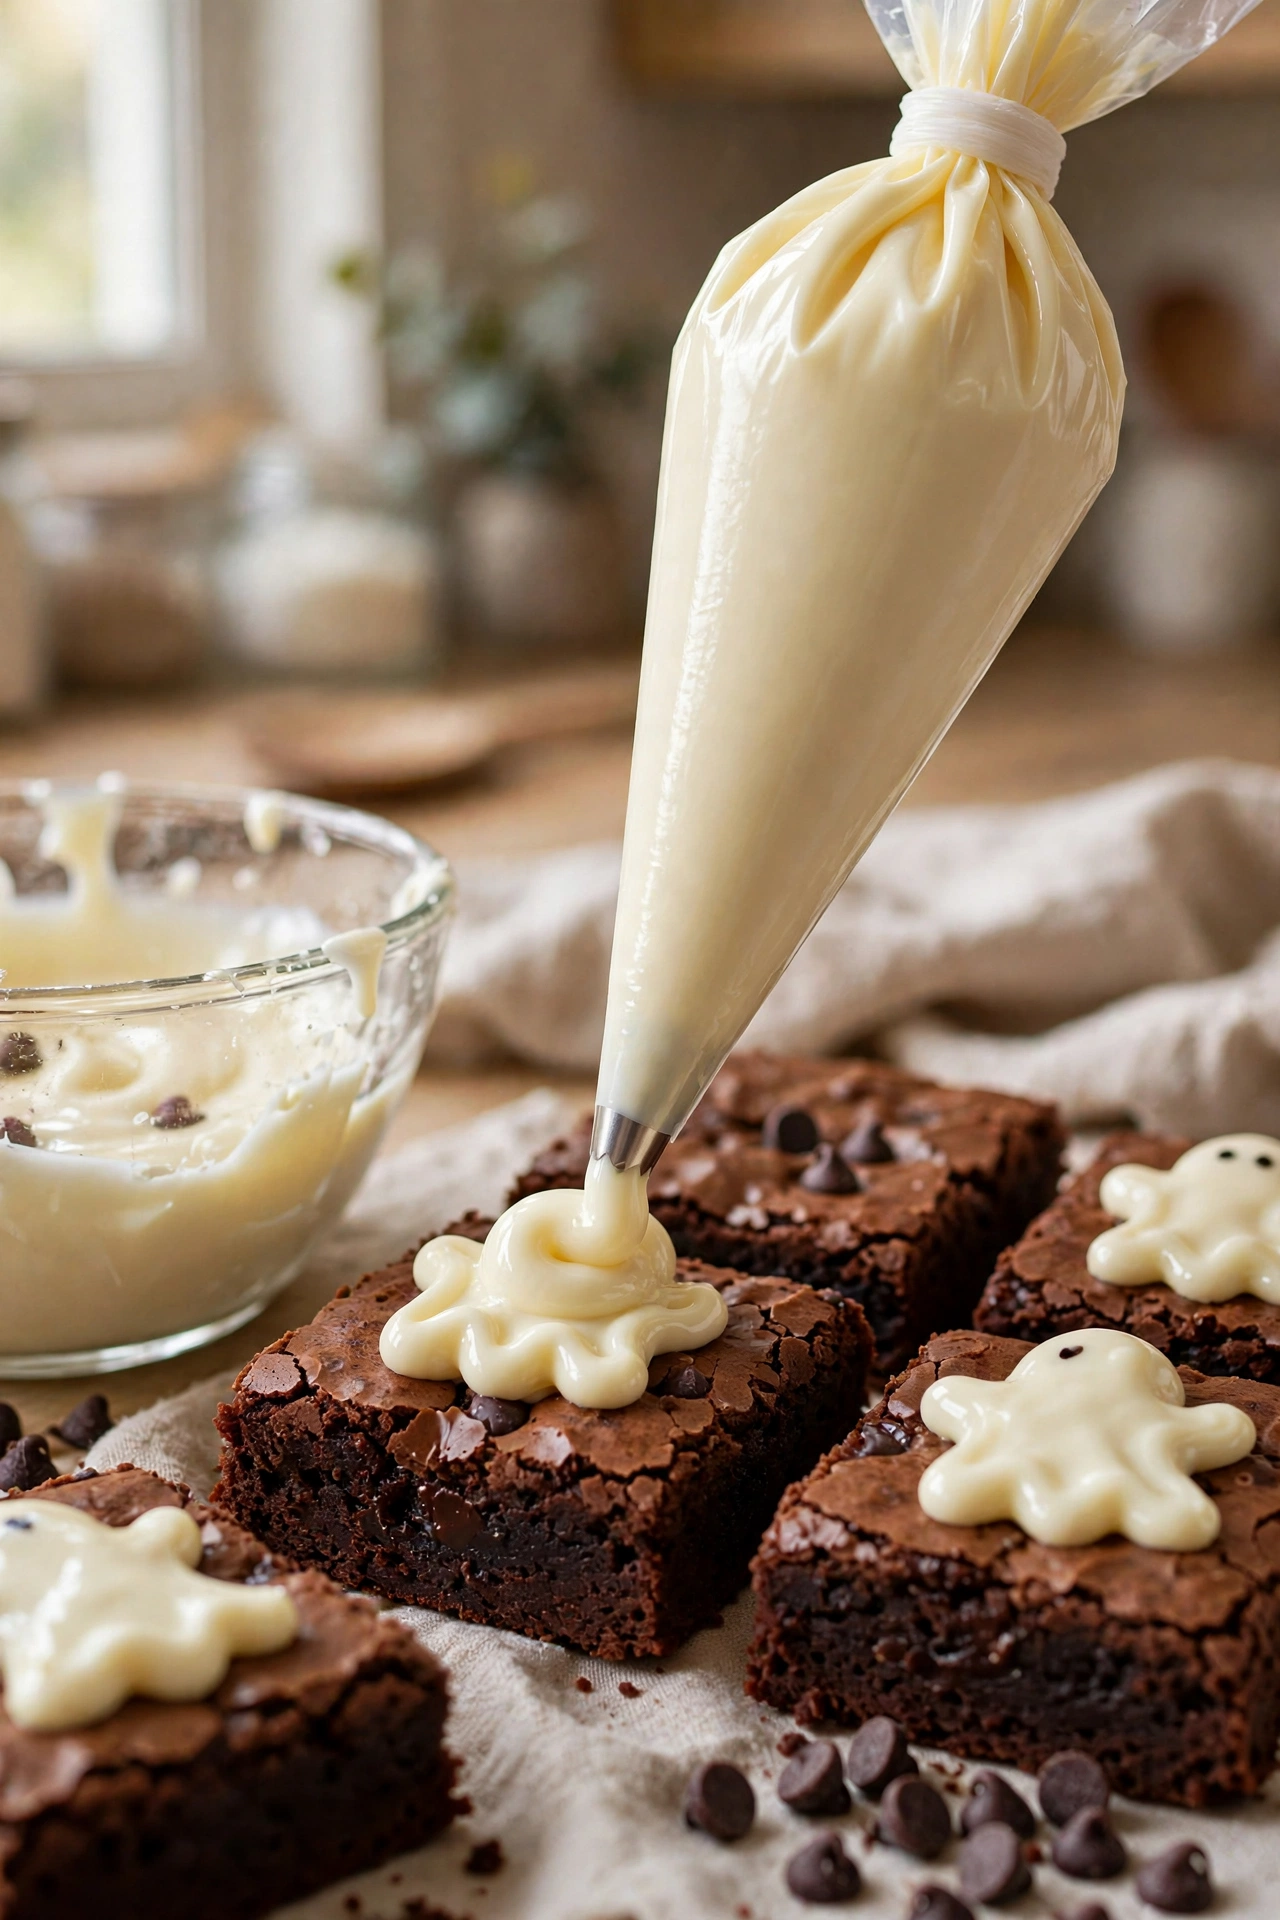
Step 9: Melt the white chocolate. Place the chopped white chocolate (or candy melts) and heavy cream in a microwave-safe bowl. Microwave in 20-second bursts, stirring between each, until smooth. Let it cool for 3–4 minutes until it’s thick enough to hold its shape but still pipeable. If it’s too thin, the ghosts will slump. Too thick, and they won’t pipe. You’re looking for the consistency of soft-serve ice cream.
Step 10: Pipe the ghosts. Transfer the white chocolate to your piping bag. On each brownie square, pipe a ghost: start with a wide circular base, spiral upward, and finish with a small peak at the top — like a soft-serve swirl or a little Hershey’s Kiss shape. Let the ghosts set for about 10 minutes.
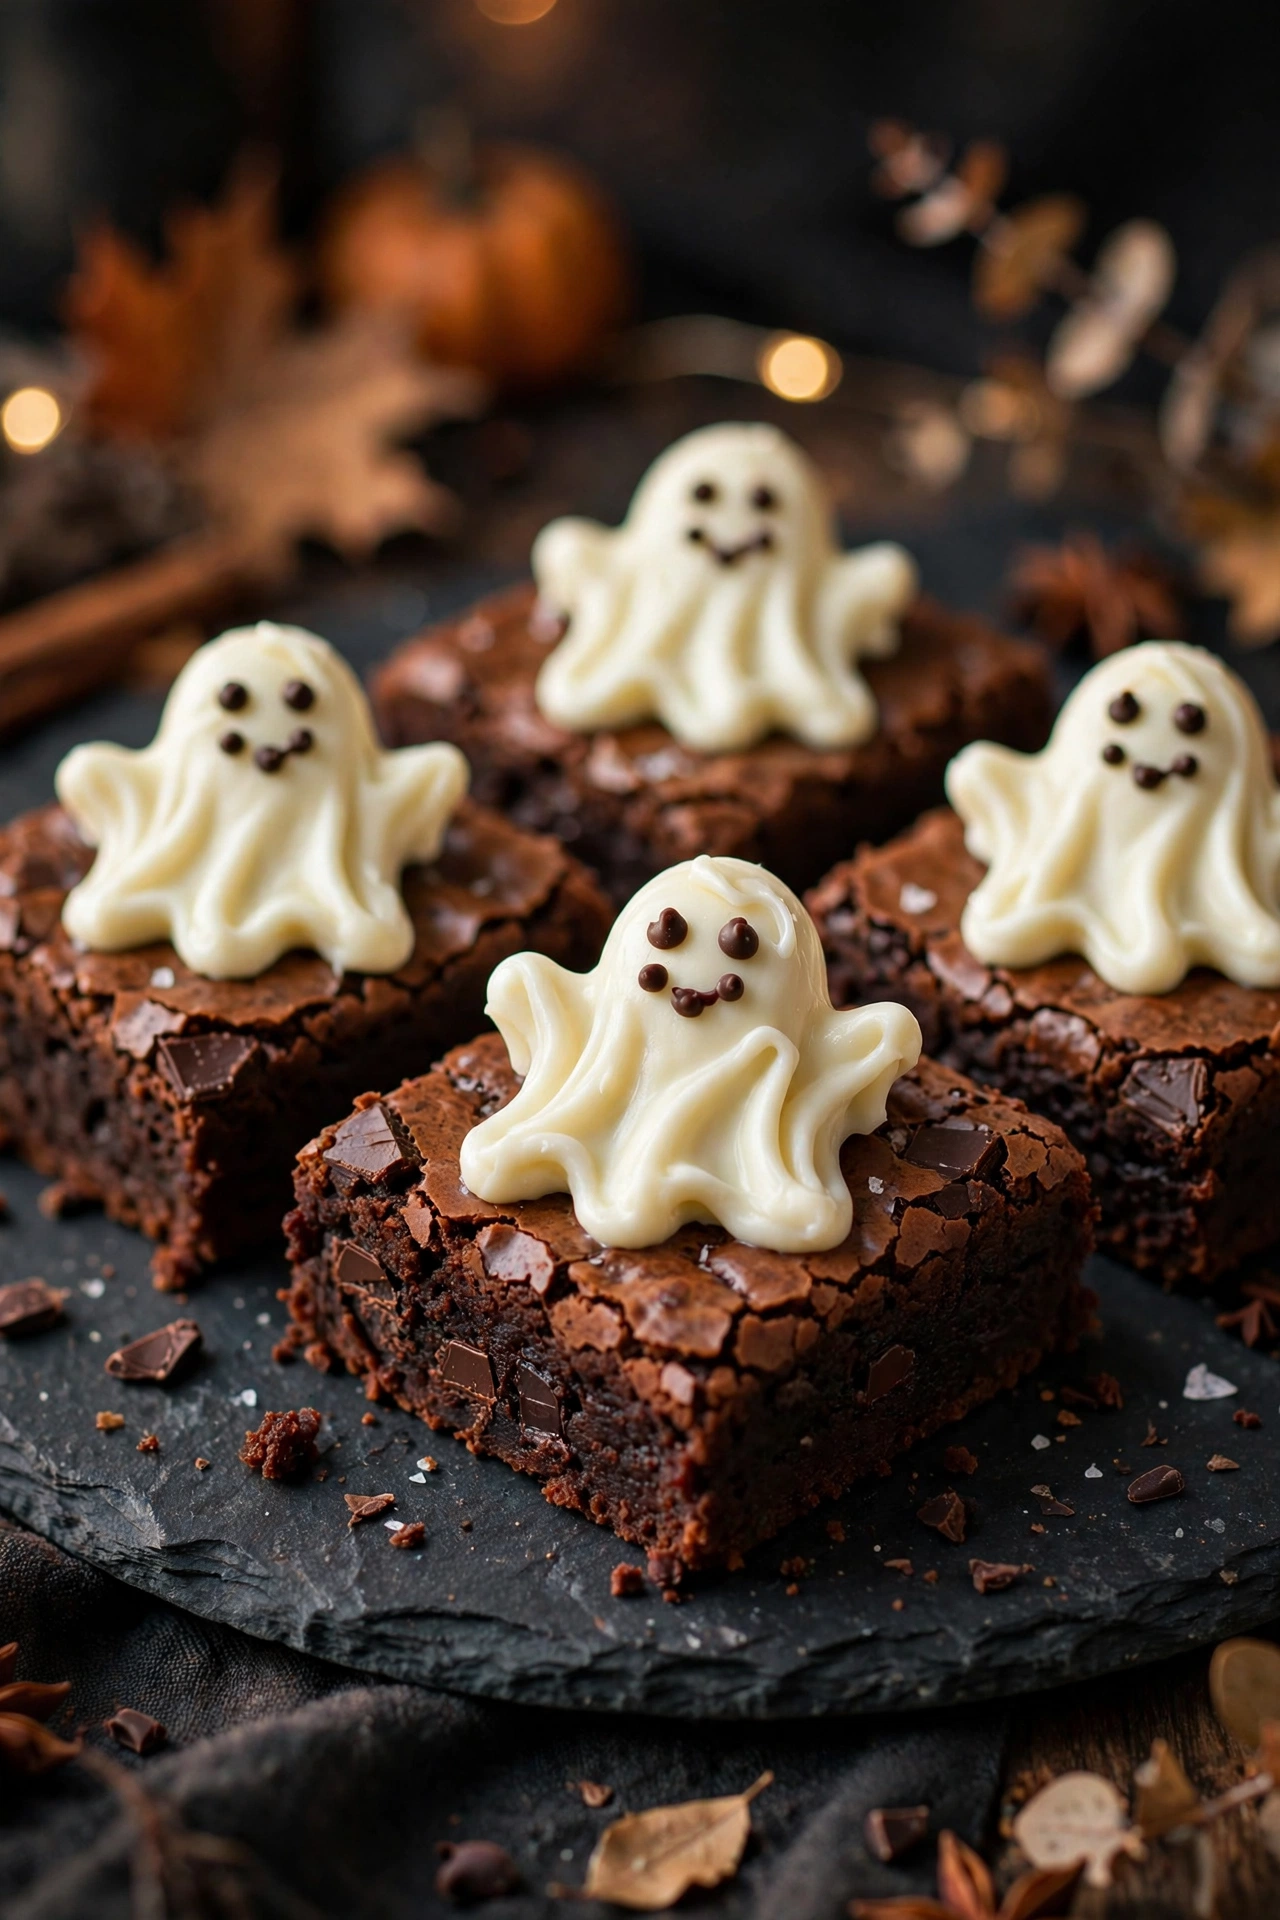
Step 11: Add the faces. Press two mini chocolate chips into each ghost for eyes, pointy side in. Add a third chip below and between them for an open, surprised mouth. Step back and admire your spooky little army.
How Do You Keep Ghost Brownies Fudgy Instead of Cakey?
The line between fudgy and cakey is thin, but these five habits keep you on the right side of it:
1. Pull them early. Brownies keep cooking from residual heat after they leave the oven. That means you should pull them when the toothpick still shows moist crumbs. If you wait until it comes out clean, you’ve gone too far.
2. Favor fat over flour. Fudgy brownies have a high ratio of butter and chocolate to flour. This recipe uses only 3/4 cup of flour for a whole pan — that’s deliberate. Don’t be tempted to add extra flour to “thicken” the batter.
3. Melt real chocolate, don’t rely on cocoa alone. Cocoa-only brownies lean cakey. The melted chocolate in this recipe is what gives you that dense, truffle-like center.
4. Use room-temperature eggs. Cold eggs can cause the melted chocolate to seize slightly and make the batter lumpy. Set your eggs on the counter 30 minutes before you start.
5. Cool before cutting. A brownie that’s still warm inside hasn’t finished setting. Cutting early makes the center look underbaked and gummy. Two full hours of cooling gives you clean squares with perfect texture.
What Are the Most Common Ghost Brownie Mistakes?
Most ghost brownie failures come from rushing. Watch out for these:
Overbaking the brownies. Even three extra minutes can push brownies from fudgy to dry. Set a timer, start checking early, and trust the toothpick test over the clock.
Piping ghosts onto warm brownies. Warmth melts white chocolate. If the brownie surface feels even slightly warm to the touch, wait longer. This is the number one reason ghosts slump into sad puddles.
Melting white chocolate too fast. White chocolate burns easily. Microwave in short bursts and stir often. If it seizes into a grainy lump, a teaspoon of coconut oil or vegetable shortening stirred in can sometimes rescue it.
Using chocolate chips instead of chopped chocolate in the batter. Chips contain stabilizers that resist melting, which gives you a less smooth, less fudgy brownie. Chopped bars melt into silk.
Cutting with a dirty knife. Dragging crumbs through your cuts makes ragged squares. Wipe the blade clean between every cut — it takes seconds and the difference is dramatic.
Piping the white chocolate too thin. If the melted white chocolate is too runny, the ghosts spread flat instead of standing tall. Let it cool and thicken slightly before piping. Patience again.
Variation 1: How Do You Make Classic Fudgy Ghost Brownies?
This is the recipe exactly as written above — the classic version that started it all. Rich, dense, deeply chocolatey brownies with glossy crackle tops and piped white-chocolate ghosts.
To make it truly bakery-worthy, sprinkle a pinch of flaky sea salt over the batter before baking. The salt doesn’t make the brownies salty — it makes the chocolate taste more like chocolate. It’s a tiny step with an outsized payoff.
This is the version to make when you want the guaranteed crowd-pleaser. It’s also the best starting point if this is your first batch. Master the classic, then play with the variations below.
Variation 2: How Do You Make Cream Cheese Swirl Ghost Brownies?
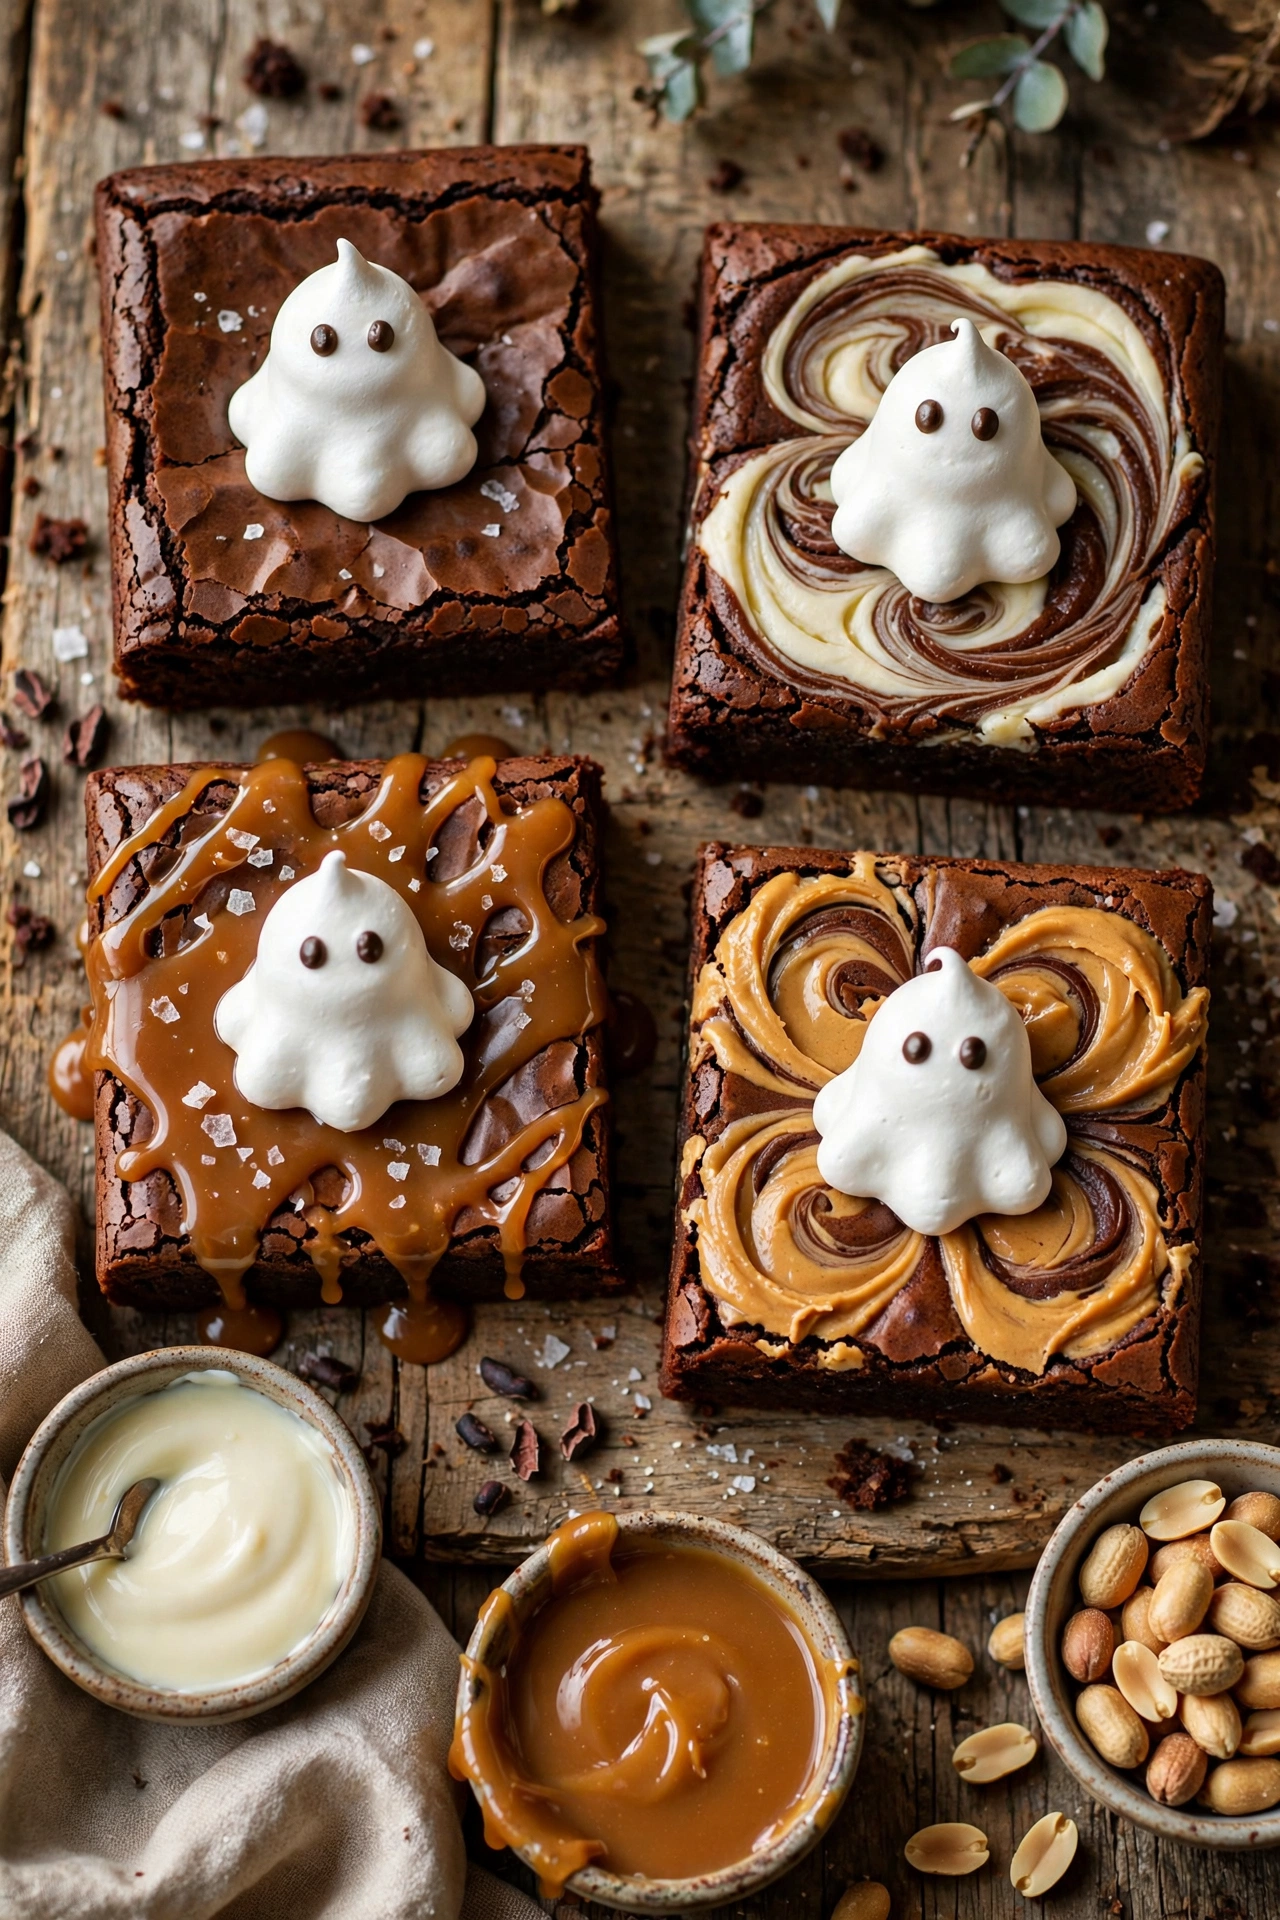
Beat 8 oz (225g) of softened cream cheese with 1/4 cup of sugar, 1 egg yolk, and 1/2 teaspoon of vanilla until smooth. Pour the brownie batter into the pan, dollop the cream cheese mixture over the top, and drag a knife through both in long S-curves to create marbled swirls.
Bake as usual — you may need an extra 2–3 minutes since the cream cheese adds moisture. The tangy cream cheese cuts through the richness of the chocolate beautifully, and the marbled top looks stunning even before the ghosts go on. This version tastes like cheesecake and brownies had a delicious baby.
Variation 3: How Do You Make Gluten-Free Ghost Brownies?
Replace the all-purpose flour with a 1:1 gluten-free baking blend (one that contains xanthan gum). Everything else stays exactly the same.
Gluten-free brownies can be slightly more delicate, so let them cool a full 2 hours before cutting, and use a sharp knife with a gentle sawing motion rather than pressing straight down. The ghosts and decorations are naturally gluten-free, so nothing changes on top. Nobody at the party will guess these are gluten-free — the fudgy texture hides it completely.
Variation 4: How Do You Make Peanut Butter Ghost Brownies?
Warm 1/2 cup of creamy peanut butter in the microwave for 20 seconds until pourable. After pouring the brownie batter into the pan, drizzle the peanut butter over the top in thick ribbons and swirl once or twice with a knife.
Chocolate and peanut butter is one of the greatest flavor combinations ever discovered, and it works perfectly here. The peanut butter bakes into golden ribbons that peek through the dark brownie. Press a few chopped roasted peanuts around the base of each ghost for extra crunch and a finished look.
Variation 5: How Do You Make Salted Caramel Ghost Brownies?
After the brownies come out of the oven and cool for 10 minutes, poke holes across the surface with the handle of a wooden spoon. Pour 1/2 cup of warm caramel sauce slowly over the top, letting it sink into the holes. Sprinkle with flaky sea salt, then cool completely before cutting and decorating.
The caramel soaks into the brownie and creates gooey pockets that take these completely over the top. This is the version adults fight over. Use a good-quality caramel sauce — or make your own if you’re feeling ambitious — because the flavor really shines through.
How Do You Store Ghost Brownies?
Ghost brownies store well, which is one reason they’re such a great make-ahead party dessert.
At room temperature: Place the brownies in an airtight container in a single layer, or stack them with parchment paper between the layers so the ghosts don’t get squished. They stay fresh for 3–4 days on the counter. The white chocolate ghosts hold their shape perfectly at room temperature.
In the refrigerator: Refrigeration extends freshness to about a week. The brownies will firm up when cold, so let them sit at room temperature for 20–30 minutes before serving to restore that fudgy texture. The ghosts are fine in the fridge — white chocolate doesn’t mind the cold.
One important rule: Don’t store them anywhere warm or sunny. White chocolate softens above about 75°F (24°C), and your ghosts will start to droop. A cool pantry or countertop away from the oven is ideal.
Can You Freeze Ghost Brownies?
To freeze: Cool the baked brownies completely, but don’t cut or decorate them yet. Wrap the whole uncut slab tightly in plastic wrap, then add a layer of aluminum foil. Label with the date. They keep beautifully for up to 3 months.
To thaw and decorate: Thaw the slab overnight in the refrigerator, then bring it to room temperature. Cut into squares, pipe the ghosts, add the faces, and serve. Nobody will ever know they were frozen.
Can you freeze them already decorated? Technically yes, but the white chocolate can develop a whitish bloom in the freezer, and the ghosts may crack when thawed. It still tastes fine, but it doesn’t look as pretty. Decorating after thawing takes only 15 minutes and gives you perfect-looking ghosts every time.
What Do You Serve With Ghost Brownies?
Ghost brownies are rich, so the best pairings either cool things down or lean into the Halloween fun:
- Vanilla ice cream — the classic partner. Cold, creamy ice cream against a fudgy brownie is unbeatable.
- Cold milk — simple, nostalgic, and exactly what kids want with a chocolate dessert.
- Hot cocoa — double down on the chocolate for a cozy Halloween night.
- Hot apple cider — the warm spices in cider balance the brownie’s richness beautifully.
- Coffee or espresso — for the adults at the party, a strong coffee cuts through the sweetness.
- A Halloween dessert board — arrange ghost brownies with candy corn, caramel apples, popcorn, and chocolate-covered pretzels for a spread that looks incredible with almost no extra effort.
For parties, stack the brownies on a tiered stand or a dark platter. The white ghosts pop against dark serving dishes, and a few plastic spiders or scattered candy corn around the base turn it into a centerpiece.
Ghost Brownies FAQs
Can I use a boxed brownie mix for ghost brownies?
Absolutely. Use your favorite boxed mix for the base, bake and cool it completely, then pipe the ghosts on top. Nobody will know the difference once those little ghosts are in place. This is a great shortcut when you’re short on time.
How far ahead can I make ghost brownies?
Bake the brownies up to 2 days ahead and store them undecorated at room temperature. Pipe the ghosts the day you plan to serve them — it takes about 15 minutes for a full batch. Fresh-piped ghosts look their best.
Why did my white chocolate seize up?
White chocolate seizes when even a tiny drop of water touches it, or when it’s overheated. Melt it in short microwave bursts, stir often, and make sure your bowl and spatula are completely dry. If it seizes, stir in a teaspoon of coconut oil — it can sometimes smooth back out.
Can I make meringue ghosts instead of white chocolate ones?
Yes. Whip 2 egg whites with 1/2 cup of sugar and a pinch of cream of tartar until stiff peaks form. Pipe ghost shapes onto a parchment-lined baking sheet and bake at 200°F (95°C) for 1 1/2 to 2 hours until dry and crisp. Add the chocolate-chip faces after baking. Meringue ghosts are lighter and crunchier — a fun alternative.
Will the ghosts melt if the brownies are warm?
Yes, and that’s the most common mistake. The brownies must be completely cool — not just the surface, but all the way through. Give them a full 2 hours. If you’re unsure, touch the bottom of the pan area; it should feel room temperature.
How do I pipe ghosts without a piping bag?
Use a zip-top plastic bag. Fill it with the melted white chocolate, press out the air, seal it, and snip a small corner (about 1/4 inch). It works just as well as a real piping bag for this job.
Can I make ghost brownies dairy-free?
Yes. Use dairy-free butter, dairy-free chocolate chips and bars, and dairy-free white chocolate (several brands make it). The texture stays fudgy and the ghosts pipe just the same.
Why did my brownies turn out cakey instead of fudgy?
The usual causes: overbaking, too much flour, or overmixing the batter. Remember — moist crumbs on the toothpick, spoon-and-level your flour, and fold gently. This recipe is designed to be fudgy, so one of those three things is almost always the culprit.
Can I use regular-size chocolate chips for the ghost faces?
You can, but mini chips look much better — regular chips are oversized for a small piped ghost and can look goofy rather than cute. If minis aren’t available, use the pointy tip of a regular chip pressed into the ghost for a smaller look.
How long can ghost brownies sit out at a party?
They’re fine at room temperature for a full day at a party. After that, refrigerate any leftovers. Just keep them out of direct sunlight and away from heat sources so the white chocolate ghosts stay perky.
Final Thoughts
Ghost brownies prove that Halloween baking doesn’t have to be complicated to be spectacular. A great fudgy brownie, a swirl of white chocolate, and a few chocolate-chip eyes — that’s the whole trick. No special skills, no fancy tools, no stress.
Make the classic version first and watch them disappear. Then try the salted caramel for the adults, the peanut butter for the kids, and the cream cheese swirl when you want to show off. Bake a batch the weekend before Halloween, and you’ll have the dessert table handled.
Happy haunting — and happy baking.
If you’re building a full Halloween dessert table, these ghost brownies pair perfectly with our Halloween Popcorn Bar and Eyeball Cookies — spooky, sweet, and guaranteed to disappear fast.


