Mini Egg Cupcakes Recipe: Adorable Bite-Size Nest Cupcakes Everyone Will Love
SEO Title: Mini Egg Cupcakes Recipe: Best Bite-Size Nest Cupcakes!
Meta Description: These mini egg cupcakes are bite-size chocolate nests topped with speckled candy eggs. Easy recipe with piping tips, storage guide, and 5 fun variations.
What Makes These Mini Egg Cupcakes the Best You’ll Ever Bake?
There is something almost unfair about how good a tiny cupcake can taste. You pick one up expecting a cute little bite, and then the rich chocolate crumb hits, the silky frosting melts, and the crunch of a speckled candy egg finishes it off — and suddenly you are reaching for a third. These mini egg cupcakes are not just adorable; they are genuinely some of the most delicious little cakes I have ever pulled out of my oven, and I have tested this recipe more times than I can count to make sure every single batch comes out moist, domed, and bakery-worthy.
What makes this recipe the best starts with the batter itself. Instead of simply shrinking a standard cupcake recipe, I built this one from the ground up for the mini format. The cocoa ratio is dialed up so the chocolate flavor reads loud and clear in a two-bite cake. A full cup of hot coffee blooms the cocoa powder, which sounds strange until you taste the difference — blooming deepens the chocolate flavor without leaving a hint of coffee behind. The batter also uses oil rather than butter, and that is a deliberate choice: oil-based cakes stay soft and moist for days, which matters when you are baking dozens of minis for a party and need them to taste fresh hours later.
Then there is the texture. Nobody wants a dry, crumbly mini cupcake that falls apart in the wrapper. This recipe produces a tender, even crumb with a gentle dome — the perfect little platform for a swirl of frosting. And because the cupcakes are small, they bake fast. We are talking twelve to fourteen minutes from oven to cooling rack, which means you can have a full platter of decorated mini egg cupcakes ready in under an hour, start to finish.
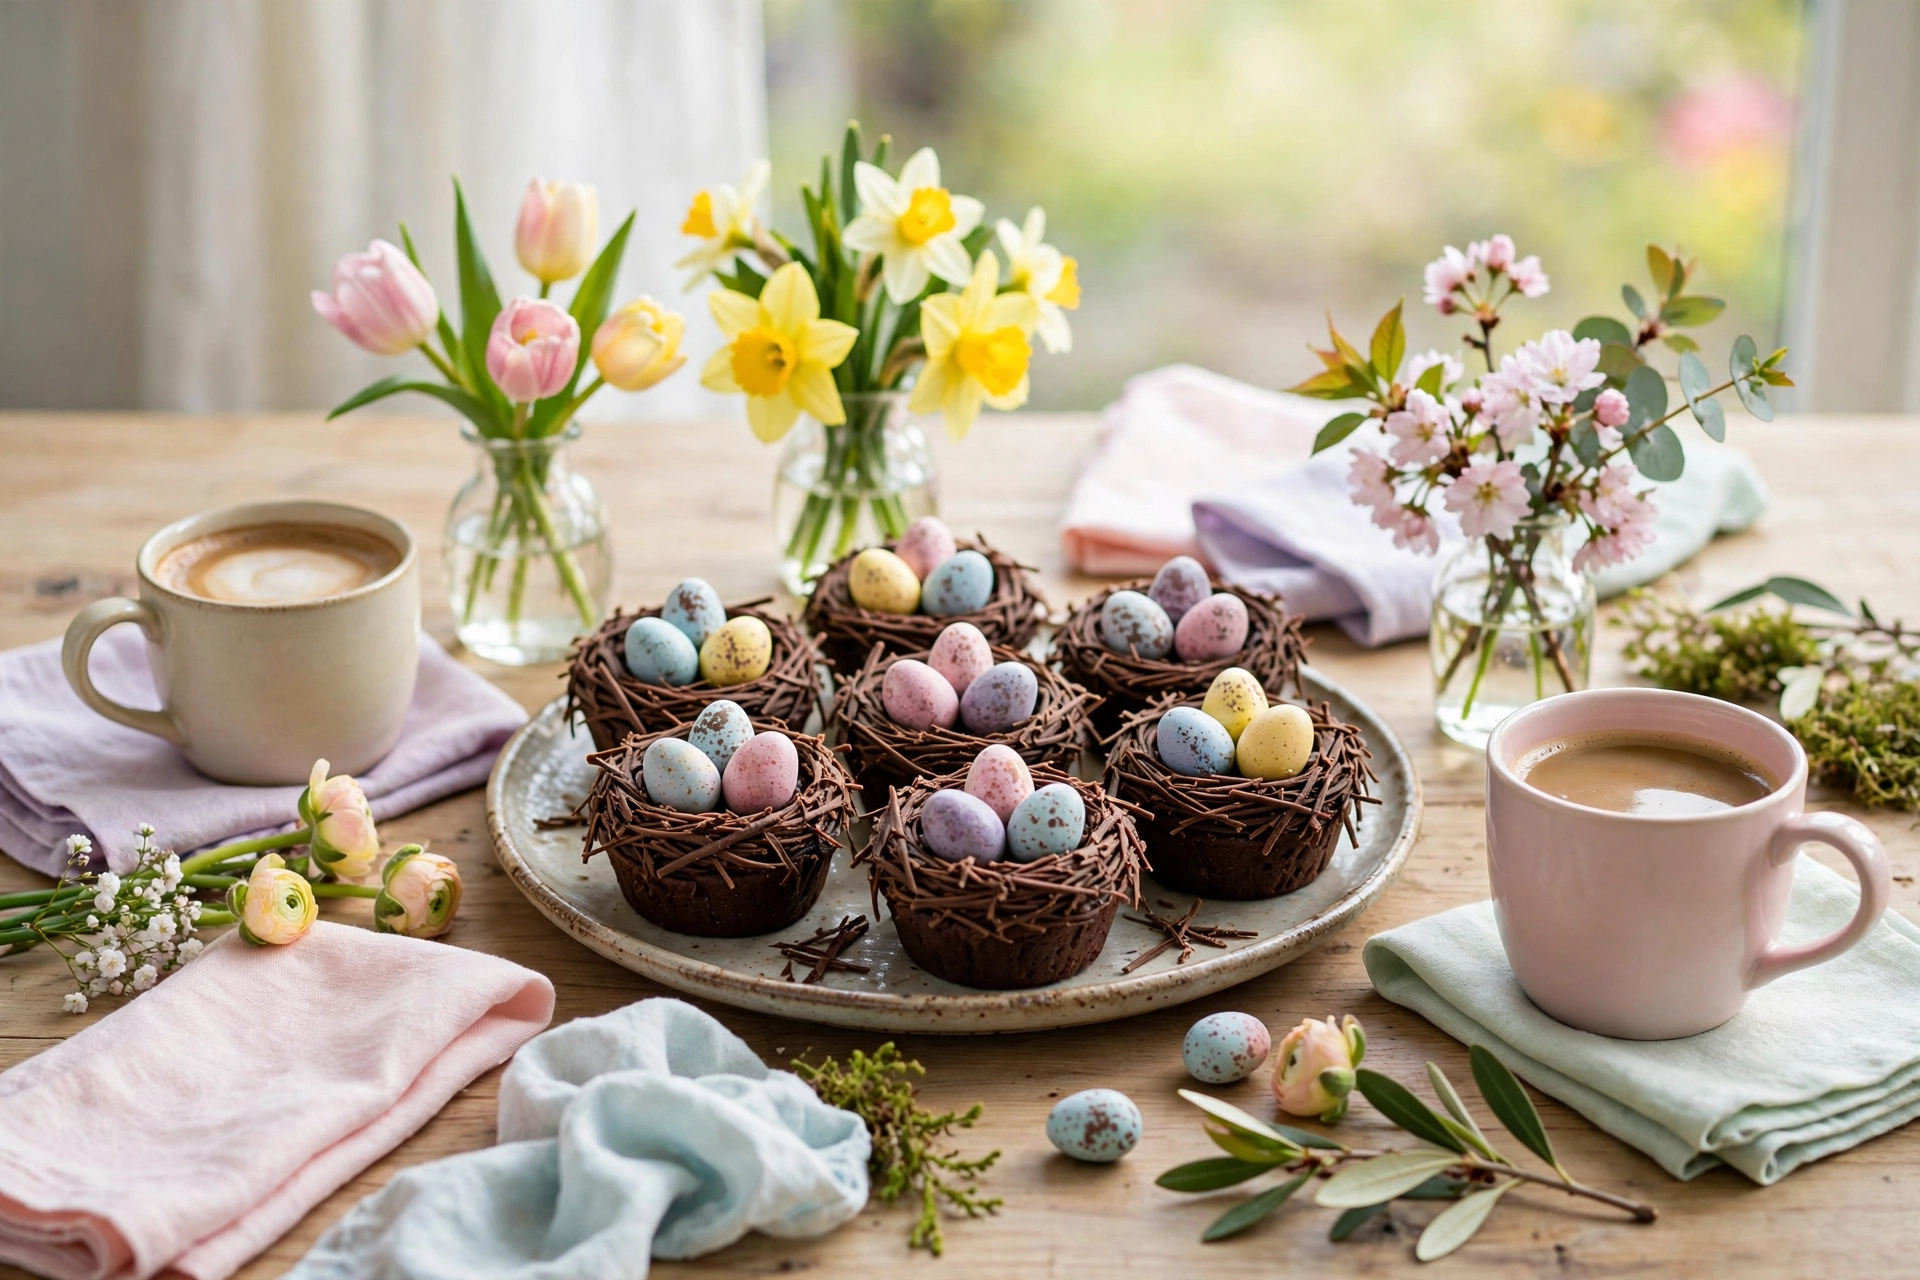
But the real magic is the decoration, and this is where the recipe earns its name. Each cupcake gets a swirl of chocolate buttercream piped into a little nest, a light dusting of cocoa “twigs” if you are feeling fancy, and three speckled mini chocolate eggs nestled right on top. The result looks like something from a high-end bakery window, yet the technique is simple enough for a first-time baker with a piping bag and a star tip. Kids go wild decorating these, which makes the recipe a secret weapon for Easter parties, spring bake sales, baby showers, and birthday tables.
I also love how practical these are. Full-size cupcakes are a commitment — frosting everywhere, half-eaten cakes abandoned on plates. Minis are the perfect two-bite dessert. Guests at a party can grab one (or five) without feeling guilty, they fit beautifully on a tiered stand, and they travel well in a covered container. If you have ever struggled to transport a tray of tall frosted cupcakes without smearing the tops, you will appreciate how forgiving the mini format is.
Every detail in the method below exists for a reason: the room-temperature eggs that whip more volume into the batter, the specific fill level that prevents overflow in tiny liners, the chilling step that makes piping cleaner. Follow the steps as written the first time, and you will understand exactly why this recipe beats every other mini egg cupcake recipe out there. Then make it your own with the five variations further down — the malted milk version alone is worth the price of admission.
What Exactly Are Mini Egg Cupcakes, and Why Is Everyone Obsessed With Them?
Mini egg cupcakes are bite-size cupcakes — baked in a mini muffin tin — that are decorated to look like little bird nests holding speckled chocolate mini eggs. The “mini egg” in the name refers to those small, candy-coated chocolate eggs with the pretty speckled shells that show up in stores every spring. You know the ones: pastel blues, pinks, yellows, and greens with tiny brown speckles, like a robin’s egg shrunk down to candy size. Set two or three of them into a swirl of frosting, and the cupcake instantly reads as a nest. It is one of those decorations that looks complicated and takes about ten seconds.
Their popularity makes complete sense when you think about how we eat dessert now. The era of the giant, frosting-loaded cupcake is fading; people want smaller portions, prettier presentations, and desserts that photograph well. Mini egg cupcakes check every box. They are naturally portion-controlled, they are absurdly photogenic, and they carry a built-in theme — spring, Easter, baby showers, garden parties — without any extra effort. A platter of them needs no other decoration on the table.
There is also the nostalgia factor. Speckled mini eggs are one of those candies that instantly transport adults back to childhood Easter mornings, digging through baskets and trading colors with siblings. Putting that candy on a homemade cupcake merges childhood memory with grown-up baking skill, and people respond to that emotionally. I have watched guests at parties pick these up and smile before they even take a bite.
From a baker’s perspective, the obsession is practical too. Mini cupcakes bake in a third of the time, cool faster, and are far more forgiving to frost than their full-size cousins. A wobbly piping swirl that would look sloppy on a big cupcake looks charmingly rustic on a mini. They are the ideal project for baking with kids, for last-minute party prep, and for anyone who wants maximum visual payoff for minimum stress. Once you make a batch, you will understand why they show up everywhere from Pinterest boards to bakery cases each spring.
What Ingredients Do I Need for Mini Egg Cupcakes?
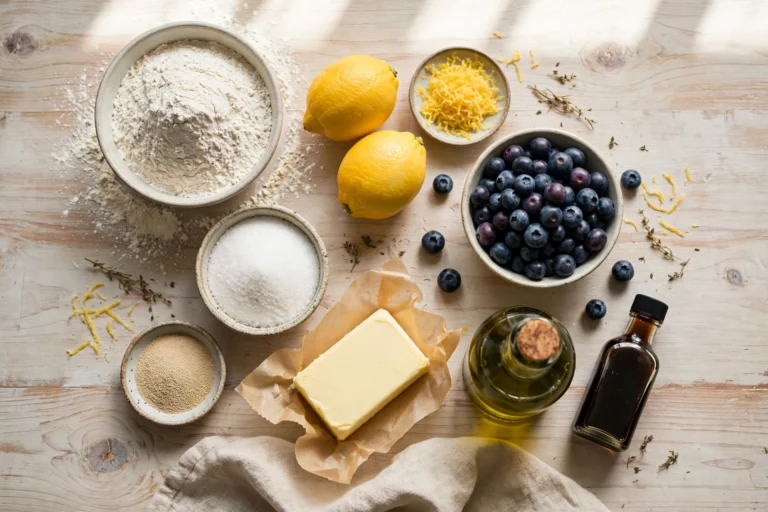
This recipe makes 36 mini cupcakes — exactly enough to fill a standard 12-cup mini muffin tin three times, or one and a half dozen per bake if you own two tins. Here is everything you will need, grouped so you can shop and prep efficiently.
For the chocolate mini cupcakes:
- 1 cup (125 g) all-purpose flour, spooned and leveled
- 1/2 cup (50 g) unsweetened Dutch-process cocoa powder
- 3/4 cup (150 g) granulated sugar
- 1/2 cup (100 g) packed light brown sugar
- 1 teaspoon baking soda
- 1/2 teaspoon baking powder
- 1/2 teaspoon fine sea salt
- 1/2 cup (120 ml) neutral oil, such as vegetable or canola
- 2 large eggs, at room temperature
- 1/2 cup (120 ml) buttermilk, at room temperature (or 1/2 cup milk mixed with 1 1/2 teaspoons lemon juice, rested 5 minutes)
- 2 teaspoons pure vanilla extract
- 1/2 cup (120 ml) hot strong-brewed coffee (or hot water)
For the chocolate nest frosting:
- 1 cup (226 g) unsalted butter, softened to room temperature
- 2 1/2 cups (300 g) powdered sugar, sifted
- 1/3 cup (35 g) unsweetened cocoa powder, sifted
- 2 to 3 tablespoons heavy cream or whole milk
- 1 teaspoon pure vanilla extract
- 1/4 teaspoon fine sea salt
For decorating:
- 108 speckled mini chocolate eggs (about 3 per cupcake; one 10-ounce bag usually holds enough)
- 2 tablespoons unsweetened cocoa powder, for dusting (optional, for the “twig” effect)
- Chocolate sprinkles or chocolate vermicelli (optional, for extra nest texture)
A quick note on the cocoa powder: Dutch-process gives the darkest color and smoothest chocolate flavor, which photographs beautifully against the pastel eggs. Natural cocoa works in a pinch, but the cupcakes will be slightly lighter in color and a touch tangier. Either way, sift it — cocoa clumps are the enemy of smooth batter and silky frosting.
If you do not have buttermilk, the lemon-juice-and-milk trick genuinely works; the acid reacts with the baking soda to give the cupcakes their lift and tenderness. And do not skip the hot coffee out of fear — I promise you cannot taste it in the finished cupcake. It simply makes the chocolate taste more like itself. If you are strictly avoiding caffeine, hot water does the job nearly as well.

What Equipment Do I Need?
- Mini muffin tin (12-cup): Two tins are ideal so you can bake back-to-back, but one works fine — the batter holds at room temperature while the first batch bakes.
- Mini paper liners: Standard mini cupcake liners. Do not try to bake these without liners; the tiny cakes are nearly impossible to release cleanly from an unlined tin.
- Piping bag and a large open-star tip (such as Wilton 1M): This is what creates the signature nest swirl. A zip-top bag with the corner snipped works in a pinch, but the star tip gives the textured “twig” look that sells the nest effect.
- Small cookie scoop (about 1 tablespoon): The single best tool for filling mini liners evenly and without drips. If you do not own one, two teaspoons work.
- Wire cooling rack: Minis go from done to soggy fast if they sit in a hot tin, so you need somewhere for them to cool quickly.
- Mixing bowls, whisk, and spatula: Nothing fancy. A hand mixer or stand mixer makes the frosting easier, but the batter comes together beautifully by hand.
- Fine-mesh sieve: For sifting cocoa and powdered sugar. Non-negotiable if you want lump-free frosting.
- Toothpick or cake tester: For checking doneness, since the bake time is short and ovens vary.
How Do I Make Mini Egg Cupcakes? (Step-by-Step Method)
Read through the whole method once before you start. These bake fast, so having everything measured and ready — what bakers call mise en place — keeps the process calm and fun instead of frantic.
- Heat the oven and prep the tin. Position a rack in the center of the oven and preheat to 350°F (175°C). Line your mini muffin tin with paper liners. Set the tin on a baking sheet if your oven has hot spots — the sheet buffers the bottoms and promotes even baking.
- Whisk the dry ingredients. In a large mixing bowl, whisk together the flour, cocoa powder, granulated sugar, brown sugar, baking soda, baking powder, and salt. Whisk for a full 30 seconds, breaking up any lumps of brown sugar or cocoa with your fingers or the back of a spoon. This thorough whisking distributes the leaveners evenly so every mini rises the same.
- Combine the wet ingredients. In a separate medium bowl or large measuring jug, whisk the oil, eggs, buttermilk, and vanilla until completely smooth and slightly frothy, about 45 seconds. Room-temperature eggs matter here — cold eggs can cause the oil-based batter to look curdled, and while it usually bakes out fine, room-temp eggs incorporate faster and give a finer crumb.
- Bring the batter together. Pour the wet mixture into the dry mixture and stir with a spatula just until no dry streaks remain. Do not overmix; a few small lumps are fine. Overmixing develops gluten, and gluten makes tough, rubbery cupcakes — the opposite of the tender bite we want.
- Bloom with hot coffee. Pour the hot coffee into the batter in a slow stream, whisking gently as you go. The batter will turn thin — thinner than you expect, almost like chocolate milk. That is exactly right. The hot liquid blooms the cocoa, unlocking deep chocolate flavor, and the thin batter is what produces such a moist crumb. Let the batter rest for 2 minutes while you double-check your liners.
- Fill the liners. Using your small cookie scoop, fill each mini liner about two-thirds full — roughly 1 tablespoon of batter per liner. This fill level is critical: overfilled minis mushroom over the liner edges and look messy, while underfilled ones bake up flat and sad. Two-thirds gives a gentle dome that peeks just above the liner rim.
- Bake for 12 to 14 minutes. Slide the tin into the oven and bake until the tops spring back lightly when touched and a toothpick inserted into the center of a cupcake comes out with a few moist crumbs (not wet batter). Start checking at 11 minutes — mini cupcakes go from perfect to dry in under two minutes, and every oven runs a little differently. Rotate the tin halfway through if your oven bakes unevenly.
- Cool fast. Let the cupcakes cool in the tin for exactly 5 minutes — no longer, or trapped steam will make the liners peel and the bottoms gummy. Then transfer them to a wire rack and cool completely, about 30 minutes. Never frost a warm cupcake; the buttercream will slide right off.
- Make the nest frosting. While the cupcakes cool, beat the softened butter in a large bowl with a mixer on medium speed until creamy and pale, about 2 minutes. Sift in the powdered sugar and cocoa powder, add the salt and vanilla, and beat on low until combined. Then add 2 tablespoons of cream and beat on medium-high for 2 to 3 minutes until light and fluffy. If the frosting is too stiff to pipe, add the remaining tablespoon of cream. It should hold a firm peak — stiff enough to keep the nest shape, soft enough to pipe smoothly.
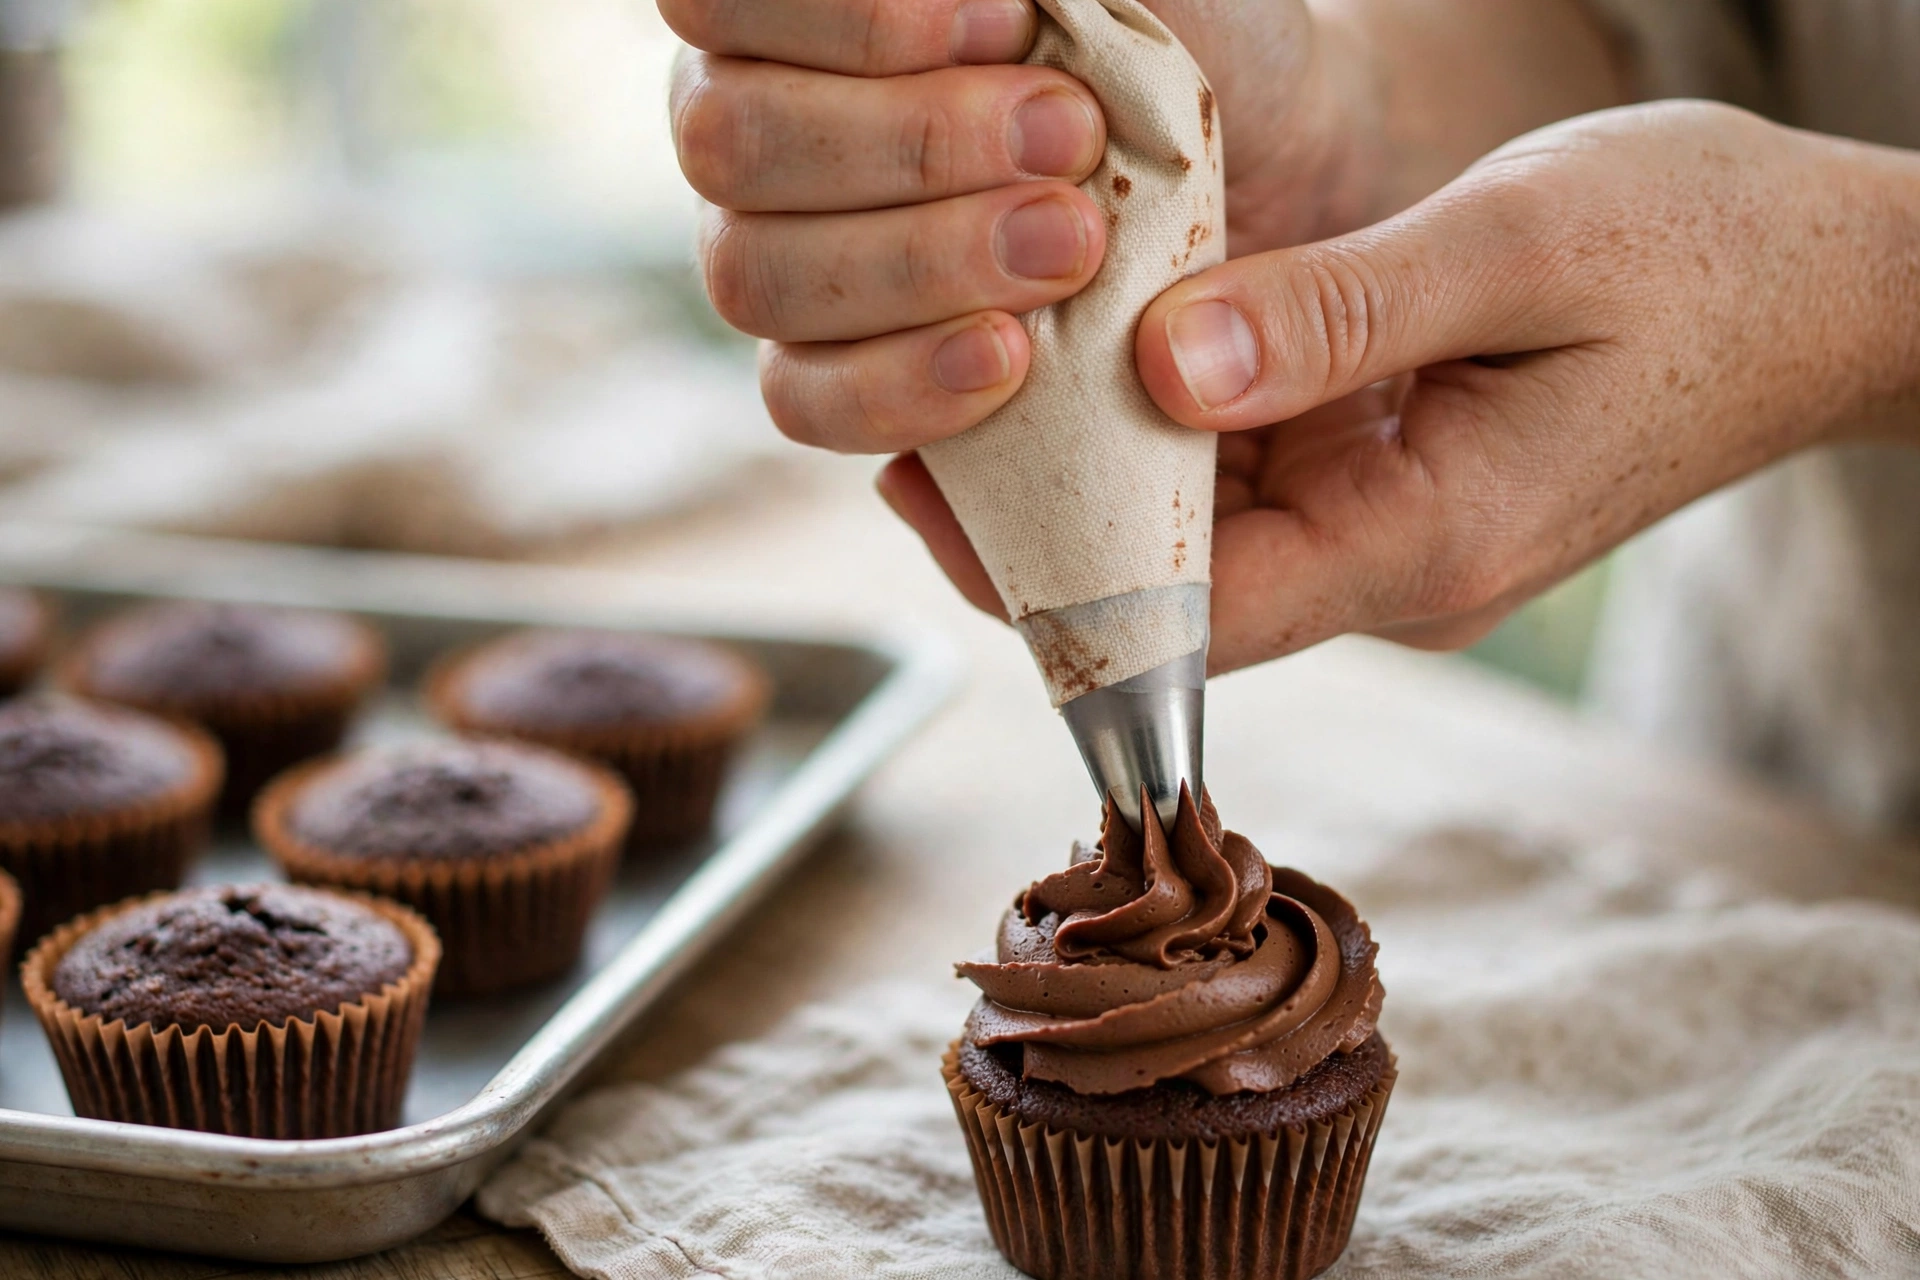
- Pipe the nests. Fit your piping bag with the open-star tip and fill it with frosting. Hold the bag perpendicular over each cooled cupcake, about half an inch above the surface, and pipe a generous swirl: start at the outer edge, spiral inward and upward, then ease off pressure at the center to leave a slight dip — a little crater where the eggs will sit. The star tip’s ridges mimic twigs, which is the whole nest illusion. Work confidently and do not overthink each swirl; slight irregularities read as rustic charm.
- Add the eggs. While the frosting is still soft, gently press 3 speckled mini chocolate eggs into the center dip of each swirl, arranging them in a little triangle like a real clutch of eggs. If you like, dust the frosting very lightly with cocoa powder first for a deeper nest color, or scatter a few chocolate sprinkles around the eggs for extra twig texture.
- Set and serve. Let the decorated cupcakes sit at room temperature for 20 to 30 minutes so the frosting firms up slightly. Then arrange on a platter or tiered stand and watch them disappear.
What Are the Pro Tips for Perfect Mini Egg Cupcakes?
After many batches, I have collected the small details that separate good mini egg cupcakes from unforgettable ones.
Weigh your flour if you can. A cup of flour can vary wildly depending on how you scoop, and minis are unforgiving of a heavy hand — too much flour makes them dense. Spoon the flour into the cup and level it, or better yet use a kitchen scale (125 g). It is the single biggest upgrade a home baker can make.
Do not skip the room-temperature ingredients. Cold eggs and cold buttermilk do not emulsify well with oil, and poor emulsification means a coarser crumb. Set the eggs and buttermilk on the counter 30 to 45 minutes before baking. In a hurry? Place cold eggs in a bowl of warm (not hot) water for 10 minutes.
Chill your frosting for 10 minutes before piping. If your kitchen is warm, the buttercream can get soft and lose its ridged definition. Ten minutes in the fridge firms it just enough to pipe crisp, clean swirls that hold their shape. If it gets too firm, knead the bag gently in your hands to soften it.
Use the two-tin rotation. While one batch bakes, fill the second tin. With two tins you can move through all 36 cupcakes in about 40 minutes of oven time with zero downtime. If you only own one tin, let it cool for a few minutes before re-lining — pouring batter into a hot tin starts the cooking process unevenly.
Sort your eggs by color. This sounds fussy, but grouping the speckled eggs into matching trios (three blues, three pinks) makes each cupcake look intentional and designed rather than random. It takes two extra minutes and the visual payoff is enormous, especially on a tiered stand.
Taste one before the party. Quality control is a baker’s privilege. One cupcake never hurt anyone, and it lets you confirm the bake, the sweetness level, and the frosting texture before guests arrive.
What Mistakes Should I Avoid When Making Mini Egg Cupcakes?
Even simple recipes have traps. Here are the six mistakes I see most often — and how to dodge every one of them.
1. Overfilling the liners. The number-one mini cupcake mistake. Fill past two-thirds and the batter spills over, fusing cupcakes together and baking into a flat, messy sheet. Use a 1-tablespoon scoop, fill to two-thirds, and trust the process. The cupcakes will dome beautifully without overflowing.
2. Overbaking by “just a minute or two.” Mini cupcakes have almost no margin for error. At 350°F, the difference between moist and dry can be 90 seconds. Set a timer for 11 minutes, check with a toothpick, and pull them the moment the toothpick shows moist crumbs. Remember they continue cooking slightly from residual heat in the tin.
3. Frosting warm cupcakes. I know the temptation — the cupcakes smell incredible and you want to finish. But warm cake melts buttercream into a greasy slide. Wait until the cupcakes are completely cool to the touch, with no warmth at all on the bottom. If you are in a hurry, 15 minutes in the fridge after the rack speeds things up.
4. Using frosting that is too soft or too stiff. Soft frosting slumps into a blob with no nest definition; stiff frosting tears and pipes in broken chunks. The sweet spot is a frosting that holds a peak but yields to gentle pressure. Test-pipe one swirl on parchment first — it takes five seconds and saves a whole batch of sad piping.
5. Skipping the sift on cocoa and powdered sugar. Lumps of cocoa in the batter bake into bitter pockets; lumps of powdered sugar in frosting clog piping tips at the worst possible moment. A fine-mesh sieve takes one minute and prevents both disasters. Do not skip it.
6. Decorating too far ahead. The cupcakes themselves keep beautifully for two days, but the speckled candy shells can bleed color onto the frosting if they sit in humidity, and the chocolate eggs can soften. For the prettiest presentation, bake and frost up to a day ahead, then add the eggs within a few hours of serving.

What Are the Best Mini Egg Cupcake Variations?
Once you have mastered the classic, these five variations keep the recipe fresh all season long. Each one starts with the same base method — only the flavors change.
- Malted Milk Nest Cupcakes. Add 1/3 cup malted milk powder to the dry ingredients and swap the chocolate buttercream for a malted vanilla frosting (beat 2 tablespoons malted milk powder into a standard vanilla buttercream). Top with the speckled eggs. The malty, nostalgic flavor tastes like the inside of a chocolate malt ball, and adults absolutely lose their minds over it.
- Peanut Butter Cup Nests. Replace 1/4 cup of the butter in the frosting with creamy peanut butter and reduce the powdered sugar slightly to balance the sweetness. Press a mini peanut butter cup into the frosting swirl first, then tuck the speckled eggs around it. Chocolate, peanut butter, and candy eggs — this is the variation that disappears first at every party.
- Lemon Bluebird Cupcakes. Swap the chocolate batter for a lemon version: use the same base but replace the cocoa with an extra 1/4 cup flour, add the zest of two lemons, and use lemon juice in place of the coffee. Frost with lemon cream-cheese frosting and top with blue speckled eggs only. The yellow cake, white frosting, and blue eggs look like a spring sky, and the bright citrus flavor is a lovely contrast to all the chocolate around Easter.
- Cookies-and-Cream Nests. Fold 3/4 cup finely crushed chocolate sandwich cookies into the batter and use an American vanilla buttercream loaded with cookie crumbs for the frosting. The speckled eggs pop beautifully against the black-and-white frosting, and the crunch of cookie against soft cake is deeply satisfying. Kids vote this one the winner every time.
- Salted Caramel Bird Nests. Keep the chocolate cupcakes but frost with salted caramel buttercream (add 1/3 cup thick caramel sauce and a pinch of flaky sea salt to the base frosting, reducing the cream). Drizzle a thin ribbon of extra caramel over each swirl before adding the eggs, and finish with a tiny pinch of flaky salt. The sweet-salty combination makes these taste far more sophisticated than their cute appearance suggests — they are the “grown-up” mini egg cupcake.

How Do I Store Mini Egg Cupcakes, and Can I Freeze Them?
Proper storage keeps these tasting bakery-fresh for days, which is essential when you are baking for an event.
At room temperature: Undecorated cupcakes keep in an airtight container at cool room temperature for up to 2 days. Once frosted, store them the same way for up to 2 days — the sugar in the buttercream acts as a preservative. Keep them in a single layer; stacking smears the nests. Add the speckled eggs as close to serving as possible to prevent color bleed.
In the refrigerator: Frosted mini egg cupcakes keep in the fridge for up to 4 days in an airtight container. The buttercream firms up when cold, so let them sit at room temperature for 20 to 30 minutes before serving — cold buttercream tastes waxy and mutes the chocolate flavor. If your kitchen is warm (above 75°F), the fridge is the safer choice even for short storage.
In the freezer: Unfrosted cupcakes freeze beautifully for up to 3 months. Cool them completely, arrange in a single layer on a baking sheet, freeze until solid (about 1 hour), then transfer to a freezer bag with the air pressed out. Frosted cupcakes can also be frozen: freeze them uncovered on a tray until the frosting is firm, then wrap the container tightly. Thaw overnight in the refrigerator, then bring to room temperature before adding the eggs and serving. Do not freeze cupcakes with the candy eggs already on top — the shells crack and weep as they thaw.
How to reheat: These are best at room temperature, not warm. But if you love a slightly warm cupcake, microwave an unfrosted mini for 8 to 10 seconds — no more, or it turns rubbery. Never microwave a frosted cupcake; the buttercream melts into a puddle. For frozen frosted cupcakes, thawing in the fridge overnight followed by 30 minutes on the counter gives the best texture.
How Should I Serve Mini Egg Cupcakes?
Presentation is half the joy of this recipe, and minis give you so many fun options.
On a tiered stand: The classic move. A three-tier stand holding 36 minis is a genuine showpiece — stagger the egg colors across tiers for a confetti effect, or graduate from light to dark for an ombré look. Tuck fresh mint sprigs or edible flowers between the cupcakes for a garden-party feel.
As a dessert board centerpiece: Arrange the cupcakes in a spiral or nest-shaped ring on a large round board, then fill the gaps with loose speckled eggs, chocolate shavings, and fresh berries. It becomes an interactive centerpiece guests graze from all evening.
In individual favor boxes: For weddings, showers, or Easter gifts, nestle two or three minis into small kraft boxes lined with tissue. Tie with ribbon and a tag. Homemade favors beat store-bought every time, and minis are the perfect size for it.
With coffee and tea: Serve alongside a proper coffee bar — the chocolate-and-coffee pairing is no accident, since coffee is already in the batter. A slightly bitter espresso or a milky latte both work. For kids’ parties, pair with cold milk or strawberry milk for maximum nostalgia.
At a bake sale: Price them at two or three for a dollar, displayed in mini cupcake boxes of four or six. They outsell full-size cupcakes because the price feels like a bargain and the cuteness is irresistible. Attach a little ingredient card for allergy transparency.
What drinks pair well with mini egg cupcakes?
For adults, a medium-roast coffee, a chai latte, or a glass of cold milk are the natural partners — the tannins in coffee and the warmth of chai cut through the frosting’s richness. A sweet dessert wine like Moscato also works surprisingly well with the chocolate. For kids, keep it simple: cold milk, chocolate milk, or a fruity punch. Avoid anything too sweet alongside them; the cupcakes bring plenty of sugar on their own.
Mini Egg Cupcakes FAQs
Can I make mini egg cupcakes without a mini muffin tin?
You can, but the result will not be quite the same. A full-size muffin tin works with the same batter — fill standard liners two-thirds full and bake for 18 to 20 minutes. You will get about 12 full-size cupcakes. Alternatively, bake the batter in an 8-inch round pan for a nest cake (28 to 32 minutes), frost the top with nest swirls, and decorate with the eggs. The flavor is identical; only the adorable bite-size format changes.
Why did my mini cupcakes stick to the liners?
Sticking usually means one of three things: the cupcakes were underbaked slightly, they cooled in the tin too long and steamed, or the liners are low quality. Fix it by baking until the toothpick shows only moist crumbs, moving cupcakes to a rack after exactly 5 minutes, and buying decent liners — the foil-lined or glassine mini liners release far better than the cheapest paper ones. A very light mist of baking spray inside each liner before filling also helps.
Can I use a cake mix instead of making the batter from scratch?
Absolutely, and no judgment — a doctored cake mix makes excellent mini egg cupcakes when time is short. Use a chocolate cake mix, but replace the water with hot coffee, add an extra egg beyond what the box calls for, and use melted butter instead of oil in the same quantity for richer flavor. The homemade frosting and the egg decoration are what make these special, so keep those from scratch if you can.
How far in advance can I make these for a party?
Bake the cupcakes up to 2 days ahead and store unfrosted in an airtight container, or freeze them up to 3 months ahead. Make the frosting up to 5 days ahead and refrigerate it — re-whip for 2 minutes before piping. Assemble (frost and add eggs) the morning of the party or the night before at the earliest. Fully assembled cupcakes hold fine overnight in the fridge, but the eggs look brightest when added within a few hours of serving.
Are mini egg cupcakes suitable for kids to help with?
They are one of the best baking projects for kids. Little hands are perfectly sized for placing the speckled eggs, and the mini format means less batter to spill. Let kids do the egg sorting and placing, the cocoa dusting, and (with supervision) the scooping. Leave the oven and the piping to adults or older teens — piping takes hand strength and coordination that younger kids find frustrating.
What is the best piping tip for the nest look?
A large open-star tip — the Wilton 1M is the classic choice — gives the ridged, twig-like texture that reads as a nest. A French star tip (like Ateco 866) makes even finer ridges for a more delicate nest. Avoid round tips; they pipe smooth swirls that look like soft-serve rather than twigs. If you have no tips at all, a zip-top bag with a 1/2-inch corner snipped off still makes a respectable nest, especially with a cocoa dusting on top.
Can I make these gluten-free?
Yes. Swap the all-purpose flour for a 1:1 gluten-free baking blend that contains xanthan gum, and keep everything else the same. Gluten-free mini cupcakes actually have an advantage — with less structure to lose, they stay tender. Check that your cocoa powder, cake decorations, and speckled eggs are certified gluten-free, since candy coatings sometimes contain hidden gluten. The texture will be slightly more delicate, so cool them fully before handling.
Why is my frosting too runny to pipe nests?
Runny frosting almost always means the butter was too soft or too much liquid was added. Fix it by beating in more sifted powdered sugar, 1/4 cup at a time, until it holds a peak. If your kitchen is warm, chill the whole bowl for 15 minutes, then re-whip. And start with butter that is cool to the touch but gives when pressed — “room temperature” means about 65°F, not a melty summer countertop.
How do I transport mini egg cupcakes without ruining them?
Minis are far easier to transport than full-size cupcakes because they are short and stable. Use a cupcake carrier with mini inserts if you own one; otherwise, place the cupcakes in a single layer in a rimmed baking sheet or shallow box lined with a non-slip mat, with the cupcakes touching gently so they cannot slide. Keep the car cool — heat is the real enemy, melting frosting faster than any bump in the road. In warm weather, transport the eggs separately and place them on arrival.
Final Thoughts
If there is one recipe that proves small things can be spectacular, it is these mini egg cupcakes. They take under an hour, they cost little, they make people genuinely happy, and they look like you spent all afternoon on them. That combination — easy, affordable, adorable, delicious — is rare in baking, and it is why this recipe has become my most-requested spring bake.
Bake a batch this weekend, even if there is no party. Sort the eggs by color, pipe the nests with confidence, and taste one while the kitchen still smells like chocolate. Then watch how fast the platter empties when you share them. Some recipes are just food; this one is a little moment of joy, two bites at a time. Happy baking!
If you cannot get enough of bite-size holiday treats, try our mini egg cheesecake for another adorable crowd-pleaser. And for a quick make-ahead dessert to share, our homemade peppermint bark is always a hit. 📌 Love this recipe? Pin it on Pinterest to save it for later!