
Christmas Cookies Decorated: The Complete Guide to Stunning, Easy Holiday Designs Anyone Can Make
1. What Are the Best Ways to Get Christmas Cookies Decorated Beautifully? (Quick Featured Snippet Answer)
The easiest way to get Christmas cookies decorated beautifully is to start with chilled sugar cookies, use a simple royal icing recipe, outline first, then flood the center with thinner icing. Let each layer dry before adding details. For fast results, you can also use Christmas cookie decorating kits, edible markers, sprinkles, and premade decorations. This makes decorating Christmas cookies fun, beginner-friendly, and stress-free.

2. Essential Christmas Cookie Decorating Supplies
Before you jump into decorating Christmas sugar cookies, gather a few basics. You don’t need a huge setup—just the essentials:
- Piping bags + tips (Wilton 1, 2, 3 are perfect for lines)
- Squeeze bottles for flooding
- Gel food coloring for bright Christmas colors
- Royal icing (homemade or store-bought)
- Toothpicks for settling icing
- Cooling racks
- Edible glitter + Christmas cookie sprinkles and decorations
- Christmas cookie decorating kit (optional but super helpful)
If you’re decorating with kids or at a christmas cookie decorating party, having a big tray of sprinkles and edible shapes makes everything easier.
3. Christmas Cookie Decorating Ideas (Beginner to Advanced)
Whether you’re looking for simple easy Christmas cookie decorating ideas or detailed, professional-style decorated Christmas cookies, here are designs that always impress.
Beginner-Friendly Designs
- Christmas lights strand
- Snowflakes (super simple with white icing)
- Santa hats
- Wreaths (just green icing + sprinkles)
- Trees using zig-zag lines
Intermediate Designs
- Christmas tree cookie decorating ideas with garlands
- Gingerbread people with sweaters
- Reindeer faces
- Color-blocked ornaments
Advanced / Fancy Decorated Christmas Cookies
- Hand-painted images
- Intricate lace-style piping
- Decorated Christmas tree cookies with layered texture
- Metallic gold details
For motivation, you can look at pictures of decorated Christmas cookies or photos of decorated Christmas cookies for inspiration.
4. How to Decorate Christmas Cookies With Royal Icing (Step-by-Step)
If you want cookies that look professional but stay simple, try decorating Christmas cookies with royal icing. Here’s an easy method that avoids the usual frustration:
- Bake cookies and let them cool completely.
This prevents melting and spreading. - Mix royal icing in two consistencies:
- Thick icing for outlining
- Thin icing for filling/flooding
- Outline the cookie using a small tip.
This step creates a barrier. - Flood with thin icing
Use a squeeze bottle for even spreading. - Pop bubbles with a toothpick.
- Let the icing dry 6–12 hours
It’s slow, but worth it if you want crisp lines. - Add details (polka dots, snowflakes, lights, etc.).
This process works for everything from sugar cookies decorated for Christmas to more advanced royal icing Christmas cookies decorating designs.
5. Christmas Cookie Decorating Kits & Parties
Hosting a christmas cookie decorating party?
Here’s what to include:
What to Buy
- A decorate Christmas cookies kit or several cookie decorating kits Christmas
- Pre-baked cookies (saves time!)
- Bowls of icing in holiday colors
- Edible glitter
- Candy cane sprinkles
- Decorations for Christmas sugar cookies (mini pearls, stars, trees)
Party Decorations
You can keep it simple:
- Red + green tablecloth
- Fairy lights
- A cookie-decorating “station”
Kids especially love cookies for Christmas decorating, edible markers, and easy shapes like trees and stars.
6. Christmas Sugar Cookie Decorating Ideas for Kids
Kids love decorating sugar Christmas cookies because it’s simple and messy (in a fun way). Try:
- Flood-and-sprinkle method
- Edible googly eyes for snowmen
- Squeeze-bottle icing
- Simple christmas sugar cookies decorating ideas like candy-cane stripes or ornament shapes
If attention spans are short, try easy decorated Christmas cookies like:
- Smiley snowmen
- Sprinkle-covered ornaments
- Simple stars with glitter sugar
7. Fancy, Professional-Level Decorated Christmas Cookies
If you’re aiming for near-bakery quality:
- Use muted color palettes (sage green, matte red, ivory)
- Add texture with stiff icing
- Try wet-on-wet marbling for ornaments
- Use metallic accents (edible gold dust)
- Add micro details like sweater patterns or snowflake filigree
Competitors often overlook decorated cookie recipes Christmas using advanced icing textures—this is a great way to stand out.
8. Common Decorating Mistakes & Easy Fixes
Icing too runny? Mix in more powdered sugar.
Colors bleeding? Let layers dry fully in between.
Cookies spreading in the oven? Chill the dough 30 minutes.
Icing won’t dry? High humidity—turn on a fan or dehumidifier.
Most beginners struggle with decorating sugar cookies for Christmas, but fixing icing consistency usually solves 80% of problems.
9. Frequently Asked Questions
What’s the best cookie for decorating?
Classic sugar cookies. They hold shape and taste great.
How long do decorated cookies last?
Up to 1 week in airtight containers.
Should I use royal icing or buttercream?
Royal icing for smooth, crisp designs. Buttercream for soft, fluffy designs.
Where can I learn more?
Local craft stores often host a christmas cookie decorating class near me.
10. Conclusion
Decorating Christmas cookies doesn’t have to be stressful or complicated. With simple supplies, a few creative christmas cookie decorating ideas, and a little drying time, you can make stunning, festive treats that look straight out of a holiday magazine. Whether you’re throwing a cookie decorating Christmas party, baking with
kids, or creating fancy decorated Christmas cookies as gifts, these ideas help you craft holiday magic one cookie at a time.
Why Do Decorated Christmas Cookies Steal the Show Every Year?
Picture a holiday party table. There are bowls of chips, a plate of brownies, maybe a cheese board. And then there is the platter of decorated Christmas cookies — snowflakes piped in icy blue lace, Christmas trees swirled in glossy green, Santas with tiny red hats. Everyone stops. Phones come out. Someone asks, “You MADE these?” and then eats four before you can answer.
That is the magic of Christmas cookies decorated with royal icing. They taste like the holidays and look like little works of art. And here is the secret nobody tells beginners: they are not as hard as they look. The fancy designs you see online come from a few simple techniques — flooding, wet-on-wet marbling, and basic piping — repeated with different colors. Once you learn those three moves, you can decorate dozens of designs.
This guide gives you everything you need: a no-spread sugar cookie recipe that keeps sharp edges, a foolproof royal icing recipe, step-by-step decorating techniques, more than twenty festive design ideas, flavor variations, make-ahead and storage instructions, gifting and packaging tips, the mistakes to avoid, and answers to the questions every decorator asks. Whether this is your first December with a piping bag or your tenth, you will find something here that makes your cookies better.
What Makes a Great Decorated Christmas Cookie?
A great decorated Christmas cookie comes down to three things working together: the cookie, the icing, and the design. Miss on any one of them and the whole thing falls short.
The cookie has to be flat, sturdy, and flavorful. A cookie that puffs up in the oven loses its crisp shape, so intricate designs have nothing to sit on. A cookie that is too thin or soft breaks when you handle it. And a cookie that tastes like cardboard ruins the whole point — these are meant to be eaten, not just admired. The ideal base is a dense, buttery cutout cookie with sharp edges and a level top.
The icing has to be smooth, glossy, and the right thickness. Royal icing is the decorator’s paint. Too thick and it will not flow flat; too thin and it runs off the edge of the cookie. The sweet spot is a consistency that spreads to a smooth surface on its own but stays inside the outline. Getting that consistency right is the single biggest skill in this whole guide — and it is easier than you think once you know the spoon test.
The design has to match your skill level today, not someone else’s. A beautifully executed simple design — a red cookie with white polka dots and a clean border — beats a sloppy complicated one every time. Start simple, build your confidence, and add complexity one technique at a time. The best cookie decorators all started with dots and lines.
Here is the good news: the recipe and techniques in this guide are built for real home kitchens. No special oven, no professional training, no twenty-piece tool kit. Just butter, sugar, icing, and a little patience.

Which Cookie Base Works Best for Decorating?
The best cookie for decorating is a no-spread sugar cookie. Regular sugar cookie dough spreads in the oven — your sharp star points turn into blobs and your gingerbread man’s arms disappear. A no-spread dough uses the right ratio of butter to flour and skips the leaveners that cause puffing, so the cookie that goes into the oven is the cookie that comes out.
This recipe makes about 24 to 30 medium cookies. It rolls out beautifully, holds every edge, and tastes rich and buttery with a hint of vanilla and almond.
Ingredients:
- 1 cup (227g) unsalted butter, softened but still cool
- 1 cup (200g) granulated sugar
- 1 large egg, at room temperature
- 2 teaspoons vanilla extract
- 1/2 teaspoon almond extract (optional but wonderful)
- 3 1/2 cups (440g) all-purpose flour
- 1/2 teaspoon salt
- No baking powder, no baking soda — that is the whole no-spread secret
Instructions:
- Cream the butter and sugar. Beat them together for 2 to 3 minutes until pale and fluffy. Do not overbeat — you want the mixture light, not whipped full of air, because air pockets cause spreading.
- Add the egg and extracts. Beat until fully combined, scraping down the bowl once.
- Add the flour and salt. Mix on low speed just until a soft dough forms. Stop the moment you stop seeing flour streaks. Overmixing develops gluten, and gluten makes cookies tough and prone to shrinking.
- Roll before chilling. This is the pro move most recipes skip. Divide the dough in half and roll each half between two sheets of parchment paper to 1/4 inch thick BEFORE refrigerating. Rolling cold, stiff dough is miserable; rolling it now is easy.
- Chill for at least 1 hour. Cold dough holds its shape. Warm dough spreads. There is no shortcut here.
- Cut cold, bake hot. Cut shapes from the chilled dough and place them on a parchment-lined baking sheet. Bake at 350°F (175°C) for 10 to 12 minutes, until the edges are just barely golden. Underbaked cookies are soft and break; overbaked cookies taste dry.
- Cool completely. Move the cookies to a wire rack and do not even think about icing until they are 100 percent cool. Warm cookies melt royal icing into a puddle.
Rolling tips that save your sanity:
- Roll to an even 1/4 inch. Thinner cookies bake unevenly and break; thicker cookies take too long to dry on top.
- Dip your cutters in flour between cuts so they release cleanly.
- Re-roll scraps only once. Every re-roll makes the dough tougher. After the second roll, bake the scraps as plain snack cookies.
- Chill cut shapes on the baking sheet for 10 minutes before baking if your kitchen is warm. Cold cookies go into a hot oven and keep their edges razor sharp.
Two worthy alternatives to sugar cookies:
- Gingerbread cutouts bring warm spice that screams Christmas. Use a sturdy gingerbread recipe (one with molasses and no strong leaveners), and decorate the darker cookie with white royal icing for that classic contrast. Note: dark cookies make light icing colors pop, but they also make color mistakes more visible.
- Shortbread is buttery and crumbly-delicious, but it is more fragile. Save shortbread for simple designs handled with care, and keep sugar cookies as your main decorating canvas.
How Do You Make Royal Icing That Actually Behaves?
Royal icing is just three ingredients — powdered sugar, meringue powder, and water — but the proportions and the mixing make all the difference. Meringue powder (dried egg whites with stabilizers) is the beginner-friendly choice: it is safe, consistent, and available at any craft store or baking aisle. Fresh egg whites work too, but they carry a small food-safety risk and whip up less predictably.
This recipe makes enough to decorate about 2 dozen cookies. Double it if you are decorating with kids, because kids use a lot of icing.
Ingredients:
- 4 cups (480g) powdered sugar, sifted
- 3 tablespoons meringue powder
- 6 to 8 tablespoons room-temperature water
- 1 teaspoon clear vanilla extract or almond extract (clear keeps white icing truly white)
- Gel food coloring (never liquid — liquid coloring thins the icing too much)
Instructions:
- Mix the dry ingredients. Whisk the sifted powdered sugar and meringue powder together in a large bowl. Sifting matters: lumps in the sugar become clogs in your piping tip.
- Add water slowly. Start with 6 tablespoons of water and the extract. Beat on medium speed for 3 to 4 minutes until the icing is thick, bright white, and holds stiff peaks. This is your stiff consistency — the base for everything else.
- Thin to the consistencies you need. This is the masterclass part. Royal icing decorators work with three main consistencies:
- Stiff (toothpaste): for piping fine details, dots, and writing. It holds its shape completely.
- Medium (soft peak): for outlining cookies and piping borders. It flows slightly but holds a line.
- Flood (honey): for filling in large areas. It should ribbon off the spoon and disappear back into the surface in about 10 seconds. That is the famous 10-second rule — count how long a ribbon of icing takes to melt flat. Around 10 seconds is perfect for flooding.
- Color it. Divide the icing into bowls and add gel coloring a tiny bit at a time with a toothpick. Colors deepen as they dry, so mix your shades one step lighter than your target. Red and black need the most patience — they can take hours to reach full depth, and adding too much gel makes the icing bitter.
- Cover it immediately. Royal icing starts crusting within minutes of air exposure. Press plastic wrap directly onto the surface of every bowl, and keep piping bags sealed with a damp towel over the tips.
The spoon test: Dip a spoon in your flood icing and let it drizzle back into the bowl. If the ribbon disappears in about 10 seconds, you are ready to flood. If it sits on top in a mound, add water a teaspoon at a time. If it vanishes instantly, your icing is too thin — add sifted powdered sugar a tablespoon at a time.
Storage: Royal icing keeps 2 weeks in the refrigerator in an airtight container, or 1 month in the freezer. Bring it to room temperature and re-whip briefly before using. Never microwave it — heat destroys the structure.
How Do You Flood a Cookie Without Making a Mess?
Flooding is the foundation of almost every decorated Christmas cookie. It is the smooth, glossy base coat of icing that covers the cookie in one even color. Get flooding right and everything you add on top looks professional.
What you need: one piping bag (or squeeze bottle) of flood-consistency icing in your base color, a toothpick or scribe tool, and a damp towel.
Step by step:
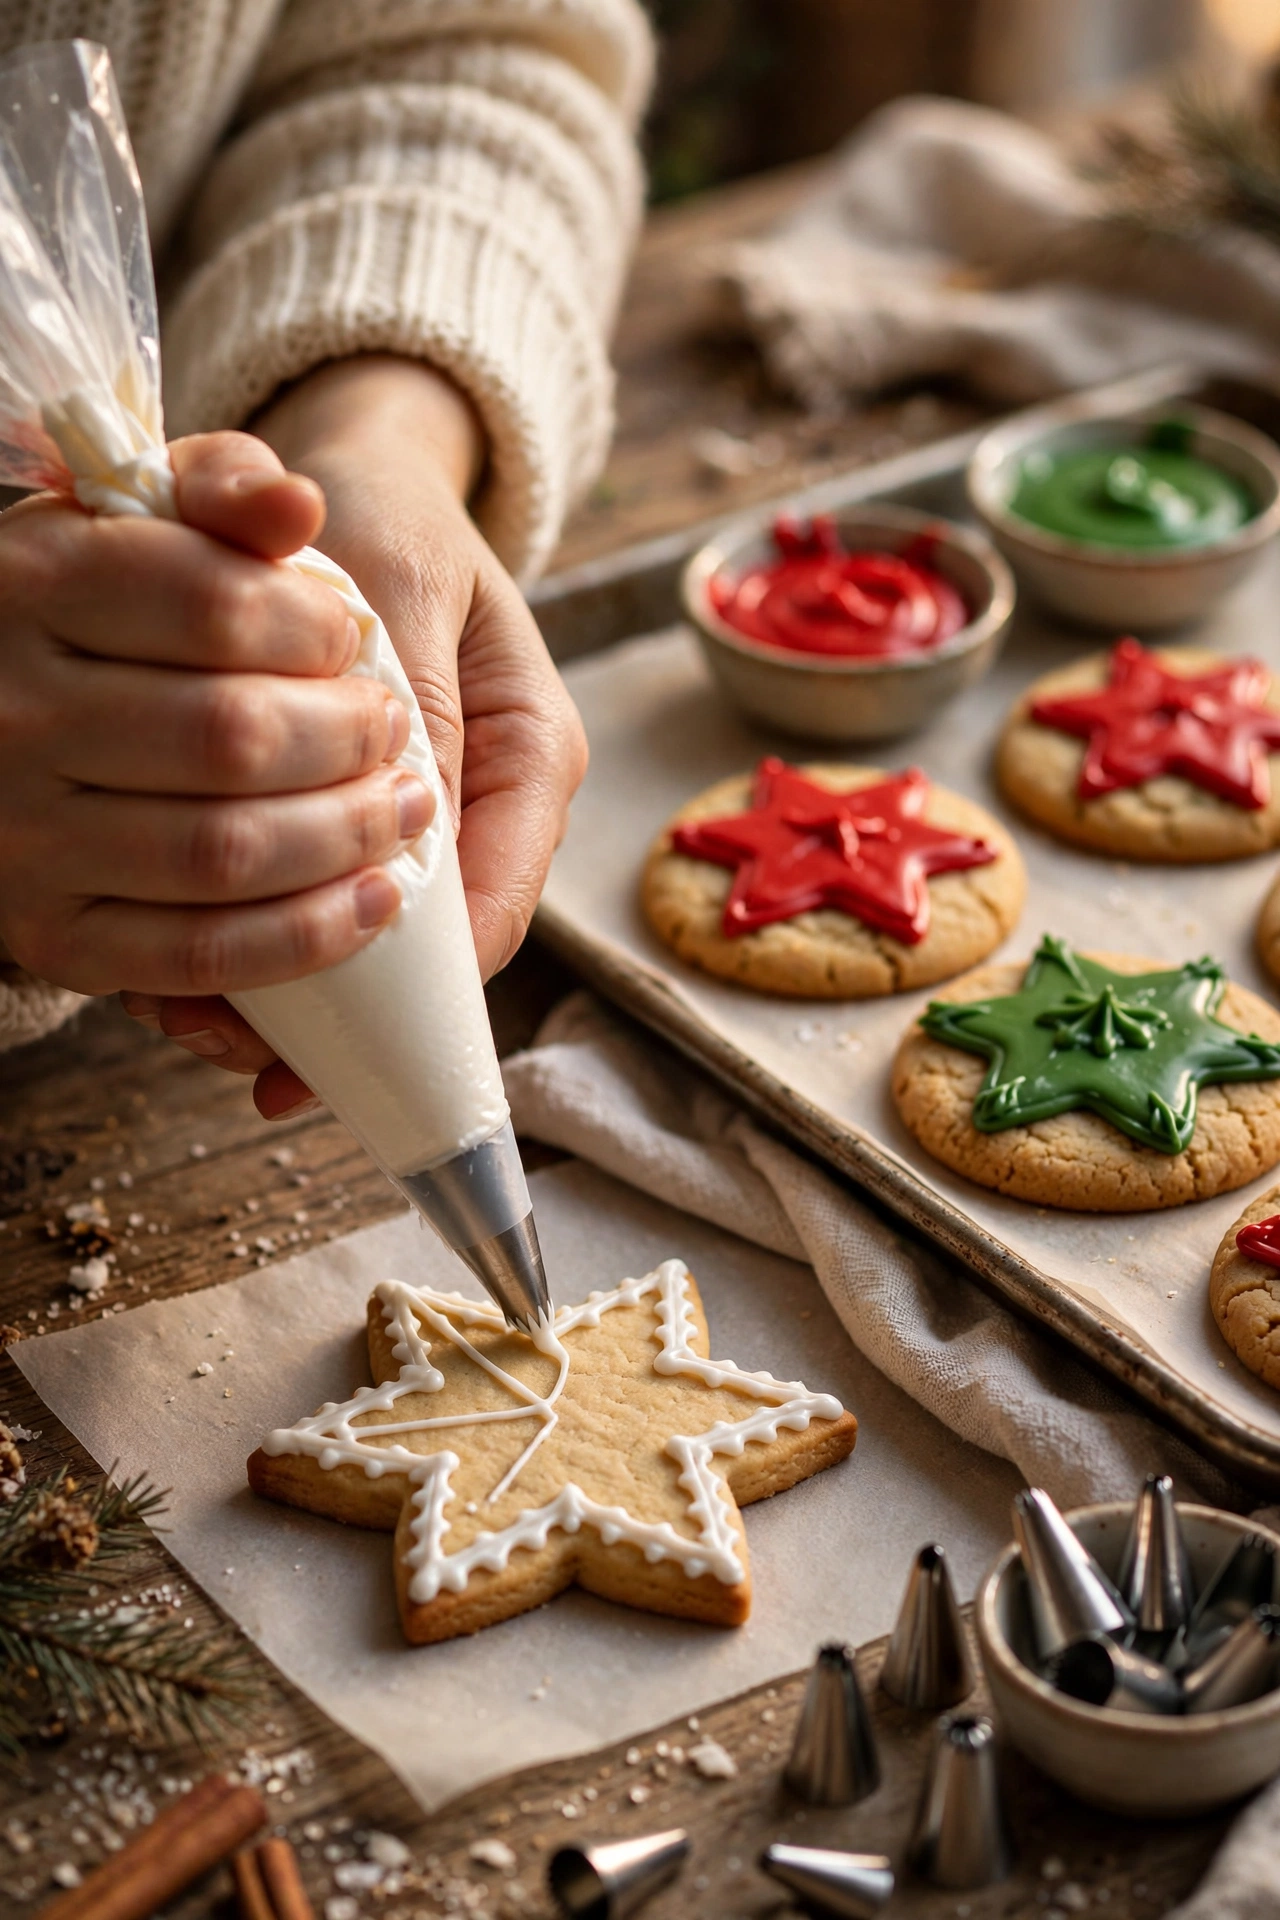
- Outline first. Pipe a thin line of medium-consistency icing around the edge of the cookie, about 1/8 inch inside the rim. Think of it as building a little dam that holds the flood icing in. Let the outline sit for 2 to 3 minutes until it just starts to crust.
- Fill the middle. Pipe your flood icing inside the outline in a zigzag or spiral, starting from the center and working outward. Do not be shy — you need enough icing to cover the cookie in one pass.
- Guide it to the edges. Use a toothpick or scribe tool to gently pull the icing into the corners and along the outline. Small circles with the toothpick pop air bubbles at the same time.
- Pop the bubbles. Hold the cookie a few inches above the counter and give it a gentle shake side to side. This levels the icing and brings trapped air bubbles to the surface, where you pop them with the toothpick. Bubbles left alone become ugly craters when the icing dries.
- Dry flat and undisturbed. Set the cookie on a level surface and do not touch it for at least 6 to 8 hours, or overnight for best results. Drying in front of a small fan speeds things up and gives a beautiful sheen. Never dry cookies in a warm oven — heat causes the icing to crack and discolor.
Flooding rules that prevent disasters:
- Work on one cookie at a time for wet-on-wet designs, but flood batches of the same color before switching bags — it is faster and keeps colors consistent.
- If icing overflows the outline, wipe it away immediately with a damp cloth. Dried mistakes have to be scraped off and the spot re-flooded.
- Keep your piping tip close to the cookie surface. Flooding from too high up traps air and makes splatters.
- If the flood icing pulls away from the edges as it dries, your icing was a touch too thin. Note it, thicken slightly, and the next batch will be perfect.
What Are the Easiest Wet-on-Wet Decorating Techniques?
Wet-on-wet decorating means adding designs into flood icing while it is still wet, so the colors melt together into one smooth surface. It looks incredibly fancy and takes almost no skill — this is the highest reward-to-effort technique in cookie decorating. Work quickly, because you only have a few minutes before the base starts to crust.
Marbled swirls: Flood the cookie in white. While it is wet, pipe thin lines or dots of red and green across the surface. Drag a toothpick through the lines in one smooth motion — straight lines for stripes, S-curves for marble. Christmas trees flooded green with white marbled garland lines look stunning this way.
Polka dots: Flood in any color, then pipe dots of a contrasting color in a grid while wet. The dots sink in and become perfectly flat circles. Red dots on white, white dots on green — instant holiday classic.
Hearts and trees: Pipe a row of dots down the center of a wet cookie. Drag a toothpick through the center of all the dots in one line. Each dot pulls into a heart shape. For a Christmas tree, pipe three rows of green dots (small at top, larger at bottom) on a white-flooded cookie and pull a toothpick down the middle — you get a dotted tree in seconds.
Feathered ornaments: Flood a round cookie in red. Pipe white curved lines across it while wet, then drag a toothpick perpendicular through the lines, alternating direction each pass. You get the classic feathered pattern you see on bakery ornaments and Easter eggs.
Spiderweb snowflakes: Flood a cookie in dark blue or red. Pipe white concentric circles while wet, then drag a toothpick from the center outward in 6 to 8 spokes. The circles pull into a perfect snowflake web.
Timing is everything: Wet-on-wet only works while the base flood is wet — usually 3 to 5 minutes at room temperature. If the base has crusted, new icing sits on top instead of melting in. When in doubt, work on one cookie at a time: flood, decorate, then move to the next.

How Do You Add Fine Details, Painting, and Stencils?
Once your flooded base is completely dry — and that means fully dry, at least 8 hours, ideally overnight — you can add the details that turn a pretty cookie into a jaw-dropper.
Piped details: Switch to stiff or medium-consistency icing and a small round tip (a #1, #2, or #3). Pipe dot borders around edges, tiny snowflake arms, Santa’s beard squiggles, and script writing like “Noel” or “Joy.” Keep your hand steady by resting your piping wrist on the table and squeezing with consistent pressure. Practice on parchment paper first — five minutes of practice lines saves a ruined cookie.
Brush painting: Thin gel coloring with a few drops of clear extract (not water — water makes royal icing bleed) and paint directly onto dried icing with a clean, food-safe brush. Gold and silver luster dust mixed with extract makes gorgeous metallic paint for ornament hooks, star toppers, and snowflake centers. Watercolor-style washes in blue and purple create dreamy winter-night backgrounds.
Stencils: Lay a cookie stencil flat on the dried cookie and spread stiff royal icing or airbrush color over it with an offset spatula, then lift straight up. Snowflake stencils, plaid patterns, and Christmas messages come out crisp and perfect every time. Stencils are the great equalizer — they make beginners look like pros.
Texture and dimension: Pipe a second layer of details on top of the first for a 3D effect — a raised snowflake on a flooded base, or dimensional fur trim on a Santa hat. Add sanding sugar, nonpareils, or edible glitter to wet details so they stick. Silver dragees make perfect ornament caps and snowflake centers.
Edible images and transfers: For truly intricate scenes — a winter village, Santa’s face — royal icing transfers let you pipe the design on parchment, let it dry completely, and then place it on the cookie. Make extras, because transfers are fragile. They are a wonderful way to get complex art onto cookies without freehand drawing.
The golden rule of layering: Let each layer dry before adding the next. Details piped onto tacky icing bleed and sink. Details piped onto fully dry icing sit crisp and clean. Patience between layers is the difference between muddy and magnificent.
Which Festive Design Ideas Should You Try This Year?
Here is a design menu organized from easiest to most ambitious. Pick three or four per batch — a platter looks best with a mix of simple and detailed cookies.
Beginner-friendly (flooding + wet-on-wet only):
- Classic red and green trees — flood green, add white polka-dot ornaments wet-on-wet, pipe a yellow star on top once dry.
- Peppermint swirls — flood white, pipe red curved lines wet-on-wet, swirl with a toothpick. They look exactly like peppermint candy.
- Snowy mittens — flood red or green, add a white cuff band and white dots wet-on-wet.
- Simple ornaments — flood round cookies in any color, add a contrasting wet-on-wet stripe or dot pattern, pipe a small cap on top when dry.
- Ugly sweater cookies — flood in a bold color, pipe white zigzag “knit” lines and dots once dry. Delightfully easy and always funny.
- Candy cane stripes — flood white, pipe red diagonal stripes wet-on-wet, drag a toothpick lengthwise for a pulled-candy look.
Intermediate (flooding + piped details):
- Lace snowflakes — flood icy blue or white, then pipe intricate white snowflake arms with a #2 tip. Practice the six-arm symmetry on parchment first.
- Santa faces — flood a round cookie in skin tone, pipe a red hat, white beard squiggles, and tiny black dot eyes. The beard does all the work.
- Gingerbread people — flood brown, pipe white squiggles for icing “clothes,” add dot eyes and a smile. Bow ties and dresses make them characters.
- Wreaths — flood green, pipe darker green leaf strokes around the edge, add red dot berries and a red bow at the top.
- Stockings — flood red, pipe a white cuff and heel, add dot and stripe details. Write a name across the cuff for personalized place cards.
- Reindeer faces — flood brown, pipe antlers, add a red dragee nose and dot eyes. Rudolph never fails to charm.
- Christmas lights — flood dark green or navy, pipe a wavy black “wire” line, add colorful dot “bulbs” along it.
Advanced (layering, painting, dimension):
- Painted winter scenes — flood white, let dry fully, then brush-paint a night sky, snowy hills, and a tiny village with thinned gel colors.
- 3D ornament balls — flood, add a second raised layer for shine lines and caps, finish with painted gold luster dust.
- Poinsettias — pipe layered red petals in stiff icing onto a green-flooded base, add yellow dot centers. They look like real flowers.
- Nutcracker soldiers — the most ambitious on this list: flood the uniform, pipe the face, hat, and gold trim in layers, letting each dry. Worth it for the gasps.
- Stained-glass window cookies — use a stencil and airbrush or thinned icing to create glowing cathedral-window panels on a dark-flooded cookie.
Platter strategy: Decorate in this order — flood all base colors first, do wet-on-wet designs while bases are wet, let everything dry overnight, then add piped details the next day. An assembly line beats decorating one cookie start-to-finish, and your colors stay consistent across the whole batch.

What Flavor Variations Go Beyond Vanilla?
Vanilla sugar cookies are the classic canvas, but the cookie underneath the icing can be a flavor star of its own. Just keep the dough a no-spread formula — swap flavors, not structure.
- Chocolate cutouts — replace 1/2 cup of the flour with Dutch-process cocoa powder. The deep brown cookie under white icing looks dramatic, and chocolate plus peppermint icing is a holiday dream.
- Almond — double the almond extract and add 1/2 cup of finely ground almonds to the dough. Elegant, nutty, and wonderful with simple white icing and sanding sugar.
- Lemon — add 2 tablespoons of lemon zest and replace the vanilla with lemon extract. Bright and fresh against rich holiday spreads, beautiful with blue and white winter designs.
- Spiced brown sugar — swap half the granulated sugar for brown sugar and add 1 teaspoon cinnamon, 1/2 teaspoon ginger, and 1/4 teaspoon cloves. Tastes like Christmas smells.
- Gingerbread — use your sturdy gingerbread dough for the whole batch and decorate with white royal icing only. The contrast of dark cookie and white icing is timeless, and the spice means the cookies taste as festive as they look.
- Peppermint chocolate chip — not a cutout, but worth mentioning: bake thick peppermint chocolate cookies and dip half in white chocolate with crushed candy cane. They are the easy, no-piping crowd-pleaser of the platter.
A note on strong flavors: Bold doughs like gingerbread and chocolate pair best with simple icing — mostly white, maybe one accent color. Let the cookie flavor shine and keep the decoration clean. Save your most colorful designs for mild vanilla and almond bases, where the icing is the star.
How Do You Make Them Ahead and Store Them?
Decorated Christmas cookies are a meal-prep dream — they actually NEED advance time, because royal icing takes hours to dry. A smart timeline turns a stressful December weekend into a relaxed project.
The ideal timeline:
- Up to 3 months ahead: Bake undecorated cookies, cool completely, and freeze in airtight containers with parchment between layers. Thaw at room temperature (still sealed, so condensation forms on the container, not the cookies) before decorating.
- 2 to 3 days before serving: Decorate. Flood and wet-on-wet designs on day one, piped details on day two after the base is fully dry.
- Day of serving: Arrange on platters. Add any fresh garnishes like sugared cranberries around the cookies, not on them.
Drying, the non-negotiable step: Flooded cookies need 6 to 8 hours minimum, and 24 hours is safer before stacking or packaging. Test by touching the icing in an inconspicuous spot — it should feel completely hard and smooth, not cool or tacky. Thick or humid-climate icing can take a full 48 hours.
Storing decorated cookies:
- Store fully dried cookies in a single layer in an airtight container at room temperature for up to 2 weeks. They stay fresh and the icing stays crisp.
- Place parchment or wax paper between layers if you must stack, and never stack before the icing is rock hard.
- Keep them away from humidity, sunlight, and strong odors. Royal icing absorbs smells — do not store them next to the onion drawer.
- Do not refrigerate decorated cookies. The fridge’s moisture makes royal icing weep, spot, and bleed colors.
Freezing decorated cookies: Yes, you can. Freeze fully dried cookies in a single layer on a baking sheet until solid, then transfer to an airtight container with parchment between layers. Thaw in the sealed container at room temperature for several hours — opening it early causes condensation that spots the icing. They keep 2 to 3 months frozen and taste freshly baked.
Food safety basics: Royal icing made with meringue powder is shelf-stable once dry. If you used real egg whites, keep the cookies refrigerated and eat within a week — or better, switch to meringue powder for gift cookies.
How Do You Package Decorated Cookies for Gifting?
A beautifully decorated cookie in a flimsy bag is a tragedy. Packaging protects your work and turns cookies into gifts people remember.
For hand delivery:
- Cellophane bags with ribbon are the classic for a reason. Slip one or two cookies into a food-safe cellophane bag, tie with curling ribbon, and add a gift tag. They show off the design and cost pennies each.
- Bakery boxes fit a dozen beautifully. Line the box with tissue paper, arrange cookies in a single layer (or use a box with a window so the designs show through), and tie the whole box with ribbon.
- Mason jars work for small, sturdy shapes like stars and trees. Layer with parchment rounds between cookies and tie ribbon around the lid.
For shipping:
- Heat-seal bags are the gold standard. A handheld heat sealer closes each cookie in its own airtight bag — they arrive fresh and unbroken. This is what professional cookie businesses use, and a basic sealer is inexpensive.
- Wrap each cookie individually in bubble wrap or tissue, then pack snugly in a sturdy box with crinkle paper so nothing shifts. Cookies that cannot move cannot break.
- Ship early in the week (Monday or Tuesday) so cookies never sit in a warehouse over the weekend. Choose 2 to 3 day shipping — decorated cookies stay fresh about 2 weeks, and you want most of that life left when they arrive.
- Include a note with the “best by” date and storage instructions. Recipients appreciate knowing the cookies keep two weeks at room temperature.
What NOT to do: Never package cookies before the icing is completely hard — even slightly tacky icing sticks to bags and smears. Never stack different designs face-to-face without parchment. And never gift cookies in containers that held strong-smelling foods; the icing will pick up the ghost of last month’s leftovers.

What Pro Tips Save the Most Time?
These are the hard-won lessons from years of December cookie marathons — the little things that separate a smooth decorating session from a stressful one.
- Make all your icing first. Color every shade you need before you pipe a single cookie. Hunting for the red bag mid-session while white icing crusts is how mistakes happen.
- Use squeeze bottles for flooding. They are faster than piping bags, easier for kids, and give you better control over how much icing flows. Save piping bags for detail work.
- Work in an assembly line. Flood every cookie that needs a white base. Then every cookie that needs green. Then switch to details. Batching beats one-at-a-time by hours.
- Keep a damp towel and a dry towel at your station. Damp for wiping mistakes immediately, dry for drying your hands. Sticky hands smudge everything they touch.
- Outline in the flood color. Instead of outlining in white and flooding in color, tint a little medium-consistency icing to match each flood color. The outline disappears into the flood and your edges look seamless.
- Embrace “good enough” drying. You do not need a dehydrator or special equipment. A small fan blowing gently across the cookies on the counter works beautifully and costs nothing.
- Photograph in natural light. If you want pictures worth sharing, shoot finished cookies near a window in the morning. Overhead kitchen lighting makes even gorgeous cookies look dull.
- Label your icing bags. A piece of masking tape with the color and consistency (“red flood,” “white stiff”) saves you from grabbing the wrong bag mid-design.
- Save your scraps. Leftover flood icing keeps two weeks refrigerated. Leftover dough scraps bake into excellent icebox cookies for the family snack jar.
What Are the Most Common Decorating Mistakes?
Every cookie decorator has made all of these. Learn them here instead of the hard way.
Icing too thick or too thin. This is mistake number one by a mile. Thick icing will not level, leaving lumps and peaks. Thin icing runs off the cookie and pools. The fix is always the 10-second spoon test before you start — and adjusting in tiny increments. A teaspoon of water or a tablespoon of powdered sugar is often all it takes.
Decorating on warm cookies. Even slightly warm cookies melt royal icing. The icing slides, the colors bleed, and the surface turns greasy. Cookies must be completely, boringly, room-temperature cool. When in doubt, wait another hour.
Skipping the outline. Flooding without an outline dam is like pouring pancake batter without a pan. The icing runs to the cookie’s edge and drips over. Always outline first, even for simple shapes.
Adding details to wet icing. Piping details onto a tacky base makes them sink and bleed. Details go on fully dry icing only. This is the patience tax, and there is no way around it — plan your timeline so drying happens overnight.
Overmixing colors. Adding gel color drop by drop past your target shade gives you dark, bitter icing. Mix one shade lighter than you want and let it deepen as it dries. For deep reds and blacks, make the icing the night before — the color develops overnight and you use far less gel.
Air bubbles everywhere. Bubbles come from vigorous mixing and high piping. Mix icing on medium-low, let it rest 10 minutes before bagging, and always pop bubbles with a toothpick and a gentle cookie shake after flooding.
Craters and divots. Those little sunken spots in dried flood icing are collapsed air bubbles or spots where the icing was too thin in one area. Pop every bubble you see, flood generously, and keep the cookie perfectly level while drying.
Cracking icing. Cracks happen when icing dries too fast (a hot fan blasting directly on it) or when the cookie underneath shifts. Dry with gentle, indirect airflow at room temperature, and do not move cookies once the icing starts setting.
Grease spots. Butter bleeding through the cookie surface creates yellowish spots in white icing. It usually means the cookies were slightly underbaked or very buttery. Bake cutouts until the edges are set and just golden, and let them cool fully on the sheet before moving.
Christmas Cookies Decorated FAQs
How far in advance can I make decorated Christmas cookies?
Decorated cookies stay fresh for up to 2 weeks at room temperature in an airtight container, so decorating 1 to 2 weeks before Christmas is perfect. For even earlier prep, freeze undecorated baked cookies for up to 3 months, thaw, and decorate closer to the holiday. Fully decorated cookies can also be frozen for 2 to 3 months — just thaw them sealed so condensation does not spot the icing.
Why is my royal icing not drying hard?
Three usual causes: the icing was too thin, the humidity is too high, or it has not had enough time. Flood icing needs 6 to 8 hours minimum and often a full 24. In humid climates, run a dehumidifier or a gentle fan nearby. And check your recipe — icing with too much water or added fat (butter, milk) never sets properly. Royal icing should contain only powdered sugar, meringue powder or egg whites, water, and flavoring.
Can I use buttercream instead of royal icing for decorated Christmas cookies?
You can for simple designs, but buttercream never hardens, so cookies cannot be stacked, shipped, or stored without smudging. Buttercream is delicious and great for cookies eaten the same day. For anything giftable, shippable, or intricate, royal icing is the right choice — it dries rock hard and protects the design.
How do I get really dark colors like red and black without bitter icing?
Make dark colors the night before. Gel colors deepen dramatically as they rest, so you need far less gel than you think. Start with a base close to your target (pink for red, gray for black), add gel sparingly, then let the icing sit covered overnight. For black, a chocolate royal icing base (with cocoa powder) gives depth without a bucket of black gel.
My cookies spread in the oven and lost their shape. What went wrong?
Warm dough, too much leavener, or overcreamed butter. Chill your cut shapes for 10 minutes before baking, make sure your recipe has no baking powder or soda, and cream the butter and sugar just until combined and pale — not whipped. Also check your oven temperature with a thermometer; an oven running cool lets dough melt before it sets.
Can kids help decorate Christmas cookies?
Absolutely — it is one of the best parts. Set kids up with squeeze bottles of flood icing (easier than piping bags), pre-flooded cookies for them to add sprinkles to, and wet-on-wet designs where precision does not matter. Skip the fine-tip piping for little hands and let them go wild with dots, sprinkles, and marbling. Their cookies will be gloriously imperfect and they will be so proud.
How do I fix a mistake in wet royal icing?
Act fast. While the icing is wet, scrape the mistake off gently with a toothpick or the edge of a damp paper towel, smooth the area, and re-flood or re-pipe. If the icing has already crusted, let it dry completely, then carefully scrape the dried spot off with a sharp knife and touch up the area. Small flaws can also be hidden — a strategically placed sprinkle or piped dot covers a multitude of sins.
Do decorated Christmas cookies need to be refrigerated?
No — and they should not be. The refrigerator’s moisture makes royal icing weep, spot, and bleed. Fully dried royal icing is shelf-stable, so store decorated cookies in an airtight container at room temperature for up to 2 weeks. The only exception is icing made with raw egg whites instead of meringue powder — those cookies should be refrigerated and eaten within a week.
Final Thoughts
Decorated Christmas cookies look like they require talent, but they really require a system: a no-spread dough, icing at the right consistency, and techniques done in the right order. Flood first, decorate wet-on-wet while you can, let everything dry overnight, then add the details that make people gasp.
Start this year with three or four designs from the beginner list. Next year, add the snowflakes and the Santas. The year after that, someone will ask you to teach them — and you will remember when polka dots felt ambitious.
Bake the cookies. Mix the icing. Put on some holiday music and make a mess worth framing. That platter of little edible art is going to be the thing everyone remembers about your Christmas.