What Makes This the Best Dutch Apple Pie Recipe?
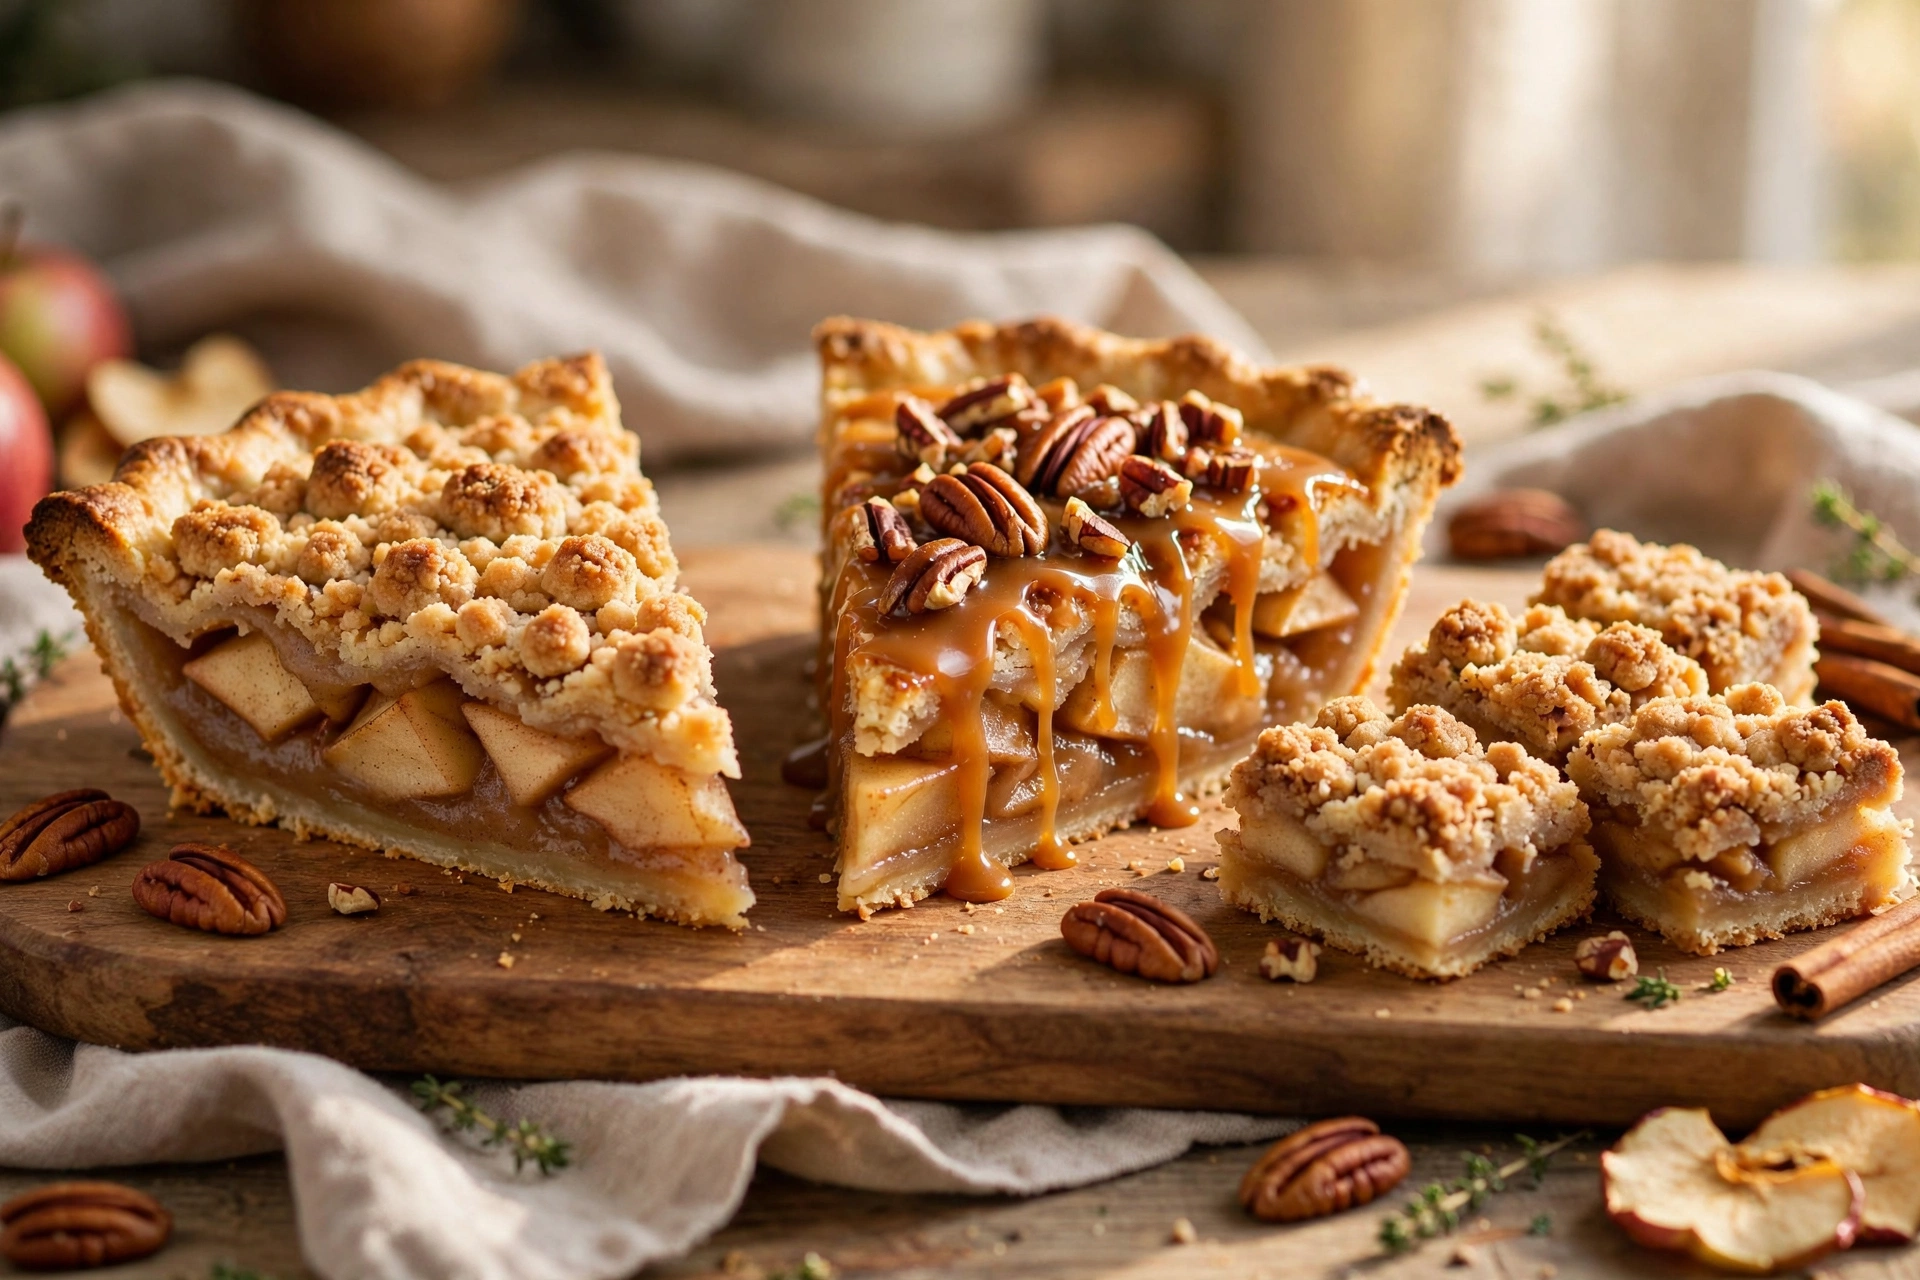
Forget everything you think you know about fussy apple pie. Dutch apple pie skips the lattice top entirely and replaces it with something better: a thick, buttery, golden-brown crumb topping that bakes up crisp and caramelized over a mountain of spiced apples. One bite gives you tender cinnamon-kissed fruit, a crunchy streusel cap, and a flaky bottom crust — three textures in perfect harmony.
Among all the Dutch apple pie recipes out there, this one wins because it solves the two problems that ruin most apple pies. First, the filling actually sets. No watery slice collapsing on the plate, no juice flooding the crust. A quick pre-cooking step with the apples concentrates their flavor and tames their liquid before the pie ever meets the oven. Second, the crumb topping stays crisp. The right ratio of butter to flour to sugar, plus a chill before baking, keeps the streusel pebbly and crunchy instead of melting into a greasy sheet.
This is also one of the easiest impressive pies you will ever make. There is no lattice to weave, no top crust to crimp, no venting to worry about. You pile the filling into a single crust, shower it with crumbs, and bake. The rustic look is the whole point — it is supposed to look generous and homemade.
Whether you are baking for Thanksgiving, a fall gathering, or just because the apples looked too good at the market, this guide covers everything: the ingredients, the equipment, detailed step-by-step instructions, pro tips, the mistakes that cause soggy results, five delicious variations, storage and reheating advice, serving ideas, and answers to the most common questions.
What Is Dutch Apple Pie and Why Is It So Popular?
Dutch apple pie — sometimes called apple crumb pie — is the beloved cousin of the classic American double-crust apple pie. Instead of a pastry top, it wears a streusel crumb topping made from butter, flour, sugar, and warm spices. The pie likely traces its roots to the Netherlands, where fruit pies with crumb toppings have been baked for centuries, and it found a second home in American kitchens, especially in Pennsylvania Dutch country.
Its popularity comes down to pure eating pleasure. The crumb topping does something a pastry top cannot: it delivers a buttery crunch that contrasts with the soft, jammy apples underneath. Every forkful has texture — the crisp streusel, the tender fruit, the flaky crust. It is also more forgiving than a lattice pie. There is no top crust to shrink, tear, or underbake. Beginners get bakery-worthy results on their first try.
Dutch apple pie is also endlessly adaptable. The filling welcomes different apple varieties, extra spices, nuts, caramel, and even other fruits. The topping can go classic, oaty, nutty, or spiced. And because the topping hides the filling, the pie always looks gorgeous with zero decorating skill. Serve it warm with vanilla ice cream and it becomes the dessert people talk about long after the meal.
What Ingredients Do You Need for Dutch Apple Pie?
This recipe breaks into three parts — the crust, the apple filling, and the crumb topping — and every ingredient earns its place.
For the crust:
- 1 unbaked 9-inch pie crust (homemade or store-bought)
For the spiced apple filling:
- 6 to 7 medium apples (about 2 1/2 pounds), peeled, cored, and sliced 1/4 inch thick
- 3/4 cup granulated sugar
- 1/4 cup packed light brown sugar
- 2 tablespoons all-purpose flour
- 1 tablespoon cornstarch
- 1 1/2 teaspoons ground cinnamon
- 1/4 teaspoon ground nutmeg
- 1/4 teaspoon salt
- 1 tablespoon fresh lemon juice
- 1 teaspoon pure vanilla extract
- 2 tablespoons unsalted butter
For the buttery crumb topping:
- 1 cup all-purpose flour
- 1/2 cup packed light brown sugar
- 1/2 cup granulated sugar
- 1 teaspoon ground cinnamon
- 1/4 teaspoon salt
- 1/2 cup (1 stick) unsalted butter, cold and cut into small cubes
- 1/2 cup old-fashioned rolled oats (optional, for extra crunch)
Choosing the right apples matters more than any other decision in this recipe. The best Dutch apple pie recipes use a mix of firm-tart and firm-sweet apples so the filling tastes complex and holds its shape. Excellent choices include Granny Smith, Honeycrisp, Braeburn, Jonagold, Pink Lady, and Cortland. Avoid Red Delicious and McIntosh — they turn to mush. A 50/50 blend of Granny Smith and Honeycrisp is a foolproof combination: tart, sweet, and sturdy.
The filling ingredients each do a job. Both sugars sweeten and help the juices thicken into a glossy sauce. Flour plus cornstarch is the thickening team — using both gives you a filling that slices cleanly without tasting pasty. Cinnamon and nutmeg bring the warm fall spice. Lemon juice brightens the apples and keeps them from browning. Vanilla rounds everything out. The butter, melted into the pre-cooked filling, adds richness and a silky mouthfeel.
For the crumb topping, cold butter is non-negotiable. Cold cubes rubbed into the flour and sugars create distinct pebbles that bake up crisp. Brown sugar adds moisture and a caramel note; granulated sugar adds crunch. The oats are optional but highly recommended — they give the topping a heartier, more textured bite.

What Equipment Do You Need to Make Dutch Apple Pie?
Dutch apple pie asks for nothing exotic. Gather these tools before you start:
- 9-inch pie plate: Deep-dish is ideal because this pie piles high. Glass or ceramic lets you check the bottom crust’s browning.
- Large skillet or Dutch oven: For pre-cooking the apple filling on the stovetop — the secret to a non-watery pie.
- Large mixing bowl: For tossing the apples and for making the crumb topping.
- Pastry blender, fork, or your fingertips: For cutting the cold butter into the crumb topping. Your fingers work fine — just work quickly so the butter stays cold.
- Apple peeler, corer, and sharp knife: Or a simple paring knife and vegetable peeler. Uniform 1/4-inch slices cook evenly.
- Measuring cups and spoons: Accurate sugar and thickener measurements keep the filling balanced.
- Rimmed baking sheet: Set the pie on it to catch drips — fruit pies bubble over, and a lined sheet saves your oven.
- Pie shield or aluminum foil: The crumb topping browns faster than the filling finishes, so you will shield it partway through.
- Wire cooling rack: The pie must cool for hours so the filling sets into clean slices.
- Oven thermometer (optional): Helpful if your oven runs hot or cold, since even baking matters here.
How Do You Make Dutch Apple Pie Step by Step?
This method has one extra step compared to most Dutch apple pie recipes — pre-cooking the filling — and it is the reason your pie will slice cleanly instead of swimming in juice. Total time is about 30 minutes of hands-on work, 55 to 65 minutes of baking, and 4 hours of cooling.
- Prepare the crust. Fit your pie crust into a 9-inch deep-dish pie plate, crimp the edges decoratively, and refrigerate while you work. A cold crust holds its shape and bakes up flakier. Preheat the oven to 375°F (190°C) with a rack in the lower third. Set the pie plate on a rimmed baking sheet lined with foil or parchment.
- Make the crumb topping first. In a large bowl, whisk together the flour, brown sugar, granulated sugar, cinnamon, salt, and oats (if using). Add the cold butter cubes and cut them in with a pastry blender, two forks, or your fingertips until the mixture forms pea-sized crumbs with some larger pebbles. Do not overwork it — distinct chunks bake up crispier. Refrigerate the topping while you make the filling; cold crumbs hold their shape in the oven.
- Prep the apples. Peel, core, and slice the apples about 1/4 inch thick. Uniform slices are the goal — thick chunks stay crunchy while thin ones dissolve, so consistency matters. Toss the slices immediately with the lemon juice to prevent browning.
- Pre-cook the filling. Melt the 2 tablespoons of butter in a large skillet or Dutch oven over medium heat. Add the apple slices, both sugars, flour, cornstarch, cinnamon, nutmeg, salt, and vanilla. Stir to coat everything evenly. Cook, stirring gently every minute or so, for 8 to 10 minutes, until the apples soften slightly and the juices thicken into a glossy sauce. The apples should still hold their shape — you are par-cooking, not making applesauce. This step drives off excess moisture so the pie never turns watery.
- Fill the crust. Spoon the warm filling into the chilled pie crust, mounding it slightly in the center. Pour in all the thickened juices too — that glossy sauce is pure flavor. The filling should heap generously; it settles as it bakes.
- Add the crumb topping. Take the chilled crumb mixture from the refrigerator and sprinkle it evenly over the filling, covering it completely right out to the edges. Pile it on generously — a thick layer bakes up into the crunchy cap that makes Dutch apple pie famous. Gently press the crumbs so they adhere.
- Bake. Slide the baking sheet into the oven and bake at 375°F (190°C) for 55 to 65 minutes. After 25 to 30 minutes, check the topping — if it is browning too fast, tent the pie loosely with aluminum foil. The pie is done when the topping is deep golden brown, the filling bubbles thickly through any cracks (look for slow, lava-like bubbles, not thin watery ones), and a knife slipped into the center meets tender apples with no crunch.
- Cool completely — do not skip this. Transfer the pie to a wire rack and cool for at least 4 hours. This is the hardest step and the most important. The filling is molten when it leaves the oven, and it needs those hours to thicken into clean, sliceable layers. Cutting early gives you apple soup. A fully cooled pie slices like a dream.
- Serve. Cut with a sharp serrated knife for the cleanest cuts through the crumb topping. Serve at room temperature or warm individual slices. Add vanilla ice cream, and listen for the applause.

What Are the Best Pro Tips for Dutch Apple Pie?
These are the hard-won habits that turn a good Dutch apple pie into a legendary one.
Pre-cook the filling. Cooking the apples for 8 to 10 minutes before baking drives off excess juice and jump-starts thickening. It is the single biggest difference between a pie that slices cleanly and one that floods the plate. It also deepens the apple flavor and lets you taste and adjust the sweetness before the pie goes in the oven.
Mix your apple varieties. One-note filling tastes flat. Combining a tart apple like Granny Smith with a sweet-crisp one like Honeycrisp or Braeburn gives you layers of flavor and a filling where some slices stay firm and others melt slightly. That contrast is what makes each bite interesting.
Keep the crumb topping cold. Make the streusel first and refrigerate it while you prepare the filling. Cold butter cubes create distinct crumbs that bake up pebbly and crisp. Warm, overworked streusel melts into a flat, greasy layer. If your kitchen is warm, chill the topped pie for 15 minutes before baking too.
Use a deep-dish pie plate. Dutch apple pie piles high — the generous filling and thick crumb layer need room. A standard shallow plate overflows; a deep-dish plate contains everything beautifully and gives you taller, more impressive slices.
Bake on the lower rack with a baking sheet. The lower rack drives heat into the bottom crust so it bakes through instead of turning soggy under the juicy filling. The rimmed baking sheet catches the inevitable bubbling drips and makes the heavy pie easy to move.
Look for slow bubbles. The visual cue for doneness is thick, slow, lava-like bubbling in the center — not just at the edges. Thin, watery bubbling means the thickeners have not fully activated. Give it more time. A pie that bubbles properly in the oven sets properly on the counter.
Cool for a full four hours. Fruit pie filling thickens as it cools — this is food science, not patience theater. The starches need time to set. Four hours at room temperature gives you picture-perfect slices. If you must serve sooner, expect a looser, spoonable pie (still delicious, just not sliceable).
Taste your apples first. Apples vary wildly in sweetness and tartness from bag to bag. Taste a slice before you mix the filling and adjust the sugar by a tablespoon or two in either direction. This tiny habit separates consistent bakers from lucky ones.
What Are the Most Common Dutch Apple Pie Mistakes?
Avoid these six traps and your pie will come out beautifully every time.
Mistake 1: Skipping the pre-cook. Raw apples release a flood of juice in the oven. Without pre-cooking, that liquid overwhelms the thickeners and you get a watery filling and a soggy bottom crust. Eight to ten minutes in a skillet solves the problem completely and concentrates the apple flavor.
Mistake 2: Using the wrong apples. Soft apples like Red Delicious and McIntosh collapse into mush, leaving you with apple filling that has no texture. Stick with firm varieties — Granny Smith, Honeycrisp, Braeburn, Jonagold, Pink Lady, or Cortland — and slice them uniformly so they cook evenly.
Mistake 3: Underbaking the pie. A pale, barely-bubbled pie has raw-tasting apples and unset filling. The thickeners (flour and cornstarch) only reach full power at a full boil, which is why you need to see thick bubbling in the center. Tent with foil if the topping browns early, but do not pull the pie before the filling bubbles properly.
Mistake 4: Slicing too soon. Cutting into a hot fruit pie is the fastest way to ruin hours of work. The filling looks set in the oven but it is actually molten; it firms up as it cools. Give the pie at least 4 hours on a wire rack. Warm slices are for serving individually reheated later — never for the first cut.
Mistake 5: Melting the butter in the topping. The crumb topping needs cold butter cut into the dry ingredients. Melted butter makes a paste, not crumbs, and it bakes up dense and greasy instead of crisp and pebbly. If your topping looks smooth rather than crumbly, your butter was too warm — chill it and try again.
Mistake 6: Forgetting the pie shield or foil tent. The crumb topping is exposed to direct heat for nearly an hour, and its sugars caramelize fast. Without a foil tent at the halfway mark, the top burns while the filling finishes. Check at 25 to 30 minutes and tent loosely — the pie underneath keeps baking perfectly while the topping stays golden, not black.
Variation 1: Caramel Dutch Apple Pie
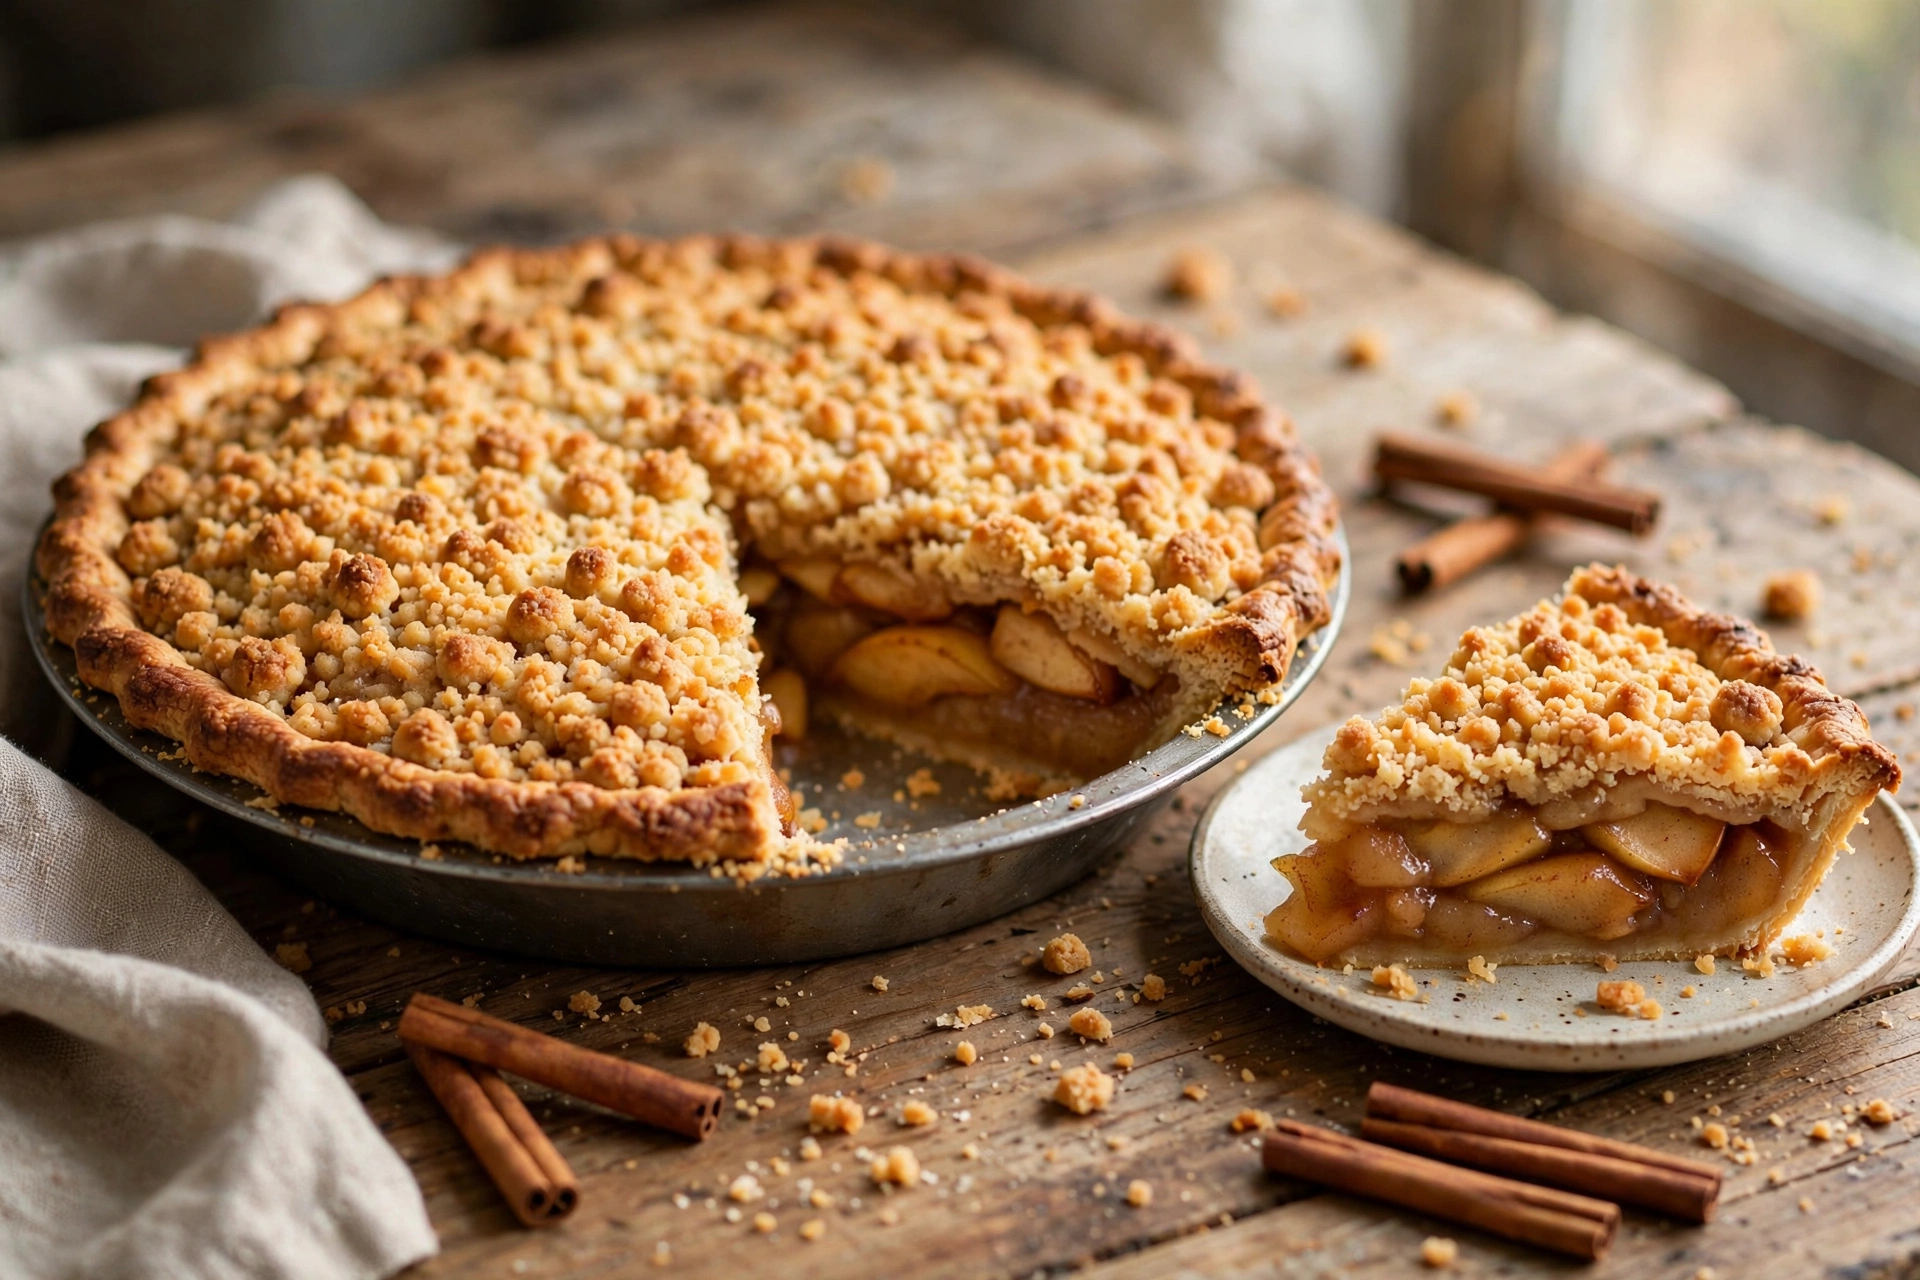
Drizzle 1/3 cup of thick caramel sauce over the pre-cooked apples before adding the crumb topping, then drizzle another 2 tablespoons over the baked, cooled pie. Add 1/2 cup of chopped toasted pecans to the crumb topping for crunch. The caramel melts into the filling and creates pockets of buttery sweetness. Serve with vanilla ice cream and watch it vanish first at any gathering.
Variation 2: Oatmeal Cookie Dutch Apple Pie
Double down on the oats: use 1 cup of old-fashioned rolled oats in the topping, add 1/2 teaspoon of cinnamon extra, and stir 1/3 cup of chopped walnuts into the crumbs. The result tastes like the best oatmeal cookie crumbled over spiced apples — hearty, chewy-crisp, and deeply comforting. This version is a standout for fall bake sales and lunchbox-friendly next-day slices.
Variation 3: Cranberry Apple Dutch Pie
Replace 1 1/2 cups of the sliced apples with 1 1/2 cups of fresh cranberries. The cranberries burst during pre-cooking and turn the filling a gorgeous ruby color with a tart sparkle that cuts the sweetness. Increase the granulated sugar in the filling to 1 cup to balance the extra tartness. This is the variation to bake for Thanksgiving — it looks festive and tastes like the holidays.
Variation 4: Dutch Apple Pie Bars
Press the crumb topping mixture (made with 3/4 cup butter instead of 1/2 cup) into a parchment-lined 9×13-inch pan as a shortbread base, reserving 1 1/2 cups of crumbs for the top. Bake the base at 375°F for 15 minutes, spread the pre-cooked apple filling over it, sprinkle with the reserved crumbs, and bake 30 to 35 minutes more. Cool completely and cut into bars. All the flavor of Dutch apple pie in portable, party-friendly form.
Variation 5: Spiced Chai Dutch Apple Pie
Add 1/2 teaspoon of ground cardamom, 1/4 teaspoon of ground ginger, and a pinch of ground cloves to the filling along with the cinnamon, and steep 2 chai tea bags in the melted butter for 10 minutes before making the filling (discard the bags). The warm chai spices make the pie taste complex and aromatic — familiar, yet impossible to place. Top with lightly sweetened whipped cream instead of ice cream for a coffeehouse-worthy dessert.
How Do You Store Dutch Apple Pie?
Dutch apple pie keeps well, and the crumb topping even stays reasonably crisp with proper storage.
Room temperature: A baked Dutch apple pie can sit at room temperature, loosely covered, for up to 2 days. Cover it with foil or a clean kitchen towel once fully cool — not airtight plastic, which traps moisture and softens the crumb topping. Keep it away from direct heat and sunlight.
Refrigerator: For longer storage, refrigerate the pie for up to 5 days. Cover it loosely with foil. The cold firms the filling nicely, though the topping loses a little crunch — a quick warm-up in the oven restores it. Let refrigerated pie sit at room temperature for 30 minutes before serving, or reheat slices.
Freezer: Dutch apple pie freezes beautifully for up to 3 months. Cool completely, then wrap the whole pie tightly in plastic wrap followed by aluminum foil, or freeze individual slices wrapped separately for grab-and-go dessert. Thaw overnight in the refrigerator. You can also freeze the unbaked assembled pie (without the final bake): wrap well, freeze up to 3 months, and bake straight from frozen at 375°F, adding 15 to 20 minutes to the bake time.
Reheating: The oven is the only way to reheat Dutch apple pie properly. Warm a whole room-temperature pie at 325°F for 15 to 20 minutes, or heat individual slices at 350°F for 8 to 10 minutes. The topping re-crisps and the filling turns jammy again. Avoid the microwave — it steams the topping soggy and makes the crust limp. For an extra treat, warm the slice and add cold vanilla ice cream on top.
What Should You Serve With Dutch Apple Pie?
Dutch apple pie is a team player — the right pairing makes it unforgettable.
Vanilla ice cream is the undisputed champion. A cold, creamy scoop melting over a warm slice of Dutch apple pie is one of dessert’s greatest combinations. The contrast of hot and cold, crisp and creamy, never gets old. Buy the best vanilla ice cream you can find — it matters here.
Salted caramel sauce drizzled over each slice adds a buttery, salty-sweet dimension that amplifies the brown sugar in the crumb topping. Warm the sauce slightly so it flows. A sprinkle of flaky sea salt on top takes it even further.
Sharp cheddar cheese might sound strange if you did not grow up with it, but a thin slice of sharp cheddar alongside warm apple pie is a classic Northeastern tradition. The salty, tangy cheese against the sweet spiced apples is genuinely delicious — try it once before you judge.
Lightly sweetened whipped cream offers a lighter alternative to ice cream. Whip cold heavy cream with a tablespoon of powdered sugar and a splash of vanilla to soft peaks. It adds richness without the heaviness, and it looks beautiful dolloped on each slice.
Hot coffee, apple cider, or chai complete the experience. A strong cup of coffee cuts through the buttery richness. Hot apple cider doubles down on the fall flavors. Chai tea echoes the pie’s warm spices. For a holiday table, offer all three and let guests choose.

Dutch Apple Pie FAQs
What is the difference between Dutch apple pie and regular apple pie?
The difference is the top. Regular (American-style) apple pie has a second pastry crust on top — either full or latticed. Dutch apple pie replaces that pastry top with a streusel crumb topping made from butter, flour, sugar, and spices. The crumb topping bakes up crisp and buttery, giving Dutch apple pie its signature crunchy cap over the soft spiced apples.
Why is my Dutch apple pie watery?
A watery pie almost always comes from skipping the pre-cook step or underbaking. Apples release a lot of juice, and if that liquid never cooks down or never reaches a full boil in the oven, the thickeners cannot do their job. Pre-cook the filling for 8 to 10 minutes, bake until the center bubbles thickly and slowly, and cool the pie for a full 4 hours so the starches set.
What are the best apples for Dutch apple pie?
Use firm apples that hold their shape when baked. The best choices are Granny Smith, Honeycrisp, Braeburn, Jonagold, Pink Lady, and Cortland. A mix of tart and sweet varieties — like half Granny Smith and half Honeycrisp — gives the most interesting flavor. Avoid soft apples like Red Delicious and McIntosh, which turn mushy.
Can I make Dutch apple pie ahead of time?
Yes. Bake the pie up to 2 days ahead and store it at room temperature, loosely covered, or refrigerate it for up to 5 days. The flavor actually improves as it rests. You can also assemble the unbaked pie, freeze it for up to 3 months, and bake it straight from frozen (add 15 to 20 minutes to the bake time). Reheat in the oven to re-crisp the topping before serving.
How do I keep the crumb topping from burning?
Tent the pie loosely with aluminum foil once the topping reaches a deep golden brown — usually around the 25 to 30 minute mark. The foil deflects direct heat while the filling underneath keeps baking. Also make sure your oven rack is in the lower third, not at the very top, so the topping is not blasted by the upper heating element.
Can I use a store-bought crust for Dutch apple pie?
Absolutely. A quality refrigerated or frozen crust works well and saves significant time. Since Dutch apple pie has only a bottom crust, a store-bought one performs just fine under the hearty filling and topping. If you want the flakiest result and have the time, homemade all-butter crust is worth it — but the pie will be delicious either way.
Why did my crumb topping melt instead of staying crumbly?
The butter was too warm or the mixture was overworked. The topping needs cold butter cut into the dry ingredients just until pea-sized crumbs form. If the butter softens and blends in smoothly, you get a paste that bakes into a dense layer instead of crisp pebbles. Make the topping first, refrigerate it while you prep the filling, and handle it as little as possible.
Should Dutch apple pie be served warm or cold?
Dutch apple pie is wonderful both ways, but warm is the crowd favorite — especially with vanilla ice cream. Bake the pie fully, cool it for 4 hours so the filling sets, then reheat the whole pie or individual slices in the oven before serving. Room-temperature pie is also delicious and slices the most cleanly, making it the best choice for a buffet or potluck.
Can I freeze Dutch apple pie?
Yes, Dutch apple pie freezes well for up to 3 months. Cool the baked pie completely, wrap it tightly in plastic wrap and foil, and freeze. Thaw overnight in the refrigerator, then reheat in a 325°F oven for 15 to 20 minutes to re-crisp the topping. You can also freeze the assembled unbaked pie and bake it directly from frozen.
How do I prevent a soggy bottom crust?
Four defenses work together: bake on the oven’s lower rack so the bottom gets strong heat, set the pie on a preheated baking sheet, pre-cook the filling so less juice hits the raw crust, and make sure the pie bakes long enough for the bottom to fully cook — the filling should bubble thickly in the center. A glass pie plate also helps because you can see the bottom browning.
Final Thoughts
Dutch apple pie is the rare dessert that is easier than it looks and better than you expect. No lattice to weave, no top crust to fuss over — just a mountain of cinnamon-spiced apples under a thick blanket of buttery crumbs, baked until golden and bubbling. It is humble, generous, and completely irresistible.
These Dutch apple pie recipes give you the full playbook: the pre-cooked filling that guarantees clean slices, the cold crumb topping that stays crisp, the pro tips that prevent soggy bottoms and burnt tops, and five variations to keep things interesting all season long. Master the base recipe once, and you will bake it on repeat every fall.
So grab a bag of Honeycrisps and Granny Smiths, cut that butter into the streusel, and fill your kitchen with the smell of cinnamon and caramelized sugar. Then serve it warm with vanilla ice cream — and take a bow. This is the pie people remember.
If you’re rounding out a Thanksgiving table, pair this pie with soft Salted Honey Butter Parker House Rolls for the bread basket and creamy Brown Butter Garlic Herb Mashed Potatoes alongside the main dish — a holiday spread like that never disappoints.