How to Build the Best Hot Cocoa Station (DIY Hot Cocoa Bar Guide)
What Makes This the Best Hot Cocoa Station?
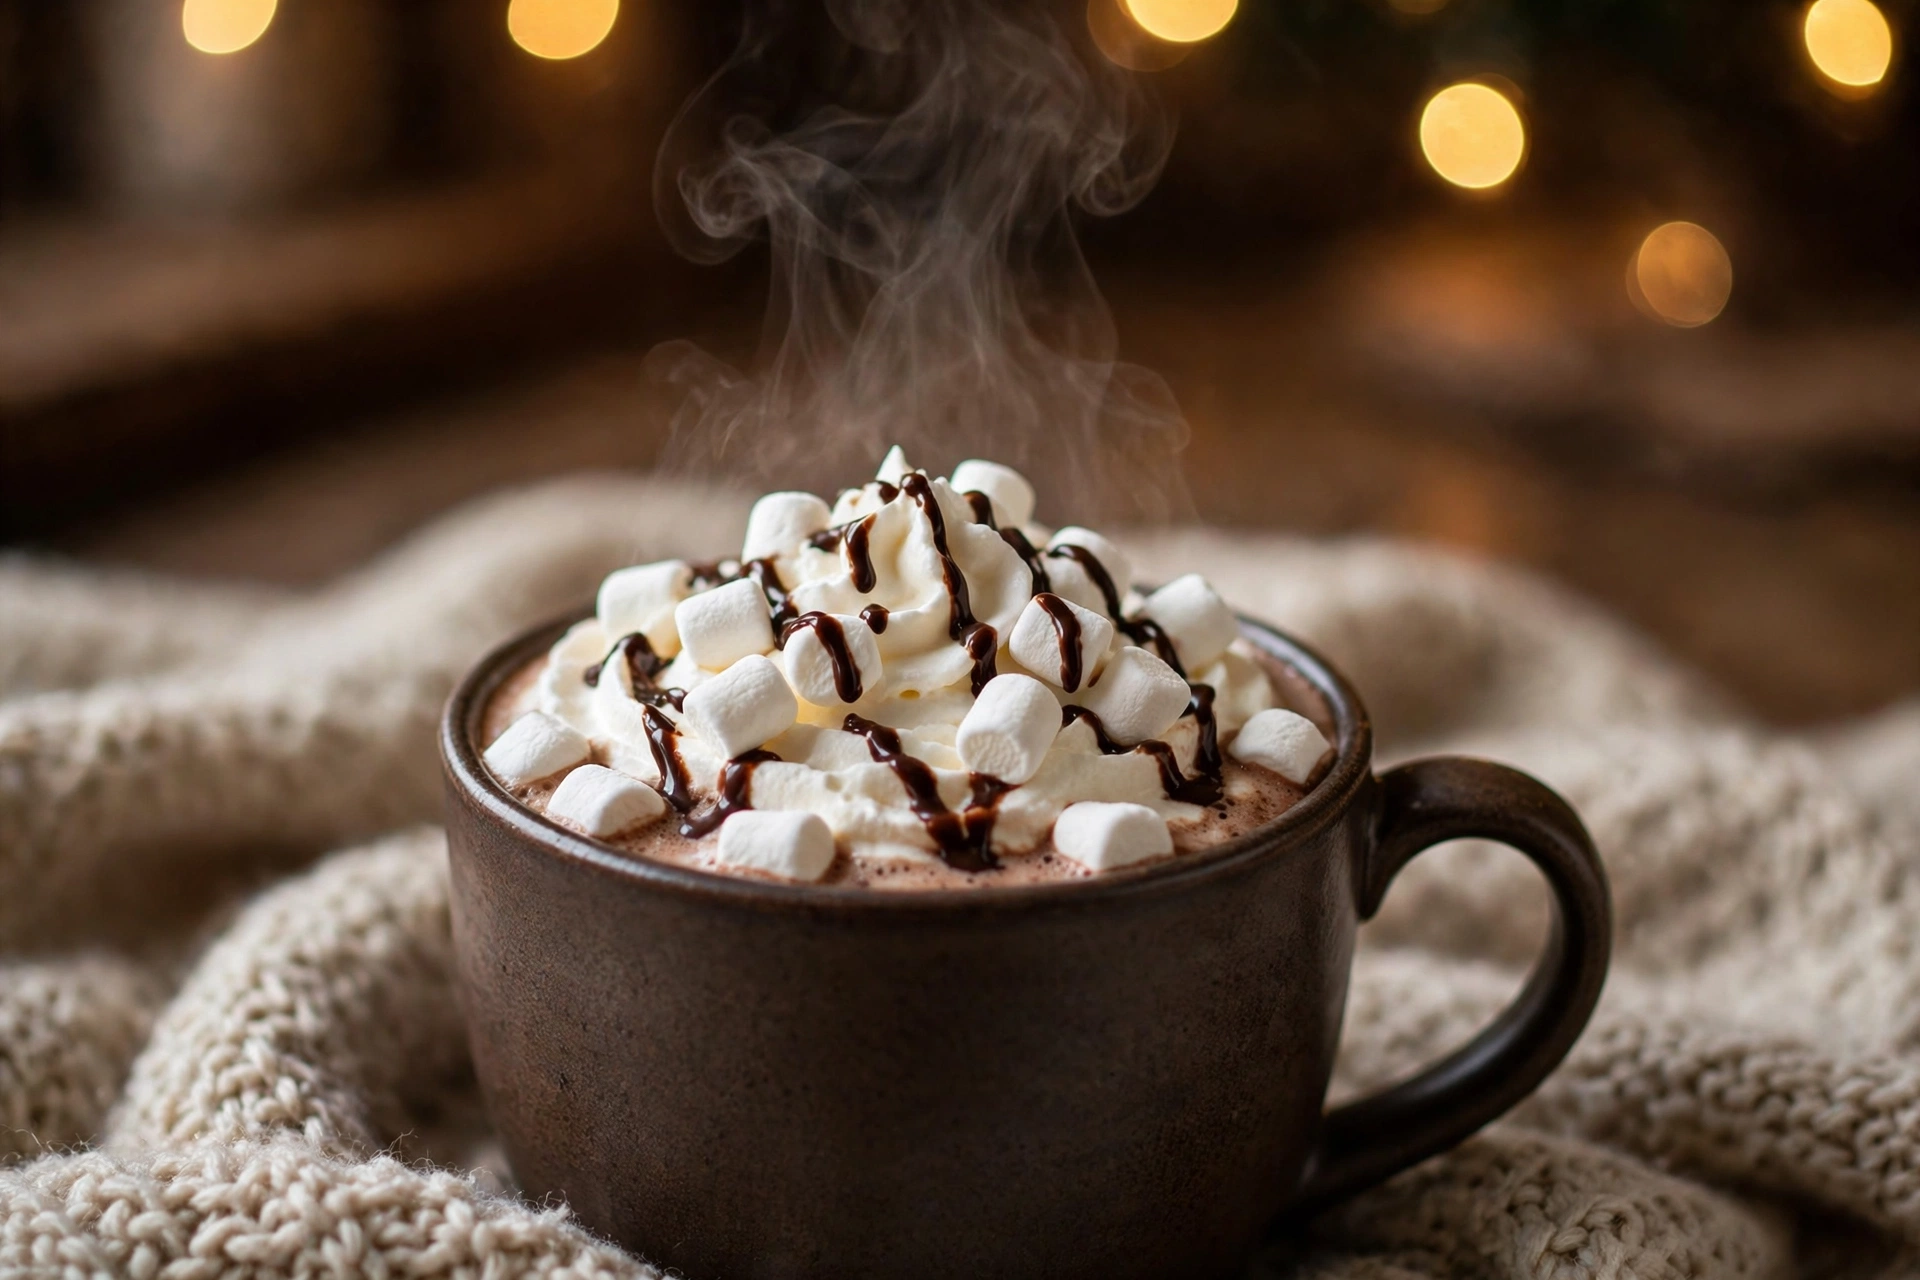
Picture this: fairy lights glowing, holiday music playing low, and a table covered with glass jars of marshmallows, crushed peppermint, chocolate chips, and cinnamon sticks. Your guests walk up, grab a mug, and build their dream cup of cocoa. That is a hot cocoa station, and it is hands-down one of the easiest ways to make any party feel special.
This guide gives you everything in one place. You get a master hot cocoa recipe that tastes rich and silky, not thin and sad like the packets. You get a full station setup plan with toppings, jars, and signage ideas. And you get the hosting tricks that keep the cocoa hot for hours while you actually enjoy your own party.
What makes this the best approach? Three things. First, the cocoa itself uses real chocolate, not just cocoa powder, which gives it a deep, creamy flavor no mix can match. Second, the station is built for real parties — a slow cooker keeps the cocoa warm, the toppings are arranged so a crowd can move through quickly, and everything is labeled so you are not answering the same question twenty times. Third, it is budget-friendly. Most of the setup uses jars and bowls you already own, and the whole thing costs less than one fancy catering order.
Whether you are throwing a holiday party, hosting a movie night, or planning a cozy winter wedding, this hot cocoa station will be the corner of the room everyone talks about. Let’s build it.
Why Are Hot Cocoa Stations So Popular?
Hot cocoa stations blew up for a reason, and it is not just because they photograph beautifully (though they absolutely do). They hit a sweet spot that few party ideas manage: they are cheap to make, easy to set up, and they make every guest feel like a kid again.
Think about how parties usually work. The host runs around refilling drinks while everyone else has fun. A hot cocoa station flips that script. Guests serve themselves, customize their own drinks, and linger around the table chatting. It becomes a gathering point, not just a beverage. That is why you see hot cocoa stations at holiday parties, baby showers, bridal showers, office events, and even winter weddings — they work everywhere.
There is also a nostalgia factor that is hard to beat. Almost everyone has a warm memory tied to hot chocolate: coming inside after playing in the snow, watching holiday movies with family, or sipping cocoa at a winter market. A hot cocoa station taps straight into that feeling. One sip and your guests are relaxed, happy, and in the mood to celebrate.
And let’s be honest — they are extremely shareable. A well-styled cocoa bar with cute signage and glass jars looks incredible in photos. Your guests will post it before they even take a sip. In a world where every event ends up on social media, a hot cocoa station is free decoration, free entertainment, and free marketing for your hosting skills, all in one.
What Ingredients Do You Need for a Hot Cocoa Station?
A great hot cocoa station has two parts: the cocoa itself and the toppings. Here is the master recipe that serves about 10–12 mugs, plus the full topping and garnish list.
For the master hot cocoa (10–12 servings):
- 8 cups (2 quarts) whole milk
- 2 cups heavy cream
- 8 oz (225g) semi-sweet chocolate, chopped (or good-quality chocolate chips)
- 1/2 cup (45g) unsweetened cocoa powder
- 3/4 cup (150g) granulated sugar
- 1/4 teaspoon fine sea salt
- 2 teaspoons pure vanilla extract
- 1/2 teaspoon ground cinnamon (optional, but lovely)
For the topping bar (pick 6–8 of these):
- 2 cups mini marshmallows
- 1 cup large marshmallows
- 1 cup whipped cream (homemade or canned)
- 3/4 cup crushed peppermint candies or candy canes
- 1/2 cup mini chocolate chips
- 1/2 cup chocolate shavings or curls
- 1/2 cup caramel sauce
- 1/2 cup chocolate syrup
- 1/4 cup crushed toffee bits
- 1/4 cup cocoa powder for dusting
- 2 tablespoons ground cinnamon
- 12 cinnamon sticks (for stirring)
- 12 striped paper straws or wooden stir sticks
For styling the station:
- Small chalkboard signs or kraft-paper tent cards
- 8–10 small glass jars, bowls, or ramekins for toppings
- A slow cooker (4–6 quart) or a large thermal drink dispenser
- A stack of 10–12 sturdy mugs
- A small tray for the mugs and a ladle or spout for serving
Every ingredient earns its place. Whole milk and heavy cream create the silky body — skim milk will give you thin, disappointing cocoa. Real chopped chocolate melts into the mixture and adds depth that cocoa powder alone cannot deliver. The small pinch of salt might sound strange, but it sharpens the chocolate flavor and keeps the cocoa from tasting flat. Vanilla goes in at the end so its delicate flavor does not cook away.
For the toppings, aim for a mix of textures and flavors: something creamy (whipped cream), something crunchy (toffee bits, peppermint), something melty (chocolate chips), and something fun (giant marshmallows, striped straws). That variety is what makes guests excited to build their own cup.

What Equipment Do You Need for a Hot Cocoa Station?
The good news: you probably own most of this already. Here is the complete list.
For making the cocoa:
- A large saucepan or Dutch oven (if making on the stovetop)
- A whisk (essential — it keeps the cocoa smooth)
- A wooden spoon
- A 4–6 quart slow cooker (for keeping cocoa warm during the party)
For the station itself:
- 8–10 small glass jars, mason jars, or bowls for toppings (mismatched looks charming)
- Small spoons or scoops for each topping jar
- A ladle (if serving from a pot) — or skip it if your slow cooker has a spout
- 10–12 mugs, ideally sturdy ones that hold heat
- A large tray or wooden board to anchor the whole display
- Chalkboard signs, tent cards, or kraft tags for labeling toppings
- A tablecloth or runner, plus any decor you like: fairy lights, pine sprigs, garland
The slow cooker is the real MVP here. It keeps the cocoa at the perfect sipping temperature for hours with zero babysitting. If you do not own one, a large thermal beverage dispenser works too — just make sure it is rated for hot liquids. Avoid thin plastic dispensers that can warp.
Pro move: set the whole station on one big tray or board. It looks intentional and styled, and when the party ends you can lift the entire thing off the table in one go for easy cleanup.
How Do You Build a Hot Cocoa Station Step by Step?
This process has two phases: making the cocoa, then setting up the station. Give yourself about 30 minutes before guests arrive.
Phase 1: Make the master hot cocoa (15 minutes)
- Warm the milk and cream. Pour the whole milk and heavy cream into a large saucepan or Dutch oven. Heat over medium-low, stirring occasionally, until steam rises and small bubbles form around the edges. Do not let it boil — boiling can scorch the milk and give the cocoa an off flavor.
- Whisk in the dry ingredients. Add the cocoa powder, sugar, and salt. Whisk constantly until everything dissolves and no lumps remain. Take your time here; lumps of cocoa powder are the number one reason homemade cocoa turns out gritty.
- Melt in the real chocolate. Drop in the chopped semi-sweet chocolate and keep whisking over low heat until it melts completely and the cocoa turns glossy and rich. This takes 2–3 minutes. The mixture should coat the back of a spoon.
- Add vanilla and cinnamon. Remove the pan from the heat and stir in the vanilla extract and cinnamon (if using). Adding vanilla off the heat keeps its flavor bright instead of cooking it away.
- Taste and adjust. This is your moment. Too sweet? Add a splash more milk. Not chocolatey enough? Whisk in another tablespoon of cocoa powder. Want it richer? Stir in a knob of butter — yes, really, it makes the cocoa unbelievably silky.
- Transfer to the slow cooker. Pour the finished cocoa into your slow cooker and set it to WARM (not LOW — LOW can scorch it over a few hours). Put the lid on until guests arrive.
Phase 2: Set up the station (15 minutes)
- Choose your spot. Pick a table or counter against a wall, near an outlet for the slow cooker. Make sure there is enough room for a line of guests on one side — you want traffic to flow in one direction, not cluster.
- Lay the foundation. Spread a tablecloth or runner, then place your big tray or wooden board in the center. Set the slow cooker on the tray at one end — this is the starting point of your cocoa assembly line.
- Arrange the mugs. Stack the mugs next to the slow cooker (or on a small riser behind it). Put a ladle or serving spoon beside them if needed.
- Fill and arrange the topping jars. Fill each jar or bowl with one topping and place a small spoon in each. Arrange them in a row or cluster after the cocoa, roughly in the order guests will use them: marshmallows first, then crunchy toppings, then sauces and drizzles, then dusting powders and stir sticks last.
- Label everything. This step matters more than you think. Write a cute label for each topping — “Crushed Peppermint,” “Salted Caramel Drizzle,” “Toasted Marshmallows.” Labels keep the line moving because nobody has to ask what anything is. They also make the whole station look ten times more professional.
- Add the finishing touches. Drape fairy lights around the table, tuck in some pine sprigs or eucalyptus, and lean your main sign (“Hot Cocoa Bar” or “Warm Up Here!”) where everyone can see it. Step back, snap a photo, and you are done.
What Are the Best Pro Tips for a Hot Cocoa Station?
Keep the cocoa at the right temperature. The WARM setting on a slow cooker holds cocoa at roughly 140–150°F — perfect sipping temperature. Check it once an hour and give it a stir. If it starts to thicken, whisk in a splash of warm milk.
Make a double batch for big crowds. The master recipe serves 10–12 mugs. For 20+ guests, double it and use a 6-quart slow cooker. Cocoa disappears fast — people always go back for seconds.
Offer one dairy-free option. Keep a small saucepan or second mini slow cooker with cocoa made using oat milk and dairy-free chocolate. Label it clearly. Your lactose-intolerant and vegan guests will love you for it.
Toast the marshmallows. If you have a kitchen torch, lightly toast a bowl of large marshmallows right before the party. The caramelized tops taste like campfire s’mores and look gorgeous in the jar. No torch? A quick pass under the broiler works — watch them like a hawk, they burn in seconds.
Pre-scoop sticky toppings. Caramel sauce and chocolate syrup get messy when twenty people share one bottle. Pour them into small squeeze bottles instead. They are cheap, they look cute, and they keep the station clean.
Freeze leftover cocoa in cubes. Pour extra cocoa into ice cube trays and freeze. Drop the cubes into hot milk later for instant single servings, or blend them with ice cream for a frozen cocoa shake.
Add a “secret menu” sign. Write 2–3 suggested combos on your main sign: “The Peppermint Patty: cocoa + peppermint + chocolate drizzle,” “The Campfire: cocoa + toasted marshmallow + cinnamon,” “The Salted Caramel: cocoa + caramel + sea salt.” Guests who feel overwhelmed by choices will follow these like a recipe, and it adds a fun, coffee-shop vibe.
Set out lids or covers for outdoor stations. If your party spills onto a patio, little paper lids or even coffee sleeves keep cocoa warm and keep leaves and bugs out. Small detail, big difference.
What Are the Most Common Hot Cocoa Station Mistakes?
Mistake 1: Using only cocoa powder and water. This is the packet-mix trap. Cocoa powder plus water gives you a thin, bitter drink. The fix is simple: use milk, and add real chocolate. Fat carries flavor, and that is what makes cocoa taste rich instead of watery.
Mistake 2: Letting the cocoa boil. Boiling scorches milk proteins and can make chocolate seize into grainy clumps. Keep the heat at medium-low and pull the pan off the burner the moment it steams. In the slow cooker, use WARM — never HIGH, and avoid LOW for more than a couple of hours.
Mistake 3: Skipping the labels. An unlabeled station creates a bottleneck. Guests hover, ask questions, and the line stalls. Label every jar, even the obvious ones. It takes ten minutes and makes you look like a hosting genius.
Mistake 4: Putting out too many toppings. Twenty topping options sound fun until your table is chaos and half the jars go untouched. Stick to 6–8 well-chosen toppings. A tight, beautiful selection beats a sprawling, messy one every time.
Mistake 5: Forgetting about flow. If guests have to reach across the table or double back for mugs, your station will jam. Set it up in assembly-line order: mugs first, then cocoa, then toppings, then stir sticks and napkins last. One direction, no backtracking.
Mistake 6: Making the cocoa too early. Cocoa made six hours ahead and held on heat can develop a skin and lose its silky texture. Make it 1–2 hours before the party, hold it on WARM, and stir every hour. Fresh tastes noticeably better.

Variation 1: How Do You Make Classic Rich Hot Cocoa?
This is the master recipe above, served pure and simple — and honestly, it needs no variation at all. For the purist’s cup, fill a mug with the master cocoa, add a single large marshmallow, and dust with cocoa powder. The deep chocolate flavor shines without competition. If you want to nudge it fancier, swap the semi-sweet chocolate for 70% dark chocolate and add a pinch of espresso powder — the coffee deepens the chocolate without making it taste like mocha.
Variation 2: How Do You Make Peppermint White Hot Cocoa?
White hot cocoa is a whole different vibe — sweet, creamy, and gorgeous in a glass mug. Warm 8 cups whole milk with 2 cups heavy cream, then whisk in 12 oz chopped white chocolate, 1/2 cup sugar, a pinch of salt, 1 teaspoon vanilla, and 1/2 teaspoon peppermint extract. Go easy on the peppermint; too much tastes like toothpaste. Serve with crushed candy canes and a candy cane stir stick. This one is a holiday-party legend and kids go wild for it.
Variation 3: How Do You Make Mexican Mocha Hot Cocoa?
For the grown-up crowd. Make the master cocoa recipe, then whisk in 2 tablespoons instant espresso powder, 1 teaspoon ground cinnamon, 1/2 teaspoon chili powder (ancho is best), and a pinch of cayenne. The heat builds slowly in the back of your throat and makes the chocolate taste even more intense. Top with whipped cream and a dusting of cinnamon. Set out a little sign warning guests about the spice — some will be thrilled, and the cautious ones will stick with classic.
Variation 4: How Do You Make Salted Caramel Hot Cocoa?
Dessert in a mug. Make the master cocoa, then stir in 1/2 cup caramel sauce plus 1/2 teaspoon flaky sea salt. Serve with a caramel drizzle over whipped cream and a sprinkle of flaky salt on top. The salt-sweet contrast is addictive. For an extra-decadent version, rim the mugs: dip the rim in caramel sauce, then in crushed toffee bits, before pouring the cocoa. It looks like something from a fancy café.
Variation 5: How Do You Make Vegan Dairy-Free Hot Cocoa?
Nobody should miss out. Warm 8 cups oat milk (oat milk is creamiest; almond works too) with 1 can (13.5 oz) full-fat coconut milk. Whisk in 1/2 cup cocoa powder, 3/4 cup sugar, 8 oz chopped dairy-free dark chocolate, 1/4 teaspoon salt, and 2 teaspoons vanilla. The coconut milk adds the richness that dairy would normally provide. Keep it in a separate labeled slow cooker so there is no cross-contact with the dairy batch, and set out dairy-free whipped topping and vegan marshmallows. Most guests will not even guess it is vegan.

How Do You Store Leftover Hot Cocoa?
In the fridge: Let the cocoa cool to room temperature (no more than 2 hours on the counter), then pour it into jars or airtight containers. It keeps for 3–4 days in the refrigerator. The chocolate may settle a bit — that is normal.
In the freezer: Hot cocoa freezes beautifully. Pour it into freezer-safe containers or zip-top bags, leaving an inch of headspace, and freeze for up to 3 months. For single servings, freeze it in ice cube trays, then transfer the cubes to a bag. Frozen cocoa cubes dropped into hot milk make the fastest single mug ever.
How to reheat: Warm it gently on the stovetop over medium-low heat, whisking often. Do not microwave a big batch — it heats unevenly and can scorch. For a single mug, the microwave is fine: heat in 30-second bursts, stirring between each. If the reheated cocoa seems thick, whisk in a splash of milk until it is silky again.
Toppings storage: Keep leftover dry toppings (peppermint, chocolate chips, cinnamon sticks) in sealed jars at room temperature — they last for weeks. Store caramel and chocolate sauces in the fridge per their labels. Toss any whipped cream leftovers after the party; it does not keep.
What Do You Serve With a Hot Cocoa Station?
A hot cocoa station is already a star, but the right pairings turn it into a full experience.
- Cookies for dunking. Shortbread, snickerdoodles, biscotti, and gingerbread are all sturdy enough to survive a dunk. Set out a big plate right next to the cocoa.
- A dessert board. Brownies, blondies, and fudge cut into bite-size pieces pair perfectly with a rich mug of cocoa.
- Savory balance. If cocoa is the dessert, serve something savory first: a baked brie, a charcuterie board, or pigs in a blanket. The contrast keeps guests from sugar overload.
- Breakfast-for-dinner parties. A hot cocoa bar alongside pancakes, waffles, or French toast is a brunch-party dream. Add a mimosa option and you have covered every guest.
- Movie night spread. Popcorn (kettle corn especially), pretzels, and M&Ms next to the cocoa station — zero cooking required, maximum coziness.
- Holiday dinner finale. After a big roast dinner, wheel out the cocoa station instead of a formal dessert. Guests can graze, customize, and relax while the evening winds down.
For drinks beyond cocoa, a pot of coffee and a pitcher of cold milk cover the non-cocoa drinkers. And always set out a small trash bowl or bin near the station for used stir sticks and napkins — it keeps the table tidy without you hovering.

Hot Cocoa Station FAQs
Can I make the hot cocoa ahead of time?
Yes, with limits. You can make the cocoa up to 2 days ahead and refrigerate it, then reheat gently and transfer to the slow cooker on party day. Do not hold it on WARM for more than 4–5 hours at the party itself — the texture suffers and a skin forms. For the freshest taste, make it the morning of your event.
How much hot cocoa do I need per guest?
Plan on 1.5 mugs per person — most guests drink one full mug and many go back for a half. The master recipe (about 10–12 mugs) comfortably serves 8 guests. For 20 guests, double the recipe. It is always better to have a little extra; leftover cocoa freezes perfectly.
Can I make hot cocoa in a slow cooker from scratch?
Absolutely. Whisk all the ingredients in the slow cooker, cook on LOW for 2 hours, whisking every 30 minutes, then switch to WARM. The only risk is scorching on the bottom, so do not skip the stirring. This is a great hands-off method when your stovetop is busy.
What is the best chocolate for hot cocoa?
A good-quality semi-sweet chocolate (around 55–65% cacao) gives the best balance of rich flavor without bitterness. Chocolate chips work fine in a pinch because they melt evenly. Avoid waxy baking bars and unsweetened chocolate unless you adjust the sugar. And real talk: the better the chocolate, the better the cocoa. This is the one ingredient worth spending a little more on.
How do I keep the toppings fresh during a long party?
Dry toppings are worry-free for hours. For whipped cream, keep the canister or bowl chilled in a bowl of ice — swap it for a fresh one halfway through a long event. Marshmallows can get sticky in humid rooms; keep them covered with a lid or plastic wrap between rushes.
Can I set up a hot cocoa station outdoors?
Yes, and it is magical at bonfires and outdoor movie nights. Use a slow cooker with a locking lid for transport, bring an extension cord rated for outdoor use, and set out paper lids for the mugs. Keep the topping jars covered when not in use, and bring everything inside if rain threatens.
What can I use instead of a slow cooker?
A large electric thermal carafe or beverage dispenser rated for hot liquids works well. In a pinch, make the cocoa on the stovetop and keep the pot on the lowest burner setting, stirring often — but this ties you to the kitchen. Avoid regular plastic pitchers; they can warp or leach with sustained heat.
Is a hot cocoa station good for kids’ parties?
It is one of the best kids’ party ideas out there. Kids love building their own drinks, and the toppings double as an activity. Use warm (not hot) cocoa, unbreakable mugs or paper cups, and put the sauces in squeeze bottles to limit mess. The peppermint white hot cocoa variation is always a hit with the under-12 crowd.
How do I make my hot cocoa station look expensive on a budget?
Three tricks: use glass jars (mason jars cost almost nothing and look great), add height with cake stands or stacked books under the tray, and invest in fairy lights and one good sign. Matching kraft-paper labels tie everything together. Guests will assume you spent a fortune.
Final Thoughts
A hot cocoa station is proof that the best party ideas are not complicated — they are just thoughtful. One pot of rich, real-chocolate cocoa, a handful of fun toppings, and a little styling turn an ordinary gathering into something people remember. It costs little, it practically runs itself once set up, and it gives your guests a reason to slow down, customize, and connect.
So pick a date, grab some mason jars, and build your hot cocoa station. Your guests will thank you — probably with photos, definitely with empty mugs.
Round out your cozy setup with a few sweet bites — our Caramel Apple Bark and Halloween Popcorn Bar make perfect companions for a hot cocoa station at any fall or winter gathering.