
Sweet Potato Wedges are crispy on the outside, tender on the inside, and packed with naturally sweet flavor. They’re a healthier alternative to traditional French fries and make the perfect side dish for burgers, sandwiches, grilled meats, or salads.
These oven-baked wedges are simple to prepare, require only a handful of ingredients, and deliver delicious results every time. Whether you’re cooking for your family or preparing a snack for guests, this recipe is guaranteed to become a favorite.
Why You’ll Love This Recipe
- Crispy edges with soft, fluffy centers
- Made with simple pantry ingredients
- Naturally gluten-free
- Easy to customize with your favorite seasonings
- Healthier than deep-fried potatoes
- Great for meal prep
- Family-friendly and budget-friendly
What to Buy
Main Ingredients
- 2 large sweet potatoes
- 2 tablespoons olive oil
- 1 teaspoon paprika
- ½ teaspoon garlic powder
- ½ teaspoon onion powder
- ½ teaspoon salt
- ¼ teaspoon black pepper
Optional Toppings
- Fresh parsley
- Parmesan cheese
- Chili flakes
- Smoked paprika
- Fresh herbs
Optional Dipping Sauces
- Garlic aioli
- Ranch dressing
- Honey mustard
- Chipotle mayo
- Barbecue sauce
Essential Tools for Success
Having the right tools makes preparation easier and helps ensure perfectly cooked wedges.
Kitchen Equipment
- Sharp chef’s knife
- Cutting board
- Large mixing bowl
- Measuring spoons
- Baking sheet
- Parchment paper
- Spatula or tongs

Sweet Potato Wedges in Steps
Step 1: Preheat Your Oven
Preheat your oven to 425°F (220°C).
A properly heated oven helps create crispy edges while keeping the inside tender.
Line a baking sheet with parchment paper for easy cleanup.
Step 2: Prepare the Sweet Potatoes
Wash and scrub the sweet potatoes thoroughly.
Cut each sweet potato lengthwise in half, then slice each half into evenly sized wedges.
Uniform wedges cook more evenly and help prevent some pieces from overcooking while others remain undercooked.
Step 3: Season the Wedges
Place the sweet potato wedges into a large mixing bowl.
Drizzle with olive oil and sprinkle with paprika, garlic powder, onion powder, salt, and black pepper.
Toss thoroughly until every wedge is evenly coated.
Step 4: Arrange on Baking Sheet
Spread the wedges in a single layer on the prepared baking sheet.
Avoid overcrowding the pan. Leaving space between wedges allows hot air to circulate and creates a crispier texture.
Step 5: Bake to Perfection
Bake for 25 to 30 minutes.
Flip the wedges halfway through cooking to ensure even browning.
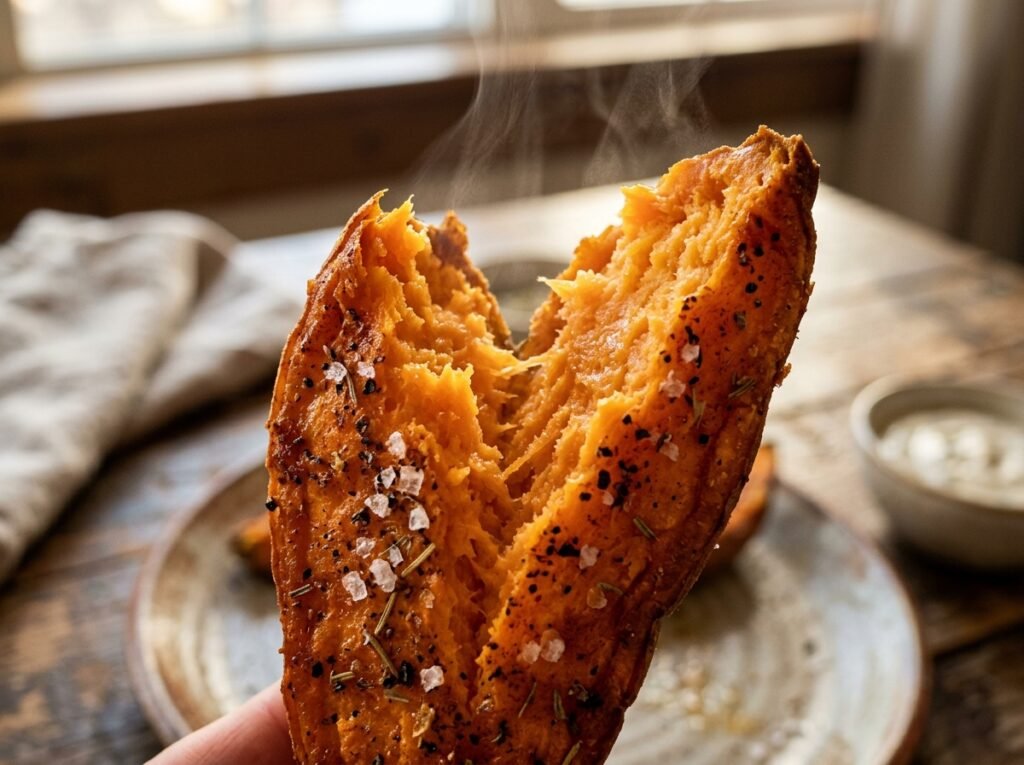
The wedges are ready when they are golden brown around the edges and fork-tender in the center.
Step 6: Serve and Enjoy
Remove the wedges from the oven and allow them to cool for a few minutes.
Garnish with fresh parsley, grated Parmesan cheese, or an extra sprinkle of seasoning.
Serve immediately with your favorite dipping sauce.

How to Make It Lighter
If you’d like an even healthier version, try these simple adjustments.
Use Less Oil
Reduce the olive oil to 1 tablespoon while still maintaining good flavor.
Skip High-Calorie Toppings
Leave out cheese-based toppings and focus on herbs and spices.
Pair with Healthy Dips
Choose Greek yogurt-based dips instead of heavy cream-based sauces.
Add More Vegetables
Serve alongside a fresh salad or roasted vegetables for a balanced meal.
Slip-Ups to Skip
Overcrowding the Baking Sheet
Crowded wedges steam instead of roast, resulting in softer texture.
Cutting Uneven Wedges
Different sizes cook at different speeds and can create inconsistent results.
Skipping the Flip
Turning the wedges halfway through baking helps both sides become crispy.
Using Too Much Oil
Excess oil can make wedges soggy instead of crispy.
Not Preheating the Oven
Starting with a fully heated oven is essential for proper caramelization.
Keep It Fresh: Storage Guide
Refrigerator
Store leftover wedges in an airtight container for up to 4 days.
Freezer
Freeze baked wedges in a freezer-safe container for up to 2 months.
Reheating
For best results, reheat in the oven at 400°F (200°C) for 5–10 minutes.
An air fryer also works well for restoring crispiness.
Avoid microwaving whenever possible, as it can make the wedges soft.
Questions People Ask
Can I use other types of potatoes for this recipe?
Yes. Russet potatoes, Yukon Gold potatoes, and red potatoes can all be used. Cooking times may vary slightly depending on the variety and size.
How can I make these wedges spicier?
Add cayenne pepper, crushed red pepper flakes, chili powder, or hot paprika to the seasoning blend for extra heat.
What dipping sauces go well with sweet potato wedges?
Popular choices include garlic aioli, ranch dressing, chipotle mayo, honey mustard, barbecue sauce, and spicy yogurt dips.
How do I know when the wedges are done?
The wedges should be golden brown on the outside and easily pierced with a fork. The edges should appear slightly crispy while the inside remains soft and fluffy.
Extra Tips for Maximum Crispiness
Soak the cut wedges in a bowl of cold water for 30 minutes, then dry them completely with clean towels. The soak pulls surface starch off the potatoes, and less starch means a crisper exterior. Don’t skip the drying — wet wedges steam instead of roast.
Toss the dried wedges with a tablespoon of cornstarch before adding the oil and seasonings. The thin starch coating turns golden and crackly in the oven’s heat.
Preheat your baking sheet in the oven while it heats up. When the wedges hit the hot pan, they start sizzling immediately instead of sitting in oil while the pan warms — that instant sear makes a real difference.
If your oven has a convection setting, use it at 400°F. The circulating air crisps the wedges faster and more evenly; start checking them about 5 minutes early.
Salt the wedges after baking, not before. Salt draws moisture to the surface, and moisture is the enemy of crispiness. Season with everything else before baking, then finish with salt while they’re hot.
For the best browning, place the wedges cut-side down for the first half of baking. The flat cut surface makes full contact with the hot pan and caramelizes beautifully, then flip for the second half.
Seasoning Variations
The base method stays the same — just swap the spice blend:
- Smoky chipotle: Replace the paprika with chipotle powder and add smoked paprika. Great with a cool ranch dip.
- Sweet cinnamon-sugar: Skip the savory spices and toss with cinnamon and a tablespoon of brown sugar. These taste like a cross between a side dish and dessert.
- Garlic-herb parmesan: Use Italian seasoning in place of paprika, then shower with grated parmesan right after baking so it melts slightly.
- Curry-spiced: Swap in curry powder and a pinch of turmeric for a warm, golden version.
- Everything-bagel: Season simply with salt and pepper before baking, then sprinkle everything-bagel seasoning over the hot wedges.
- Cajun: Use your favorite Cajun seasoning blend in place of the individual spices for a one-step bold flavor.

Serving Ideas
These wedges are a natural burger-night side, but they do much more. Add them to your Thanksgiving plate next to juicy crockpot turkey breast, cornbread stuffing, and brown butter garlic herb mashed potatoes — they hold their own against the classics.
Turn them into loaded wedge nachos: arrange baked wedges on a sheet pan, top with shredded cheese, sour cream, jalapeños, and green onions, then bake 5 more minutes until the cheese melts.
For game day, set out a big tray of wedges with several dips and a bowl of roasted pumpkin seeds nearby for snacking. They also fit right into a holiday morning plate as part of a Thanksgiving brunch menu.
For a cozy weeknight dinner, pair them with a slice from our savory pie recipes — the crispy, sweet wedges balance a rich, hearty pie perfectly.

Storing and Reheating: Beyond the Basics
Always let the wedges cool completely before packing them up. Trapped steam is what turns crispy wedges soggy in the container, so give them 15–20 minutes on the counter first.
If you stack leftovers, lay parchment paper between the layers. The wedges won’t stick together, and the coating stays intact when you separate them.
To freeze without clumping, spread the baked wedges in a single layer on a tray and freeze until solid, then transfer them to a freezer bag. They’ll keep for up to 2 months and you can grab a handful at a time.
For the crispiest reheat, slide cold wedges under the broiler for 2–3 minutes — watch them closely, as they go from golden to burnt fast. An air fryer at 375°F for 4–5 minutes works just as well and needs no watching.
Frequently Asked Questions
Can I make these in an air fryer?
Yes. Cook at 380°F for 12–15 minutes, shaking the basket halfway through. Work in batches so the wedges sit in a single layer — overcrowding the basket steams them instead of crisping.
Should I peel the sweet potatoes?
No need. The skin gets deliciously crispy and helps each wedge hold its shape. Just scrub the potatoes well under running water before cutting.
Can I cut the wedges ahead of time?
Yes. Keep the cut wedges submerged in cold water in the refrigerator for up to 24 hours. Drain and dry them thoroughly before seasoning — any surface water will fight the crispiness.
Why are the edges burnt but the centers still soft?
The wedges were likely cut with thin, tapered tips that cook faster than the thick parts. Aim for evenly thick wedges with blunt ends, and start checking 5 minutes before the timer ends.
Can I use frozen sweet potato wedges with this seasoning?
Yes — toss the frozen wedges directly with the oil and spices and bake from frozen, adding 5–10 minutes to the time. They won’t get quite as crisp as fresh-cut, but they’re still tasty.
Final Thoughts
Sweet Potato Wedges are one of the easiest and most satisfying side dishes you can make at home. Their naturally sweet flavor, crispy texture, and versatility make them a great alternative to traditional fries.
Whether you’re serving them as a snack, appetizer, or side dish, these baked wedges are packed with flavor and simple enough for any day of the week. Once you try this recipe, you’ll find yourself making it again and again. 🍠✨