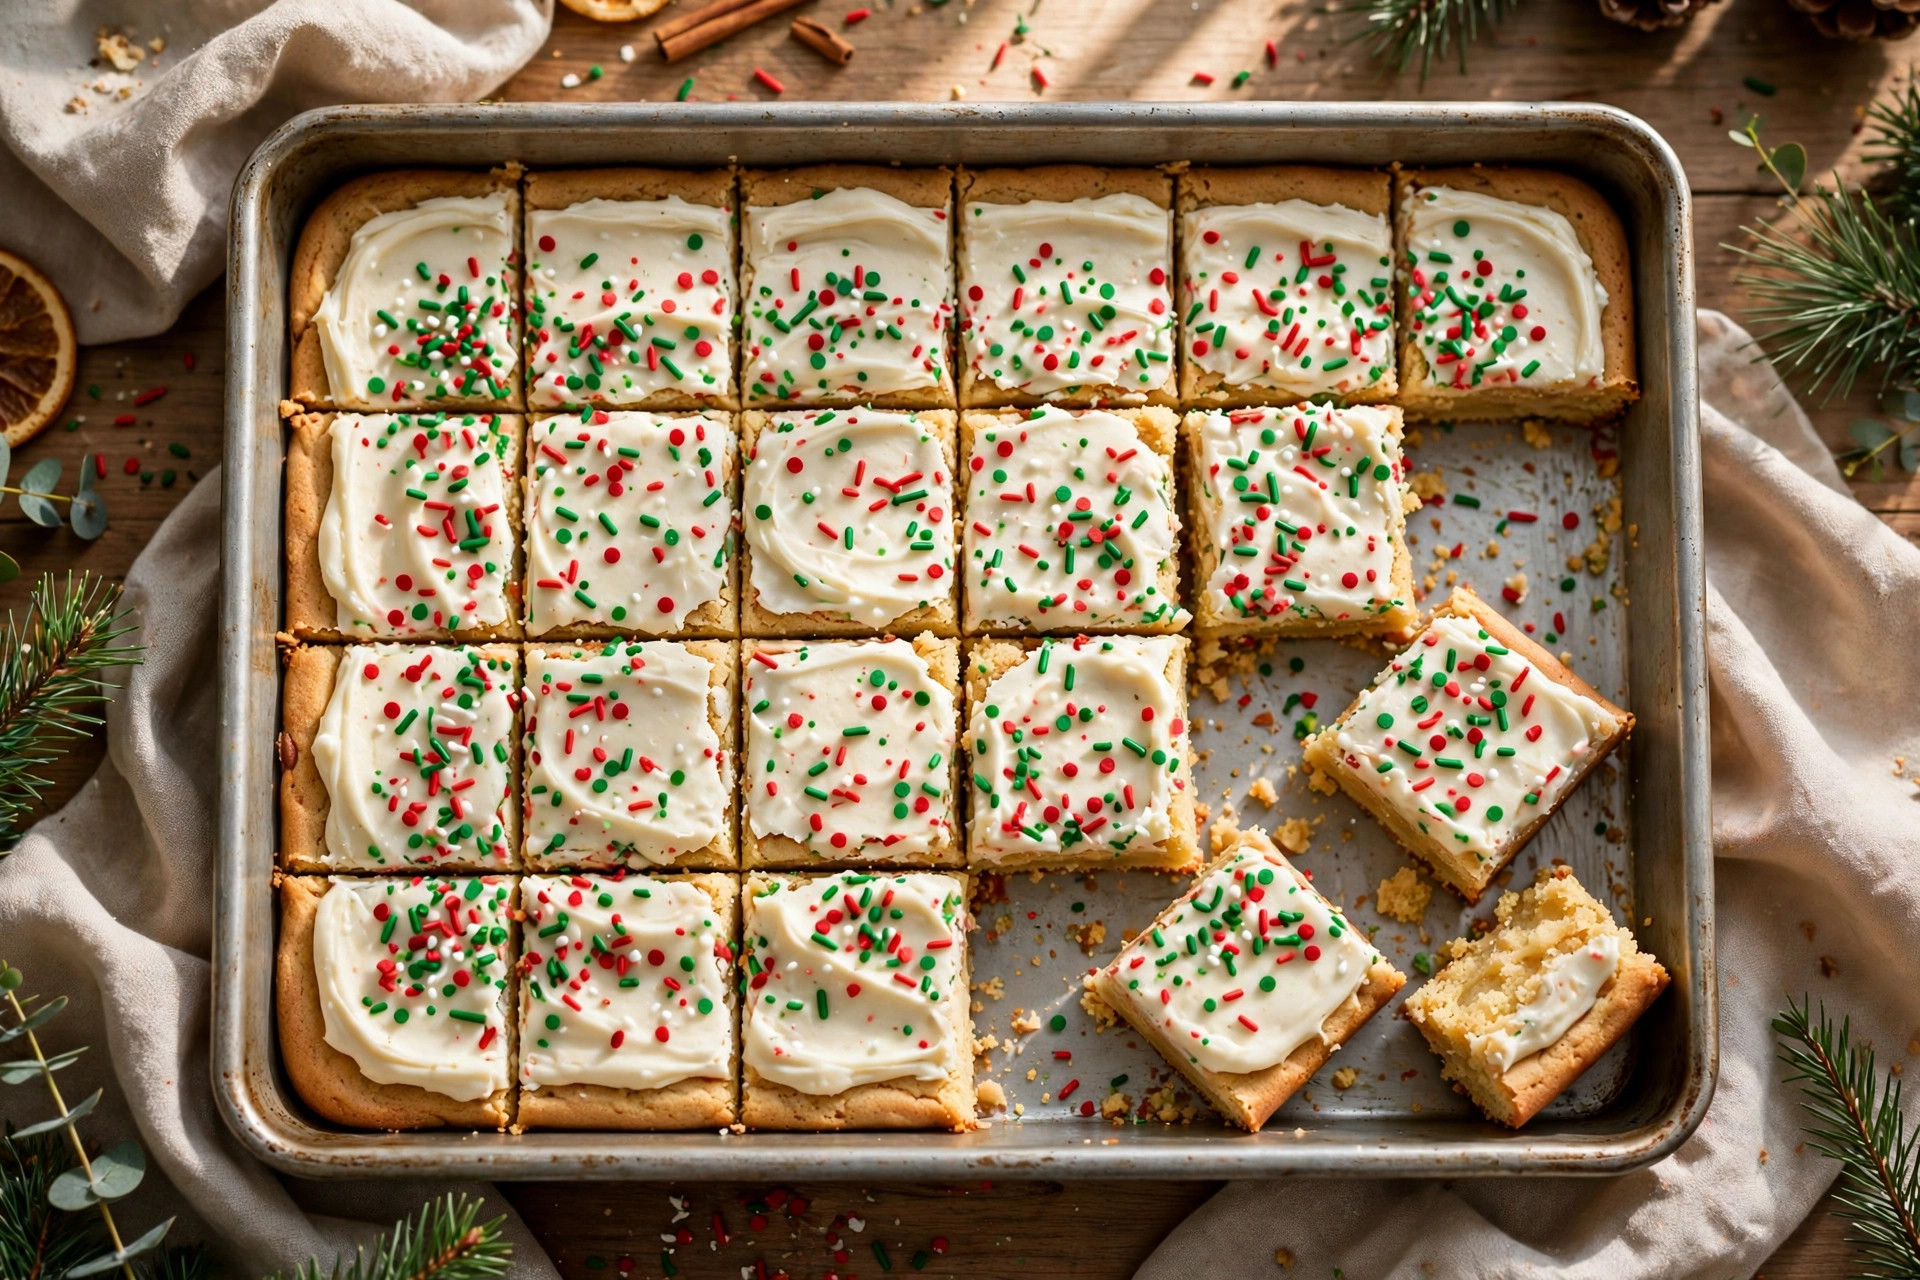
Every December, my kitchen turns into a cookie factory. Between the sugar cookies that need rolling and chilling and the gingerbread that demands decorating patience, there is always one tray that disappears before the rest even cool. These Christmas cookie bars.
They have everything people love about a classic Christmas sugar cookie — buttery, soft, a little chewy, packed with red and green sprinkles — without any of the fuss. You mix one bowl of dough, press it into a pan, and bake. No rolling pin. No cookie cutters. No chilling the dough while you wait. Thirty-five minutes later, you have a whole pan of festive bars ready to slice, stack, and share.
If you are building a holiday cookie tray, hosting a cookie exchange, or you just need something sweet that looks impressive with very little effort, this recipe belongs in your December rotation. Let me walk you through exactly how to make them, what each ingredient does, and all the ways you can dress them up.
Why Will You Love These Christmas Cookie Bars?
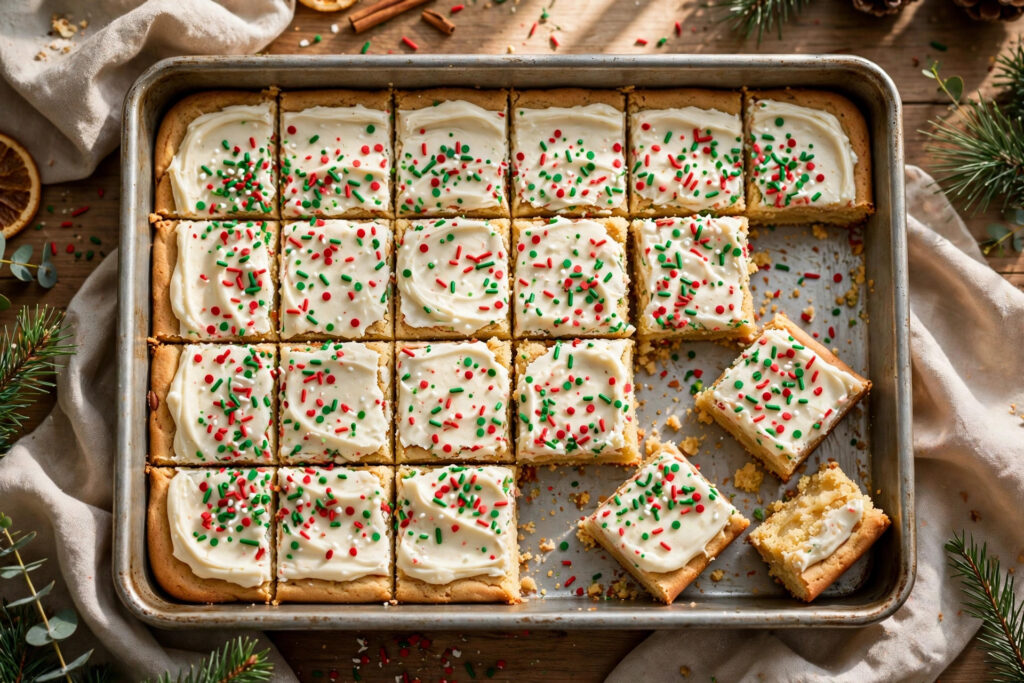
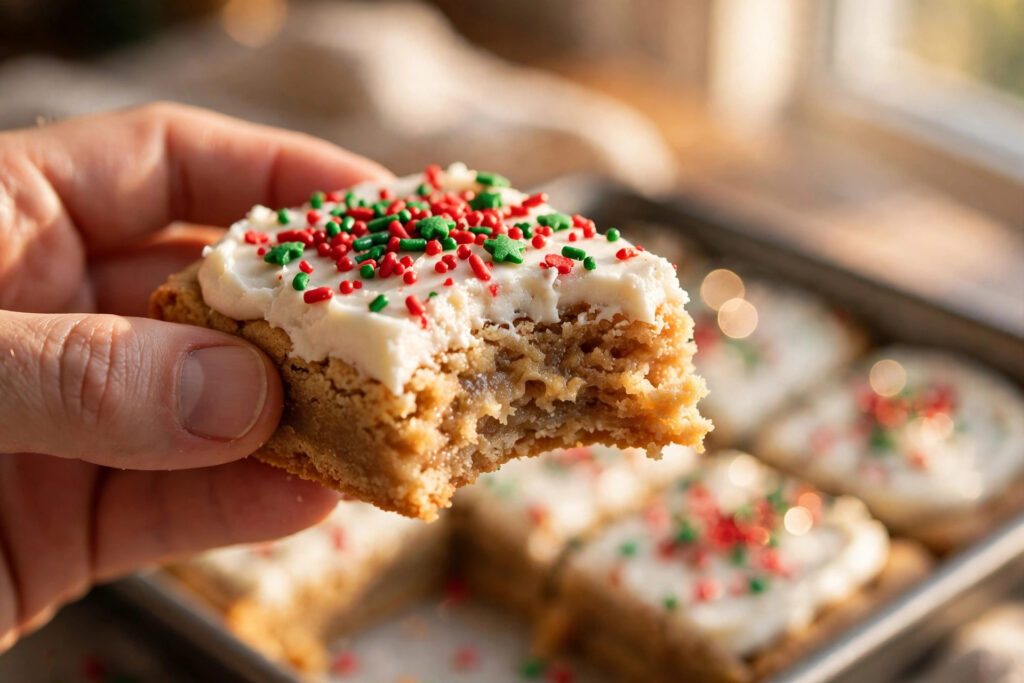
Let me count the reasons, because there are several. First, they taste like the best sugar cookie you have ever had. The edges bake up golden with the tiniest bit of crispness, while the center stays thick, soft, and chewy. A thin layer of vanilla frosting on top takes them from simple to bakery-worthy, and the extra sprinkles make them look like they took hours.
Second, they are fast. From the moment you pull the butter out of the fridge to the moment you cut the first bar, you need about 50 minutes, and 25 of those are hands-off baking time. Compare that to cut-out sugar cookies, which can easily eat up an entire afternoon with rolling, cutting, chilling, baking in batches, and decorating. If you are short on time but still want homemade holiday treats, bars win every time.
Third, they feed a crowd. One 9×13 pan makes 24 generous bars, which makes them perfect for potlucks, office parties, and cookie exchanges where you need quantity without spending the whole day baking. Cut them smaller and you can stretch the pan to 36 bite-sized pieces for a dessert table.
Fourth, they are forgiving. Drop cookies can spread too thin or bake up uneven. Cookie bars baked in a pan come out thick and even every single time, because the pan does the shaping for you. Even if this is your first time baking from scratch, you will get a pan of bars you are proud to share.

What Makes Christmas Cookie Bars Different From Drop Cookies?
This is a question I get a lot, and the answer comes down to three things: thickness, texture, and effort.
Drop cookies are scooped and spread on a baking sheet, so each cookie bakes from the outside in and develops crisp edges with a softer middle. Cookie bars bake together in one pan, which means the center stays extra thick and soft — almost like a blondie. You get more chew in every bite and a taller, more satisfying bar.
The baking method also changes the texture. Because the dough is pressed into a pan in an even layer, every piece bakes at the same rate. You do not get the batch-to-batch variation that happens when you scoop individual cookies. Every bar is soft in the middle and lightly golden on the edges, from the first slice to the last.
And then there is the effort difference. Drop cookies mean scooping, spacing, and rotating pans in multiple batches. Bars mean pressing dough into a lined pan once and walking away. When you are already making several other holiday treats — like the classic Christmas cookie recipes many of us bake every December — choosing bars for one of your recipes saves real time and oven space.
What Ingredients Do You Need for Christmas Cookie Bars?
These bars use simple pantry ingredients you probably already have. Here is what each one does, so you understand why the recipe works and how to substitute if you need to.

- Unsalted butter (1 cup / 2 sticks), softened. Butter gives these bars their rich flavor and tender crumb. Use unsalted so you can control the salt yourself. It should be soft enough to leave a dent when you press it, but not melty or greasy. If you only have salted butter, use it and reduce the added salt to 1/2 teaspoon.
- Granulated sugar (1 cup). White sugar sweetens the bars and helps the edges turn lightly crisp and golden. It also contributes to the chewy texture when combined with brown sugar.
- Light brown sugar (1/2 cup), packed. Brown sugar adds moisture and a hint of caramel flavor that makes the bars taste deeper and more buttery than a plain sugar cookie. Pack it firmly into the measuring cup so you get the full amount. Dark brown sugar works too and gives a slightly richer, more molasses-like flavor.
- Large eggs (2), at room temperature. Eggs bind the dough and add richness. Room-temperature eggs mix more evenly into the butter and sugar, which gives you a smoother dough and a more even bake. If you forget to set them out, place cold eggs in a bowl of warm water for 10 minutes.
- Vanilla extract (2 teaspoons). Vanilla is the backbone flavor of a sugar cookie bar. Use pure vanilla extract if you can — it tastes noticeably better than imitation in a recipe this simple.
- Almond extract (1/2 teaspoon), optional. This is the secret ingredient that makes people ask, “What is in these?” Almond extract adds a warm, bakery-style flavor that feels especially festive. It is strong, so do not use more than 1/2 teaspoon, and skip it if you have a nut allergy in the house.
- All-purpose flour (3 cups). Flour gives the bars their structure. Spoon it into the measuring cup and level it off with a knife instead of scooping from the bag, which packs in extra flour and makes the bars dry. For the most accurate results, 3 cups weighs about 360 grams.
- Baking powder (1 teaspoon). Baking powder lifts the bars and keeps them soft and thick instead of dense.
- Baking soda (1/2 teaspoon). Baking soda helps the bars spread just enough and encourages golden browning. Together with baking powder, it gives the perfect soft-but-set texture.
- Fine salt (1 teaspoon). Salt balances the sweetness and makes the butter and vanilla flavors pop. Do not skip it.
- Red and green sprinkles (3/4 cup for the dough, plus more for topping). Holiday sprinkles are what turn plain sugar cookie bars into Christmas cookie bars. Use classic jimmies rather than nonpareils (the tiny balls), because jimmies hold their color and shape in the oven while nonpareils can bleed. Save some to press on top of the frosting for a finished look.
- White chocolate chips (1/2 cup), optional. These melt into creamy pockets throughout the bars and add a sweet, milky flavor that pairs beautifully with the vanilla base. You can swap in regular chocolate chips if you prefer.
For the frosting, you will need 1/2 cup of softened unsalted butter, 2 cups of powdered sugar, 2 to 3 tablespoons of milk, 1 teaspoon of vanilla extract, and a pinch of salt. The frosting is simple on purpose — it should taste like vanilla buttercream, sweet and creamy, and let the bars themselves shine.
How Do You Make Christmas Cookie Bars? (Step-by-Step)
Preheat your oven to 350 degrees F (175 degrees C). Line a 9×13-inch baking pan with parchment paper, leaving a little overhang on two sides so you can lift the bars out later. Lightly grease any exposed sides of the pan.
- Cream the butter and sugars. In a large mixing bowl, beat the softened butter, granulated sugar, and brown sugar together with an electric mixer on medium-high speed for 2 to 3 minutes, until the mixture is light, fluffy, and pale in color. This step whips air into the dough, which is what keeps the bars soft instead of dense. Scrape down the sides of the bowl halfway through.
- Add the eggs and extracts. Beat in the eggs one at a time, mixing well after each addition. Then mix in the vanilla extract and the almond extract if you are using it. The batter should look smooth and creamy.
- Whisk the dry ingredients. In a separate medium bowl, whisk together the flour, baking powder, baking soda, and salt until they are evenly combined. This distributes the leaveners so the bars rise evenly.
- Combine wet and dry. Add the dry ingredients to the butter mixture and mix on low speed just until the flour disappears. Do not overmix — stop as soon as you no longer see streaks of flour. Overmixing develops gluten and makes the bars tough instead of tender.
- Fold in the sprinkles and chips. Gently stir in 3/4 cup of sprinkles and the white chocolate chips (if using) with a spatula. Mix just until they are evenly scattered through the dough. The dough will be thick and soft.
- Press into the pan. Transfer the dough to your lined 9×13 pan and press it into an even layer with your hands or the back of a spatula. Dampen your fingers slightly with water if the dough sticks. Take a minute to get the corners filled and the top level — an even layer means even baking.
- Bake. Bake for 22 to 26 minutes, until the edges are lightly golden and the center looks just set. It should not look wet or jiggly, but do not wait for the top to brown deeply — the bars firm up as they cool, and overbaking is the number one cause of dry bars. A toothpick inserted in the center should come out with a few moist crumbs, not wet batter.
- Cool completely. Let the bars cool in the pan on a wire rack for at least 1 hour. Do not frost warm bars — the frosting will melt right off. For the cleanest slices, refrigerate the cooled bars for 20 to 30 minutes before cutting.
- Frost. While the bars cool, make the frosting. Beat the softened butter until smooth, then add the powdered sugar, milk, vanilla, and salt. Beat for 2 to 3 minutes until fluffy. If it is too thick, add milk a teaspoon at a time; if too thin, add more powdered sugar. Spread evenly over the cooled bars and immediately scatter extra sprinkles over the top, pressing them in gently.
- Slice and serve. Use the parchment overhang to lift the whole slab out of the pan. Cut into 24 bars (a 6 by 4 grid) with a large sharp knife, wiping the blade clean between cuts for neat edges.
How Do You Keep Cookie Bars From Getting Dry?
Dry cookie bars are almost always the result of too much flour or too much time in the oven. Both are easy to fix.
First, measure your flour correctly. The single most common baking mistake is scooping flour straight from the bag with the measuring cup, which compacts it and adds up to 25 percent more flour than the recipe needs. Always spoon flour into the cup and level it off, or use a kitchen scale. Three cups of all-purpose flour should weigh about 360 grams.
Second, pull the bars from the oven early rather than late. They continue baking from residual heat in the hot pan for several minutes after you take them out. The visual cue is golden edges with a center that looks just barely set — not glossy or wet, but not browned either. When in doubt, check at 22 minutes. You can always bake a soft bar for one more minute, but you cannot un-bake a dry one.
Third, do not skip the brown sugar. Its molasses content holds onto moisture, which is why this recipe uses a mix of white and brown sugar instead of all white. If you ever adapt the recipe, keep that brown sugar in place.
Finally, store the bars correctly. Once cut, keep them in an airtight container at room temperature with a sheet of parchment between layers. Stored this way, they stay soft for up to 5 days. A slice of plain sandwich bread tucked into the container also works — the bars absorb moisture from the bread and stay soft even longer. Just replace the bread slice every couple of days.
What Pro Tips Make These Bars Even Better?
After making these bars many times through the holiday season, I have collected a few tricks that take them from good to the batch everyone asks about.
Line the pan with parchment, always. The overhang handles let you lift the entire slab out for clean, bakery-style cuts. Without parchment, you are digging bars out of the pan and the first row always looks rough. Parchment also makes cleanup effortless.
Chill before slicing. Even 20 minutes in the refrigerator firms up the butter in the dough and the frosting, so your knife glides through instead of dragging. You get sharp, clean edges that look professional, especially important if these are going on a cookie tray or into gift boxes.
Use a hot, dry knife. Run a large chef’s knife under hot water, wipe it completely dry, and make one cut. Wipe the blade clean between every cut. Warm metal slices through the frosting without smearing it, and wiping keeps sprinkles from one row from streaking across the next.
Do not frost the whole slab if you are gifting. Unfrosted bars travel better and stack neatly. You can pack a small container of frosting on the side for the recipient, or frost only the bars you plan to serve at home. Unfrosted bars also freeze better, which brings me to the next tip.
Make the dough ahead. The pressed, unbaked dough keeps well in the refrigerator for up to 2 days. Press it into the lined pan, cover tightly with plastic wrap, and refrigerate. Bake straight from the fridge, adding 2 to 3 extra minutes to the bake time. This is a lifesaver when you are prepping for a party and want fresh-baked bars with zero day-of effort.
Double the recipe for big crowds. These bars disappear fast. For a large gathering, make two pans rather than trying to bake one thicker batch — a deeper layer of dough bakes unevenly, with raw centers and overdone edges. Two standard pans bake perfectly and give you 48 bars.
What Are the Best Festive Variations of Christmas Cookie Bars?
Once you have the base recipe down, it becomes a blank canvas. The dough is a classic sugar cookie base, which means it plays well with almost any holiday flavor. Here are four variations my family asks for every year.
How Do You Make Peppermint Christmas Cookie Bars?
Peppermint and Christmas are inseparable, and these bars are the perfect vehicle. Replace the almond extract with 1/2 teaspoon of peppermint extract — peppermint is potent, so do not increase the amount or the bars will taste like toothpaste. Fold 1/2 cup of crushed candy canes into the dough along with the sprinkles, and sprinkle more crushed candy cane over the frosting instead of (or in addition to) the sprinkles. The candy cane pieces soften slightly in the oven and create little pockets of minty crunch. These are especially good served with hot cocoa.
How Do You Make Cranberry White Chocolate Christmas Cookie Bars?
This variation looks like Christmas in bar form — creamy white studded with ruby red. Add 3/4 cup of dried cranberries and 3/4 cup of white chocolate chips to the dough, and keep the red and green sprinkles for color. The tart cranberries cut through the sweetness of the white chocolate and frosting, giving the bars a balanced, grown-up flavor. Dried cranberries work better than fresh here because fresh ones release too much moisture. If you love the cranberry and white chocolate combination, these bars earn a permanent spot on your holiday dessert table next to classics like a Dutch apple pie with a buttery crumb topping.
How Do You Make Gingerbread Swirl Christmas Cookie Bars?
For gingerbread lovers, this version brings warm spice into the sugar cookie base. Add 1 teaspoon of ground cinnamon, 1/2 teaspoon of ground ginger, and 1/4 teaspoon of ground cloves to the dry ingredients. Then make a quick molasses swirl: whisk 2 tablespoons of molasses with 2 tablespoons of the finished dough in a small bowl, and drizzle it over the pressed dough in the pan. Drag a butter knife through the drizzle in figure-eight patterns to create a marbled swirl. Bake as directed. The result tastes like a soft gingerbread cookie met a sugar cookie bar, with a beautiful marbled top. A cream cheese frosting — swap half the butter in the frosting for softened cream cheese — pairs wonderfully with the spice.
How Do You Make Snickerdoodle Christmas Cookie Bars?
Snickerdoodle bars are comfort in a pan. Leave the sprinkles out of the dough entirely and instead mix 2 tablespoons of granulated sugar with 2 teaspoons of ground cinnamon in a small bowl. Sprinkle this cinnamon sugar generously and evenly over the pressed dough before baking — it forms a crackly, sweet-spiced crust as the bars bake. After baking, frost as usual or skip the frosting and dust the warm bars with a little extra cinnamon sugar. The cinnamon sugar topping gives every bite the signature snickerdoodle tang and warmth. These pair beautifully with a holiday brunch spread, and they sit nicely alongside sweeter bakes like a cinnamon focaccia when you want a full table of cinnamon-scented treats.
You can also mix and match. Half the pan peppermint and half classic, or a gingerbread swirl with white chocolate chips folded in — the base dough is forgiving, so small experiments rarely go wrong. That flexibility is one reason bars beat individual cookies for creative holiday baking.
How Should You Serve and Store Christmas Cookie Bars?
These bars are at their best at room temperature, about 20 minutes after slicing, when the frosting is soft and the centers are perfectly chewy. Arrange them on a platter in slightly overlapping rows for a dessert table, or stand them upright in a basket lined with a festive napkin for a casual party.
For a holiday dessert spread, cookie bars play well with other seasonal bakes. A full Christmas dessert table might include these bars alongside a classic buttermilk pie for guests who want something custardy, plus something bread-like and shareable such as a sweet focaccia bread. The contrast of textures — chewy bars, silky pie, soft bread — makes the whole table more interesting than a tray of cookies alone.
For gifting, cut the bars and layer them in a tin or bakery box with parchment between the layers. They travel well because the pan-baked shape is sturdy, and they look genuinely festive through a clear cellophane bag tied with ribbon. A dozen bars in a simple box makes a thoughtful hostess gift or neighbor treat that costs very little but feels generous.

Can You Make Christmas Cookie Bars Ahead of Time?
Yes, and they are ideal for it. You have three make-ahead options. Option one: press the dough into the lined pan, cover tightly, and refrigerate for up to 2 days before baking. Option two: bake the bars a day ahead, cool completely, and store unfrosted at room temperature — frost them the day you serve for the freshest look. Option three: bake and frost fully up to 2 days ahead and keep them covered at room temperature; the frosting actually helps seal in moisture. If the bars are for a cookie exchange or party, I recommend option two — fresh frosting always looks best.
Can You Freeze Christmas Cookie Bars?
Absolutely. Freezing is the secret weapon of holiday bakers. For the best results, freeze the bars unfrosted. Cool them completely, cut into bars, and wrap the slab or individual bars tightly in plastic wrap, then in foil or a freezer bag. They keep for up to 3 months. Thaw overnight in the refrigerator or for 2 to 3 hours at room temperature, then frost fresh before serving. You can freeze frosted bars too — place them in a single layer in a rigid container with parchment between layers — but the frosting can pick up freezer odors and lose a little of its fresh look, so unfrosted is better if you have the choice. This make-ahead strategy means you can bake your December treats in November and actually enjoy the holidays.
How Long Do Christmas Cookie Bars Stay Fresh?
At room temperature in an airtight container, frosted bars stay soft and fresh for 4 to 5 days. Unfrosted bars last a day or two longer. Do not refrigerate frosted bars for daily storage — the cold firms up the butter in the dough and frosting and dulls the flavor. Room temperature is the sweet spot. If you need them to last longer than 5 days, freeze them using the method above.
Frequently Asked Questions About Christmas Cookie Bars
Can I use a different pan size?
Yes, with adjustments. An 8×8 or 9×9 pan with the same amount of dough makes thicker bars — add 5 to 8 minutes to the bake time and watch the center carefully. A half-sheet pan (18×13) with a doubled recipe makes thinner bars that bake faster, so start checking at 18 minutes. The 9×13 pan in this recipe gives the ideal thickness, so stick with it if you can.
Do I have to frost the bars?
No. The bars are delicious unfrosted — buttery, chewy, and sweet on their own. Frosting makes them prettier and adds sweetness, but if you prefer a less sweet treat or want bars that stack and travel easily, skip it. A simple dusting of powdered sugar through a sieve over the cooled, unfrosted bars looks festive and takes ten seconds.
Can I make these gluten-free?
You can swap the all-purpose flour for a 1-to-1 gluten-free baking flour blend that contains xanthan gum. The texture will be slightly more delicate, so handle the cooled bars gently and chill before slicing. Everything else in the recipe stays the same. Check that your sprinkles and baking powder are certified gluten-free if you are baking for someone with celiac disease.
Why did my sprinkles melt or bleed into the dough?
This usually happens with nonpareils — the tiny round balls — which have a soft candy coating that melts and bleeds in the oven’s heat. Classic jimmies (the rod-shaped sprinkles) hold their shape and color much better during baking. If you only have nonpareils, fold them in very gently at the last moment and do not overmix, or save them for the top of the frosting where there is no heat involved.
Can I make the dough without an electric mixer?
Yes. Make sure your butter is genuinely soft — it should give easily when pressed — and cream the butter and sugars with a sturdy wooden spoon or spatula for 3 to 4 minutes. It takes a little arm work, but it works fine. Melted butter is not a substitute here; it changes the texture and makes the bars greasy and flat instead of thick and chewy.
How do I cut perfectly even bars?
Lift the cooled slab out of the pan using the parchment overhang and place it on a cutting board. For 24 bars, mark the long side into 6 equal sections and the short side into 4, then cut with a long sharp knife, wiping the blade clean between cuts. Chilling the slab for 20 minutes before cutting makes the lines even cleaner. A ruler helps if you want truly uniform bars for gifting.
Final Thoughts
Christmas baking should feel joyful, not stressful. These Christmas cookie bars give you everything you want from a holiday cookie — buttery flavor, soft chew, festive color — in a fraction of the time that cut-out cookies demand. One pan, one bowl, and a little over half an hour stand between you and 24 bars that look like you tried much harder than you did.
Make them classic with red and green sprinkles, or try one of the variations and start a new tradition. Peppermint for the mint lovers, cranberry white chocolate for the dessert table, gingerbread swirl for the spice fans, snickerdoodle for the purists. However you make them, they will disappear fast — so consider baking a double batch. Happy holidays, and happy baking.
If you are planning a full holiday baking day, pair these bars with a batch of homemade peppermint bark for an easy no-bake treat, and add some pecan pumpkin pie bars to round out a festive dessert tray that everyone will love.
📌 Love this recipe? Pin it on Pinterest to save it for later!